> ## Documentation Index
> Fetch the complete documentation index at: https://help.coachiq.io/llms.txt
> Use this file to discover all available pages before exploring further.
# Understanding Your Athlete Portal
> Learn how CoachIQ's Athlete Portal works, including iOS app restrictions, athlete access methods, and what you control as a coach.
**Where to find this**: Dashboard → App (left sidebar)
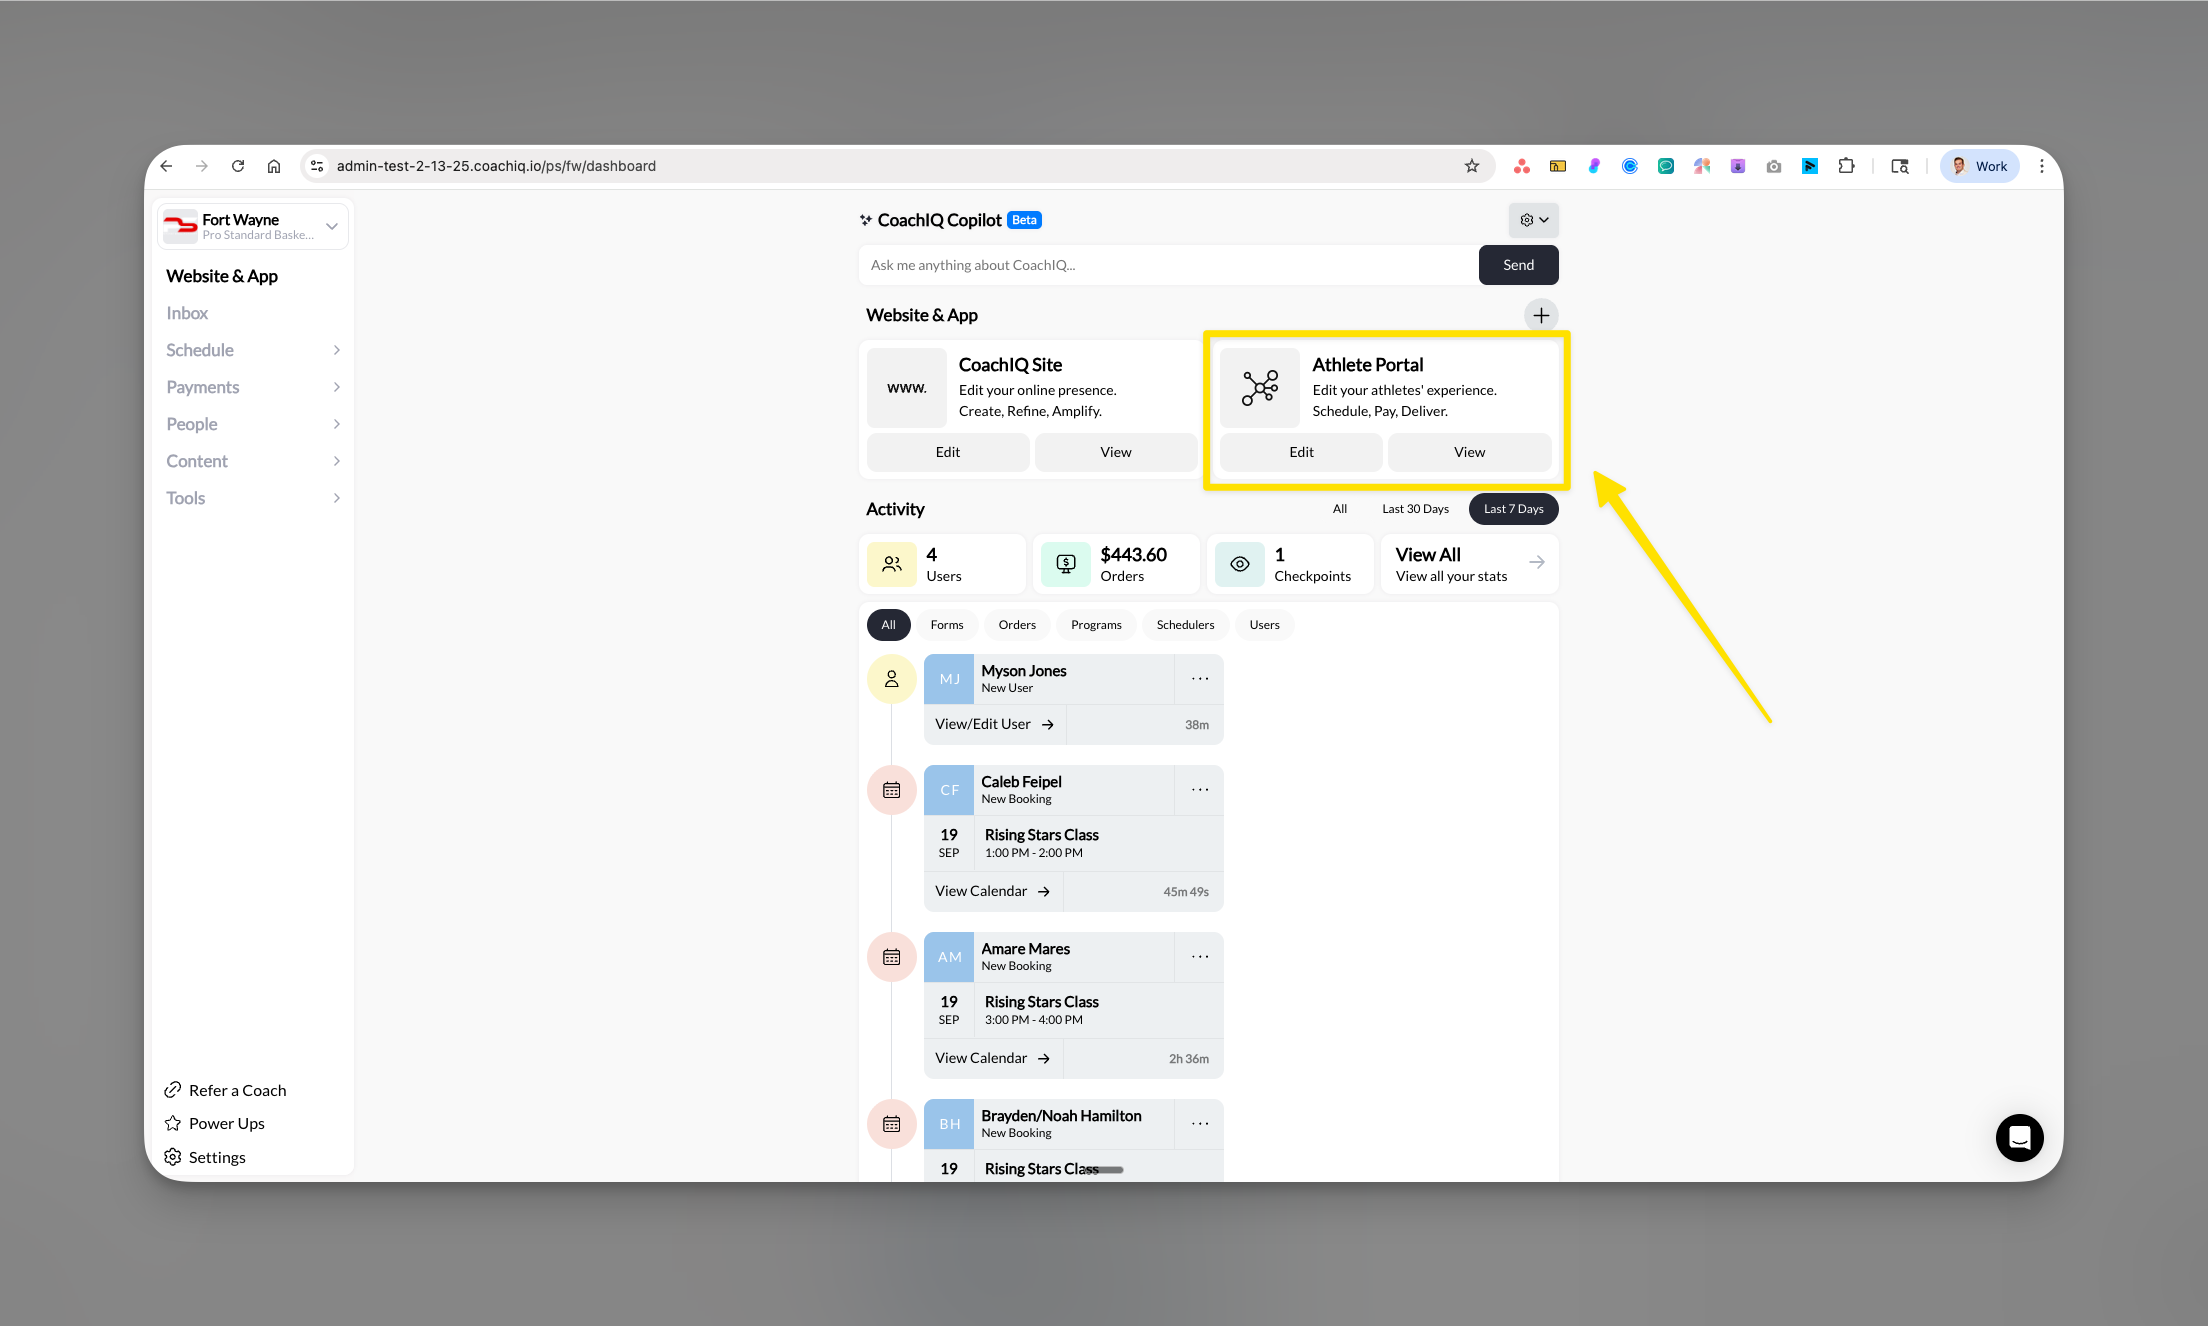 ## Give your athletes a professional training experience
Your Athlete Portal is the professional, branded platform where athletes and parents access everything about their training - from booking sessions to viewing programs. You control every aspect of the experience while athletes enjoy a seamless, app-like interface that makes your business look as professional as the big academies.
## What is the Athlete Portal?
The Athlete Portal is your custom-branded platform that gives athletes and parents organized access to their training experience. It's not just a basic login area - it's a complete ecosystem with three access points:
## Give your athletes a professional training experience
Your Athlete Portal is the professional, branded platform where athletes and parents access everything about their training - from booking sessions to viewing programs. You control every aspect of the experience while athletes enjoy a seamless, app-like interface that makes your business look as professional as the big academies.
## What is the Athlete Portal?
The Athlete Portal is your custom-branded platform that gives athletes and parents organized access to their training experience. It's not just a basic login area - it's a complete ecosystem with three access points:
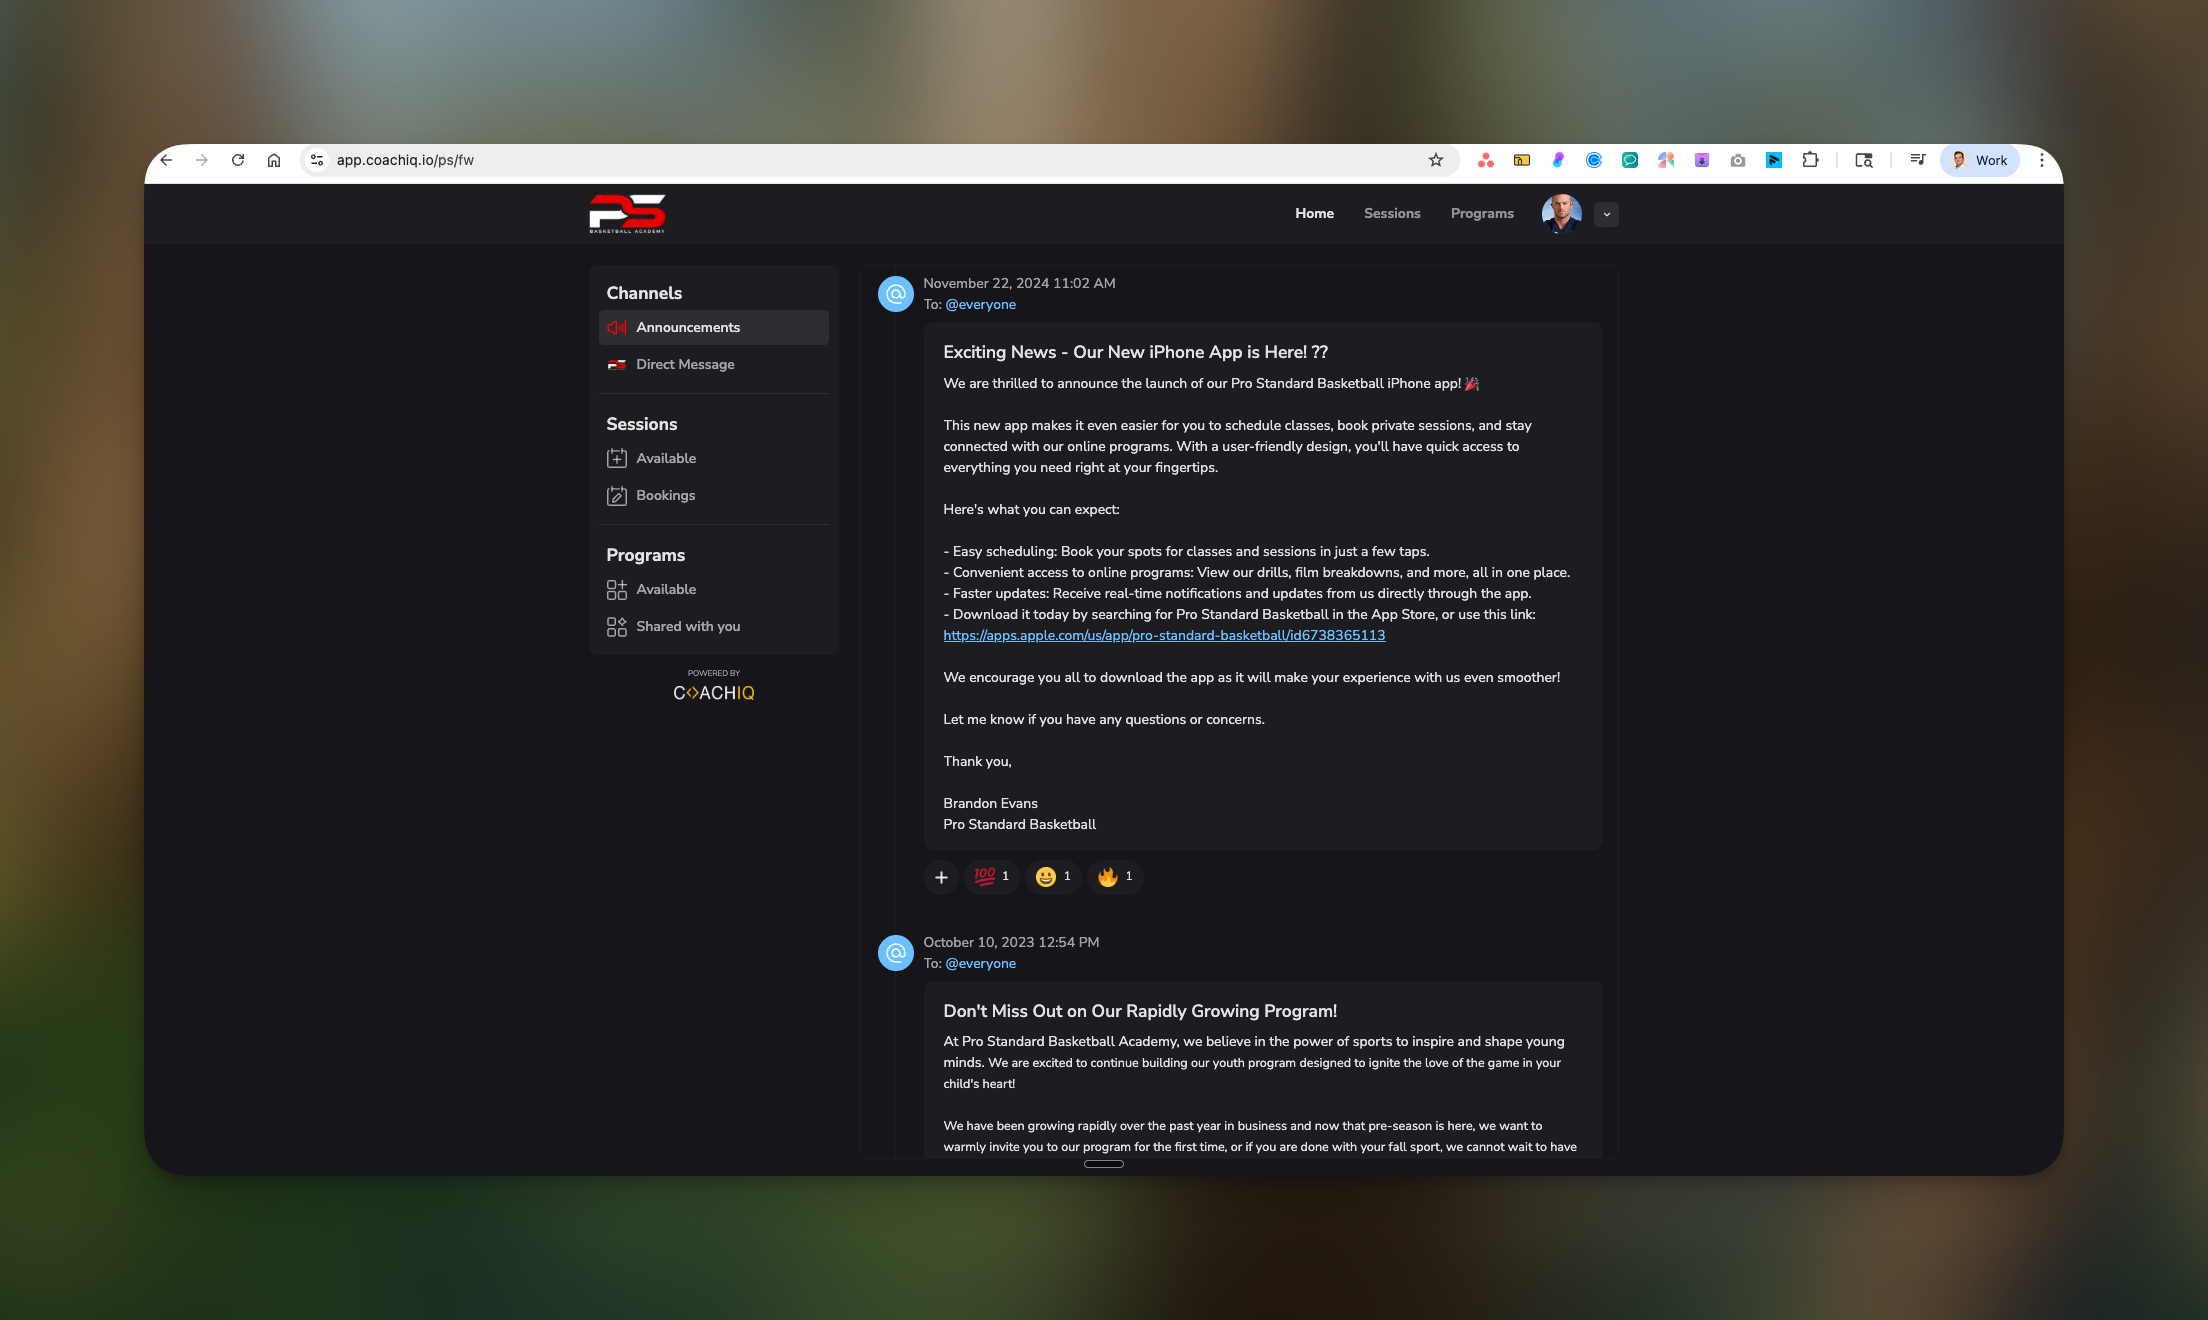 * **iOS mobile app** (your branded app in the Apple App Store)
* **Android mobile app** (your branded app in Google Play Store)
* **Web portal** (accessible from any browser on phone or computer)
Think of it as the athlete-facing side of your coaching business - the polished, professional interface that athletes interact with daily while you manage everything behind the scenes.
## The two experiences: What you control vs what athletes see
You work in the **App Builder** - your control center where you:
* Design the layout and branding
* Add or remove features
* Set up paywalls and access levels
* Organize content and scheduling
* Control what athletes can see and do
Athletes see a **polished app experience** where they:
* Book and manage their training sessions
* Access programs and educational content
* Receive announcements and messages
* Purchase memberships or products
* Track their progress and credits
## How athletes get started (Critical for iOS users)
**iOS App Store Requirement**: Due to Apple's "Reader App" policy, athletes cannot sign up or make purchases directly in your iOS app. They must create their account through your website first or you must add them manually.
### Two ways athletes can join your portal
The smoothest experience for everyone:
1. You add the athlete in **People** → **New User**
2. They receive a welcome email with login credentials
3. They can immediately download your app and sign in
4. Full access granted based on their tags/purchases
**Best for**: Existing clients, trial sessions, team onboarding
Athletes create their own accounts:
1. Athlete visits your CoachIQ website
2. Creates account through web portal
3. Makes any initial purchases (memberships/credits)
4. Downloads your app and logs in with web credentials
**Best for**: New sign-ups, online programs, self-service model
### Platform differences
* **Sign-up**: Web only (cannot register in app)
* **Purchases**: Web only (no in-app purchases)
* **Login**: Full app access after web registration
* **Features**: All viewing/booking features available
* **Sign-up**: More flexible options
* **Purchases**: Can process through app (market-dependent)
* **Login**: Standard app access
* **Features**: Full functionality
## What athletes can do in your portal
Once athletes have access, they can:
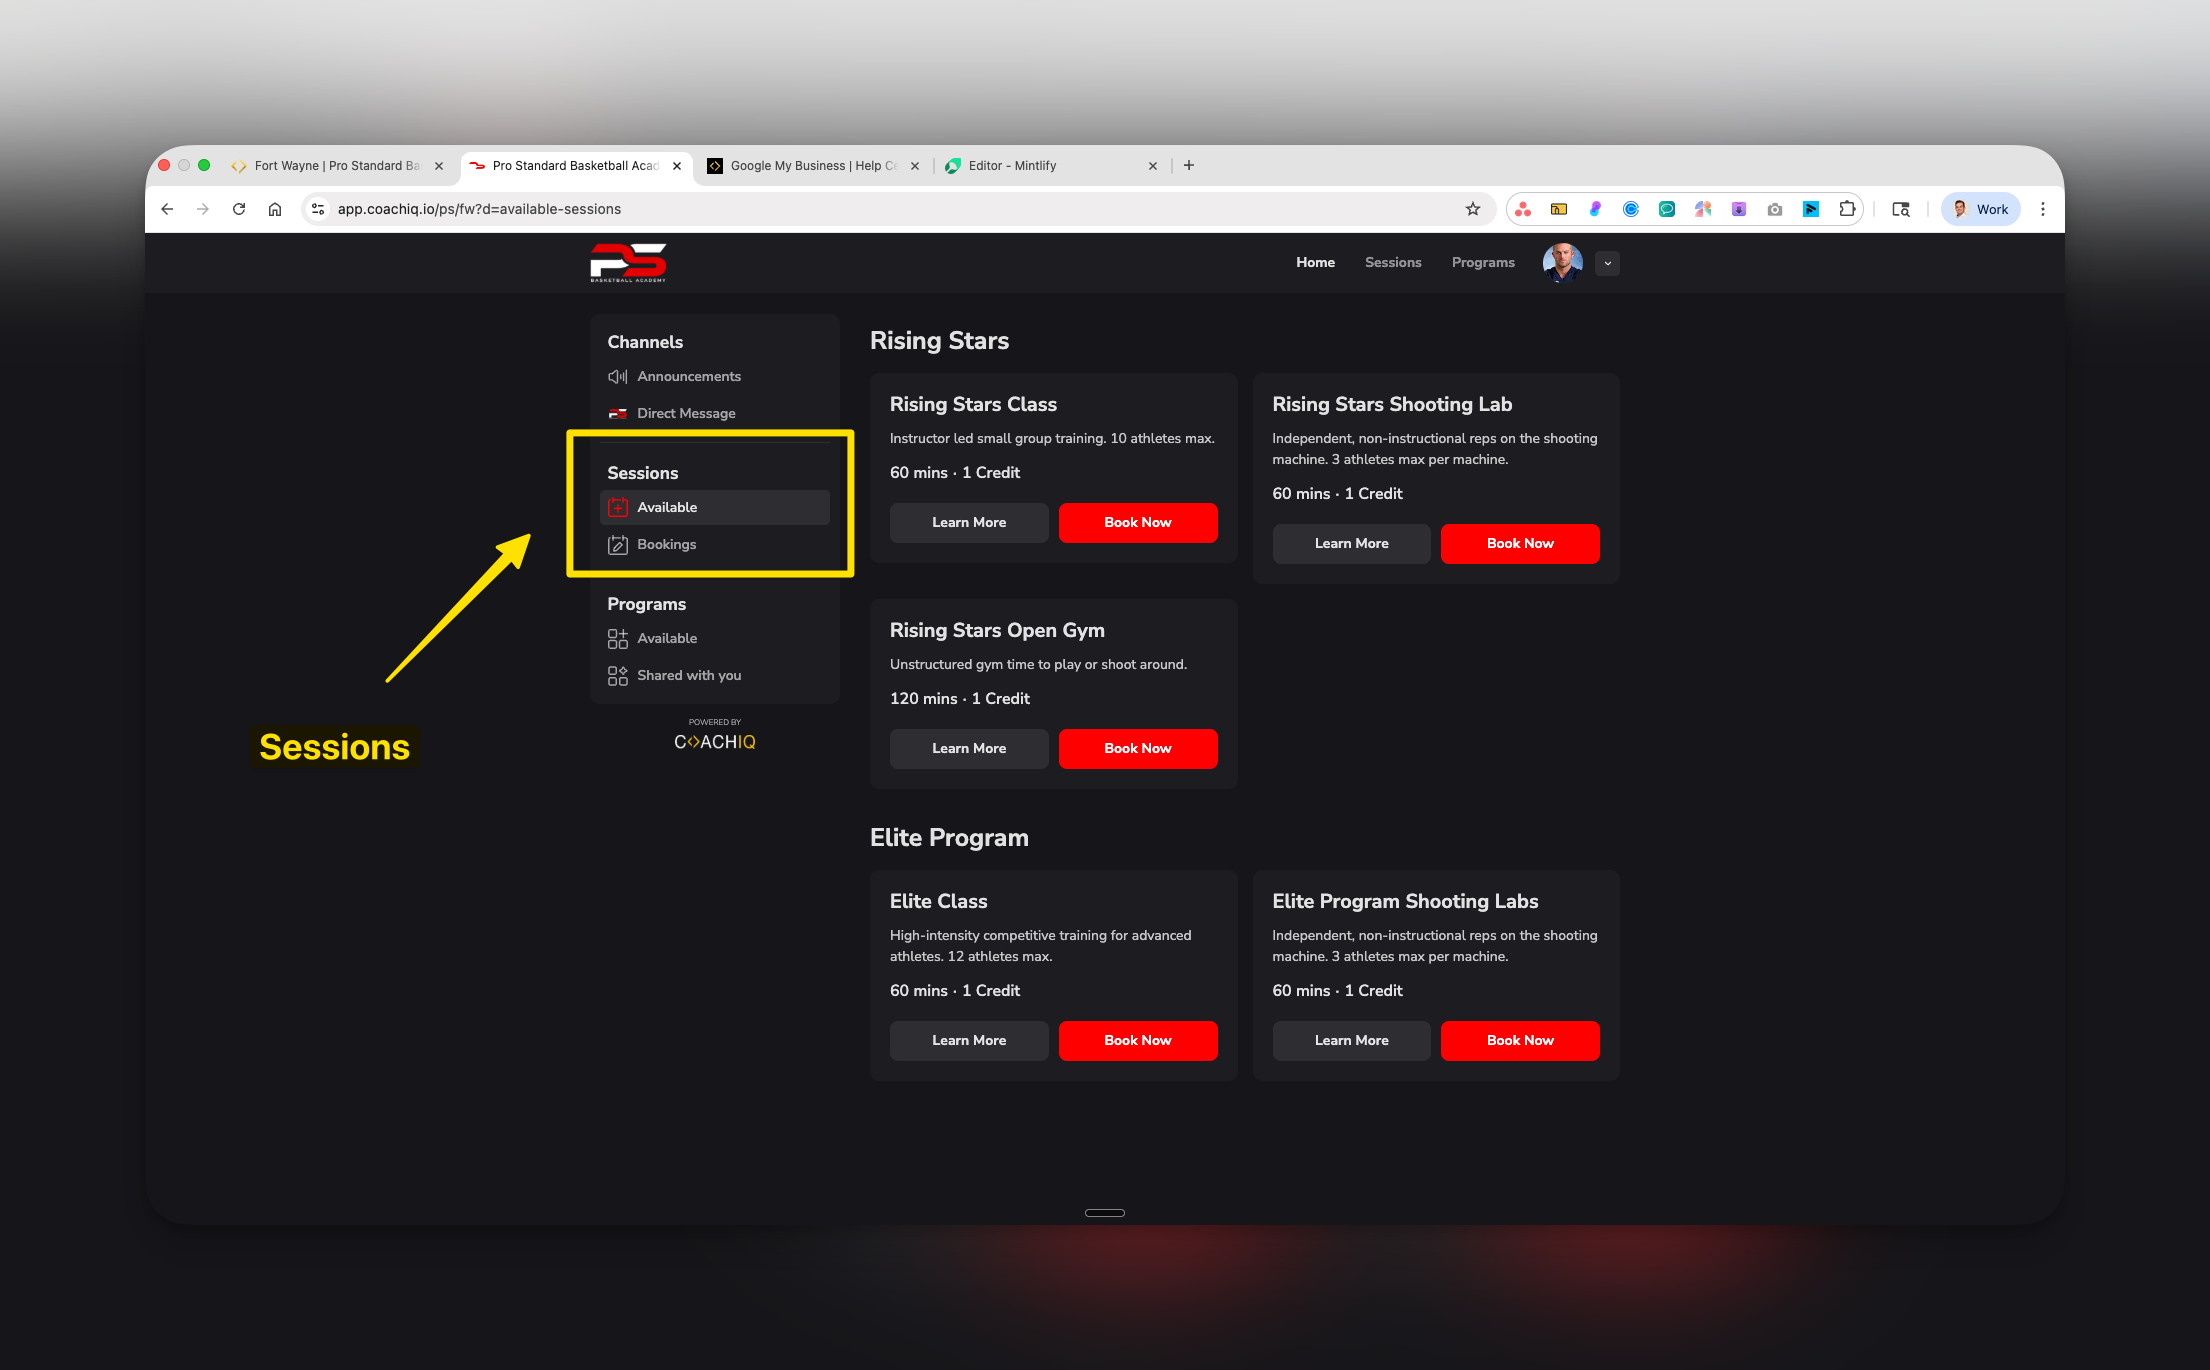
✅ **Scheduling & Bookings**
* View available sessions and schedules
* Book sessions using credits or payment
* Cancel or reschedule bookings
* See session details and coach assignments
* **iOS mobile app** (your branded app in the Apple App Store)
* **Android mobile app** (your branded app in Google Play Store)
* **Web portal** (accessible from any browser on phone or computer)
Think of it as the athlete-facing side of your coaching business - the polished, professional interface that athletes interact with daily while you manage everything behind the scenes.
## The two experiences: What you control vs what athletes see
You work in the **App Builder** - your control center where you:
* Design the layout and branding
* Add or remove features
* Set up paywalls and access levels
* Organize content and scheduling
* Control what athletes can see and do
Athletes see a **polished app experience** where they:
* Book and manage their training sessions
* Access programs and educational content
* Receive announcements and messages
* Purchase memberships or products
* Track their progress and credits
## How athletes get started (Critical for iOS users)
**iOS App Store Requirement**: Due to Apple's "Reader App" policy, athletes cannot sign up or make purchases directly in your iOS app. They must create their account through your website first or you must add them manually.
### Two ways athletes can join your portal
The smoothest experience for everyone:
1. You add the athlete in **People** → **New User**
2. They receive a welcome email with login credentials
3. They can immediately download your app and sign in
4. Full access granted based on their tags/purchases
**Best for**: Existing clients, trial sessions, team onboarding
Athletes create their own accounts:
1. Athlete visits your CoachIQ website
2. Creates account through web portal
3. Makes any initial purchases (memberships/credits)
4. Downloads your app and logs in with web credentials
**Best for**: New sign-ups, online programs, self-service model
### Platform differences
* **Sign-up**: Web only (cannot register in app)
* **Purchases**: Web only (no in-app purchases)
* **Login**: Full app access after web registration
* **Features**: All viewing/booking features available
* **Sign-up**: More flexible options
* **Purchases**: Can process through app (market-dependent)
* **Login**: Standard app access
* **Features**: Full functionality
## What athletes can do in your portal
Once athletes have access, they can:
✅ **Scheduling & Bookings**
* View available sessions and schedules
* Book sessions using credits or payment
* Cancel or reschedule bookings
* See session details and coach assignments
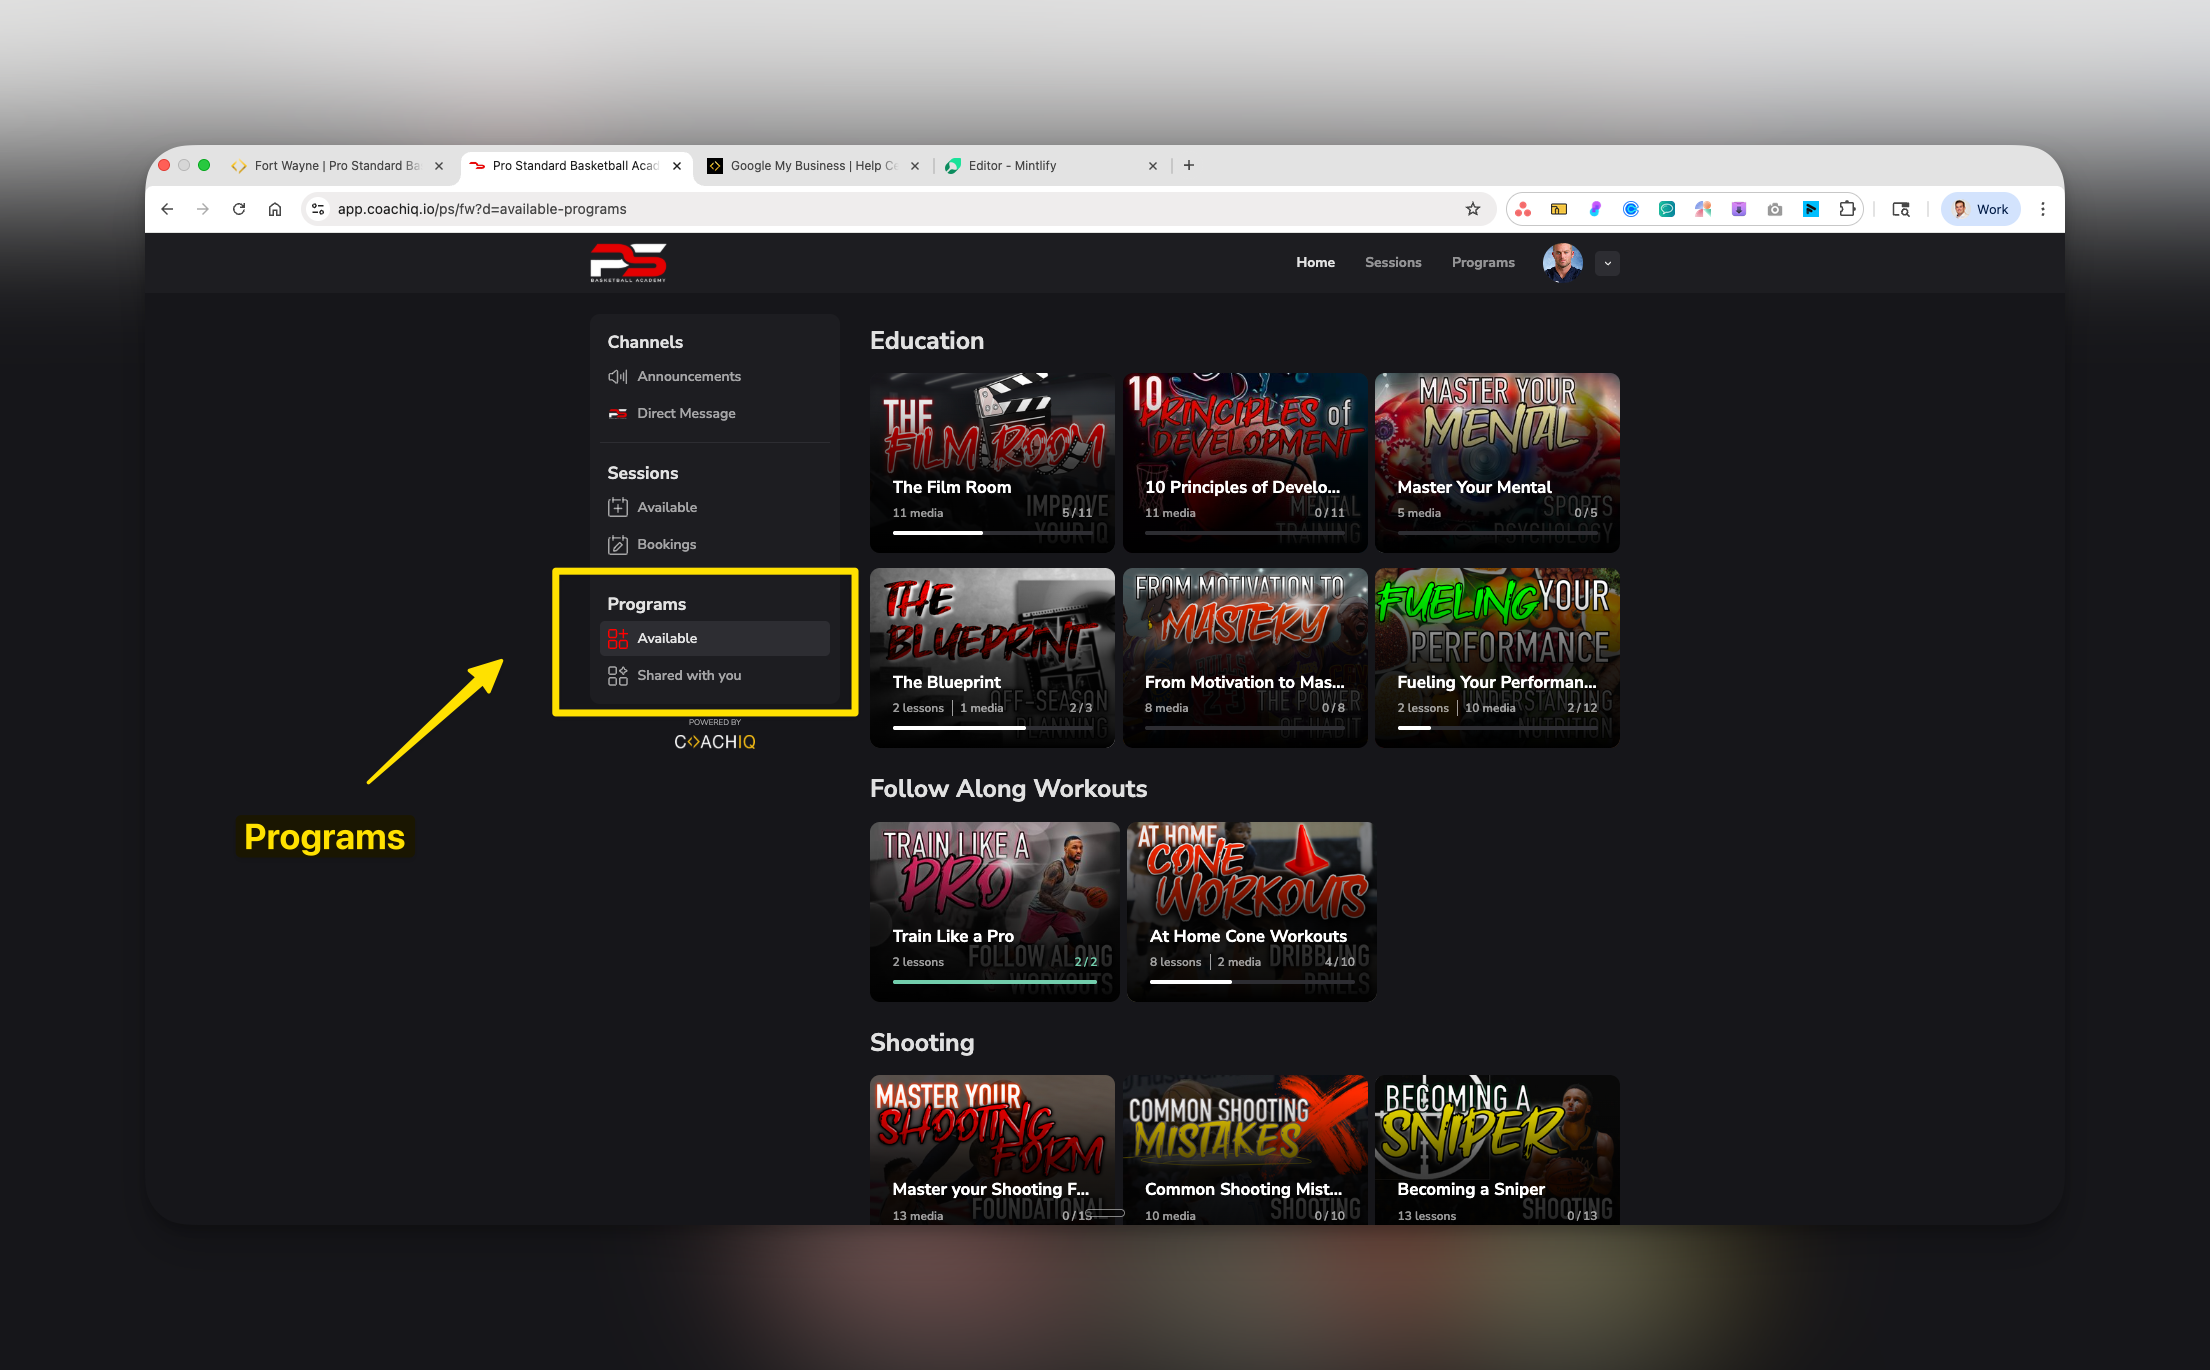
 ✅ **Content & Programs**
* Access training programs and lessons
* Watch video content and tutorials
* Track progress through programs
* Download resources and materials
✅ **Content & Programs**
* Access training programs and lessons
* Watch video content and tutorials
* Track progress through programs
* Download resources and materials
 ✅ **Communication**
* Receive announcements and updates
* View direct messages from coaches
* Reply to coach messages
* Get push notifications (mobile apps)
✅ **Communication**
* Receive announcements and updates
* View direct messages from coaches
* Reply to coach messages
* Get push notifications (mobile apps)
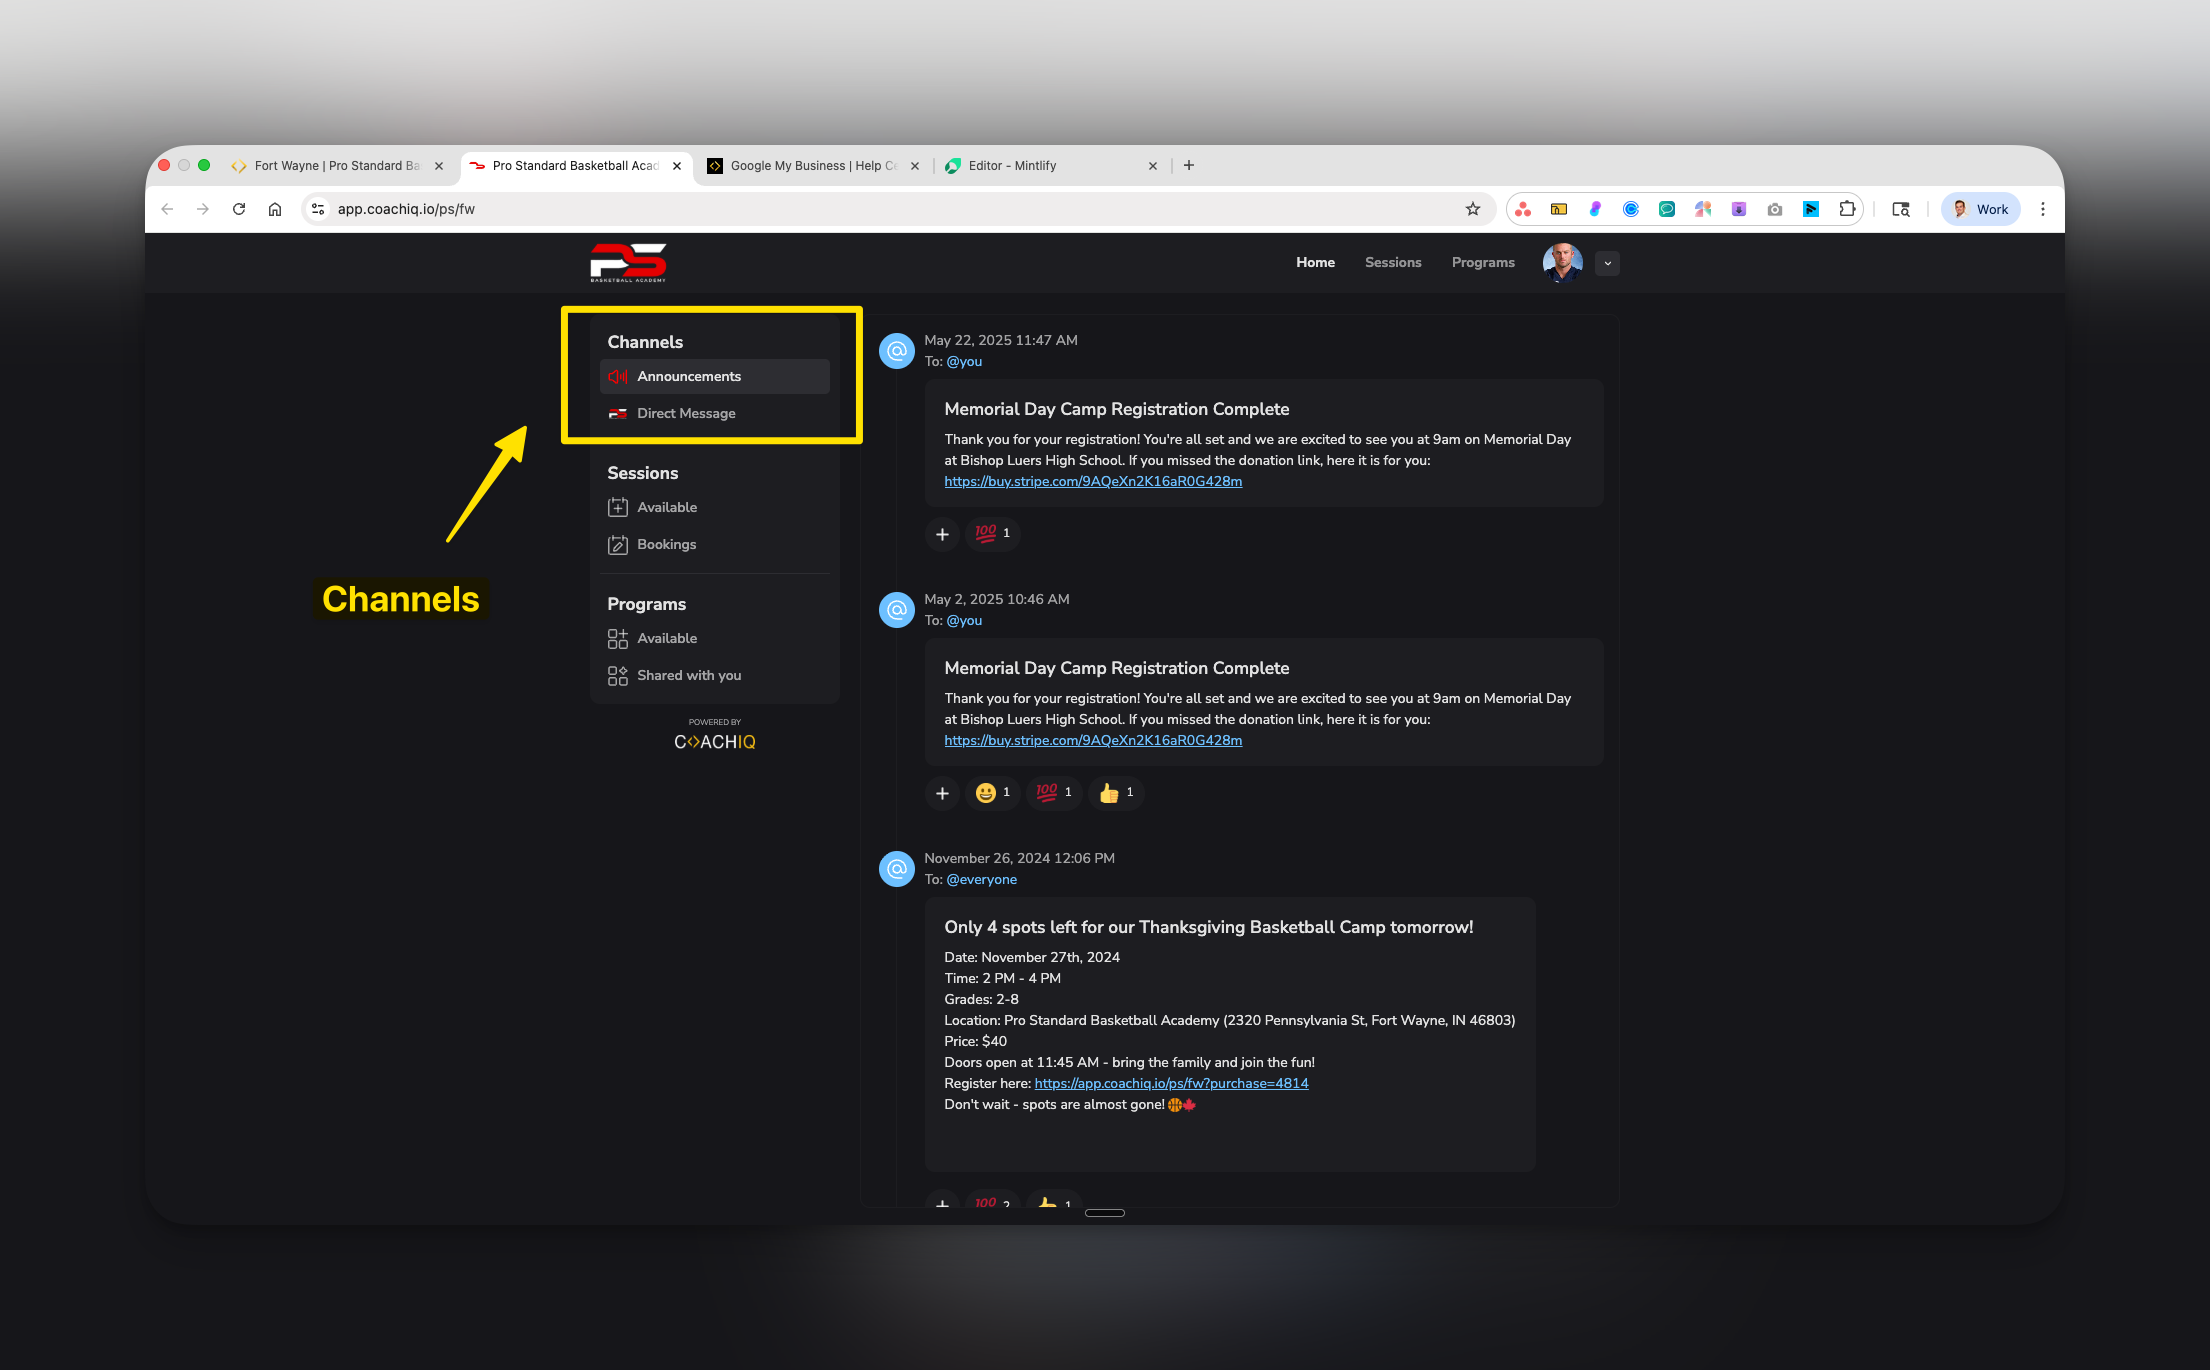 ✅ **Account Management**
* View credit balance and history
* Manage billing and subscriptions
* Update profile information
* Track payment history
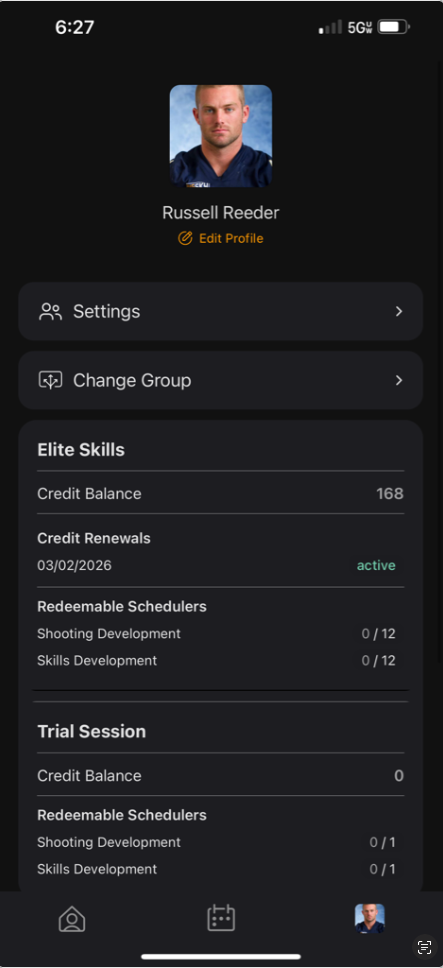
Athletes can view their credit balance, renewal dates, and which schedulers their credits work for by tapping their profile icon.
✅ **Account Management**
* View credit balance and history
* Manage billing and subscriptions
* Update profile information
* Track payment history
Athletes can view their credit balance, renewal dates, and which schedulers their credits work for by tapping their profile icon.
 ✅ **Purchases** (Web portal for iOS users)
* Buy memberships and subscriptions
* Purchase session credits
* Register for camps and clinics
* Access paywalled content
## What athletes CANNOT do
Understanding limitations helps set proper expectations:
❌ **Cannot in iOS app**:
* Create new accounts
* Make any purchases or payments
* Add payment methods
❌ **Cannot anywhere**:
* See other athletes' information or bookings
* Message other athletes directly
* Modify program content or materials
* Change session availability or schedules
* Access coach-side features
* View content behind paywalls (without payment)
## Your control center: The App Builder
The App Builder is where you shape the entire athlete experience. Located in your dashboard's left sidebar, it provides:
### Core structure
* **Channels**: Communication hub for messages and announcements
* **Content**: Programs and educational materials
* **Schedule**: Session booking and calendar
* **Products**: Memberships and purchases
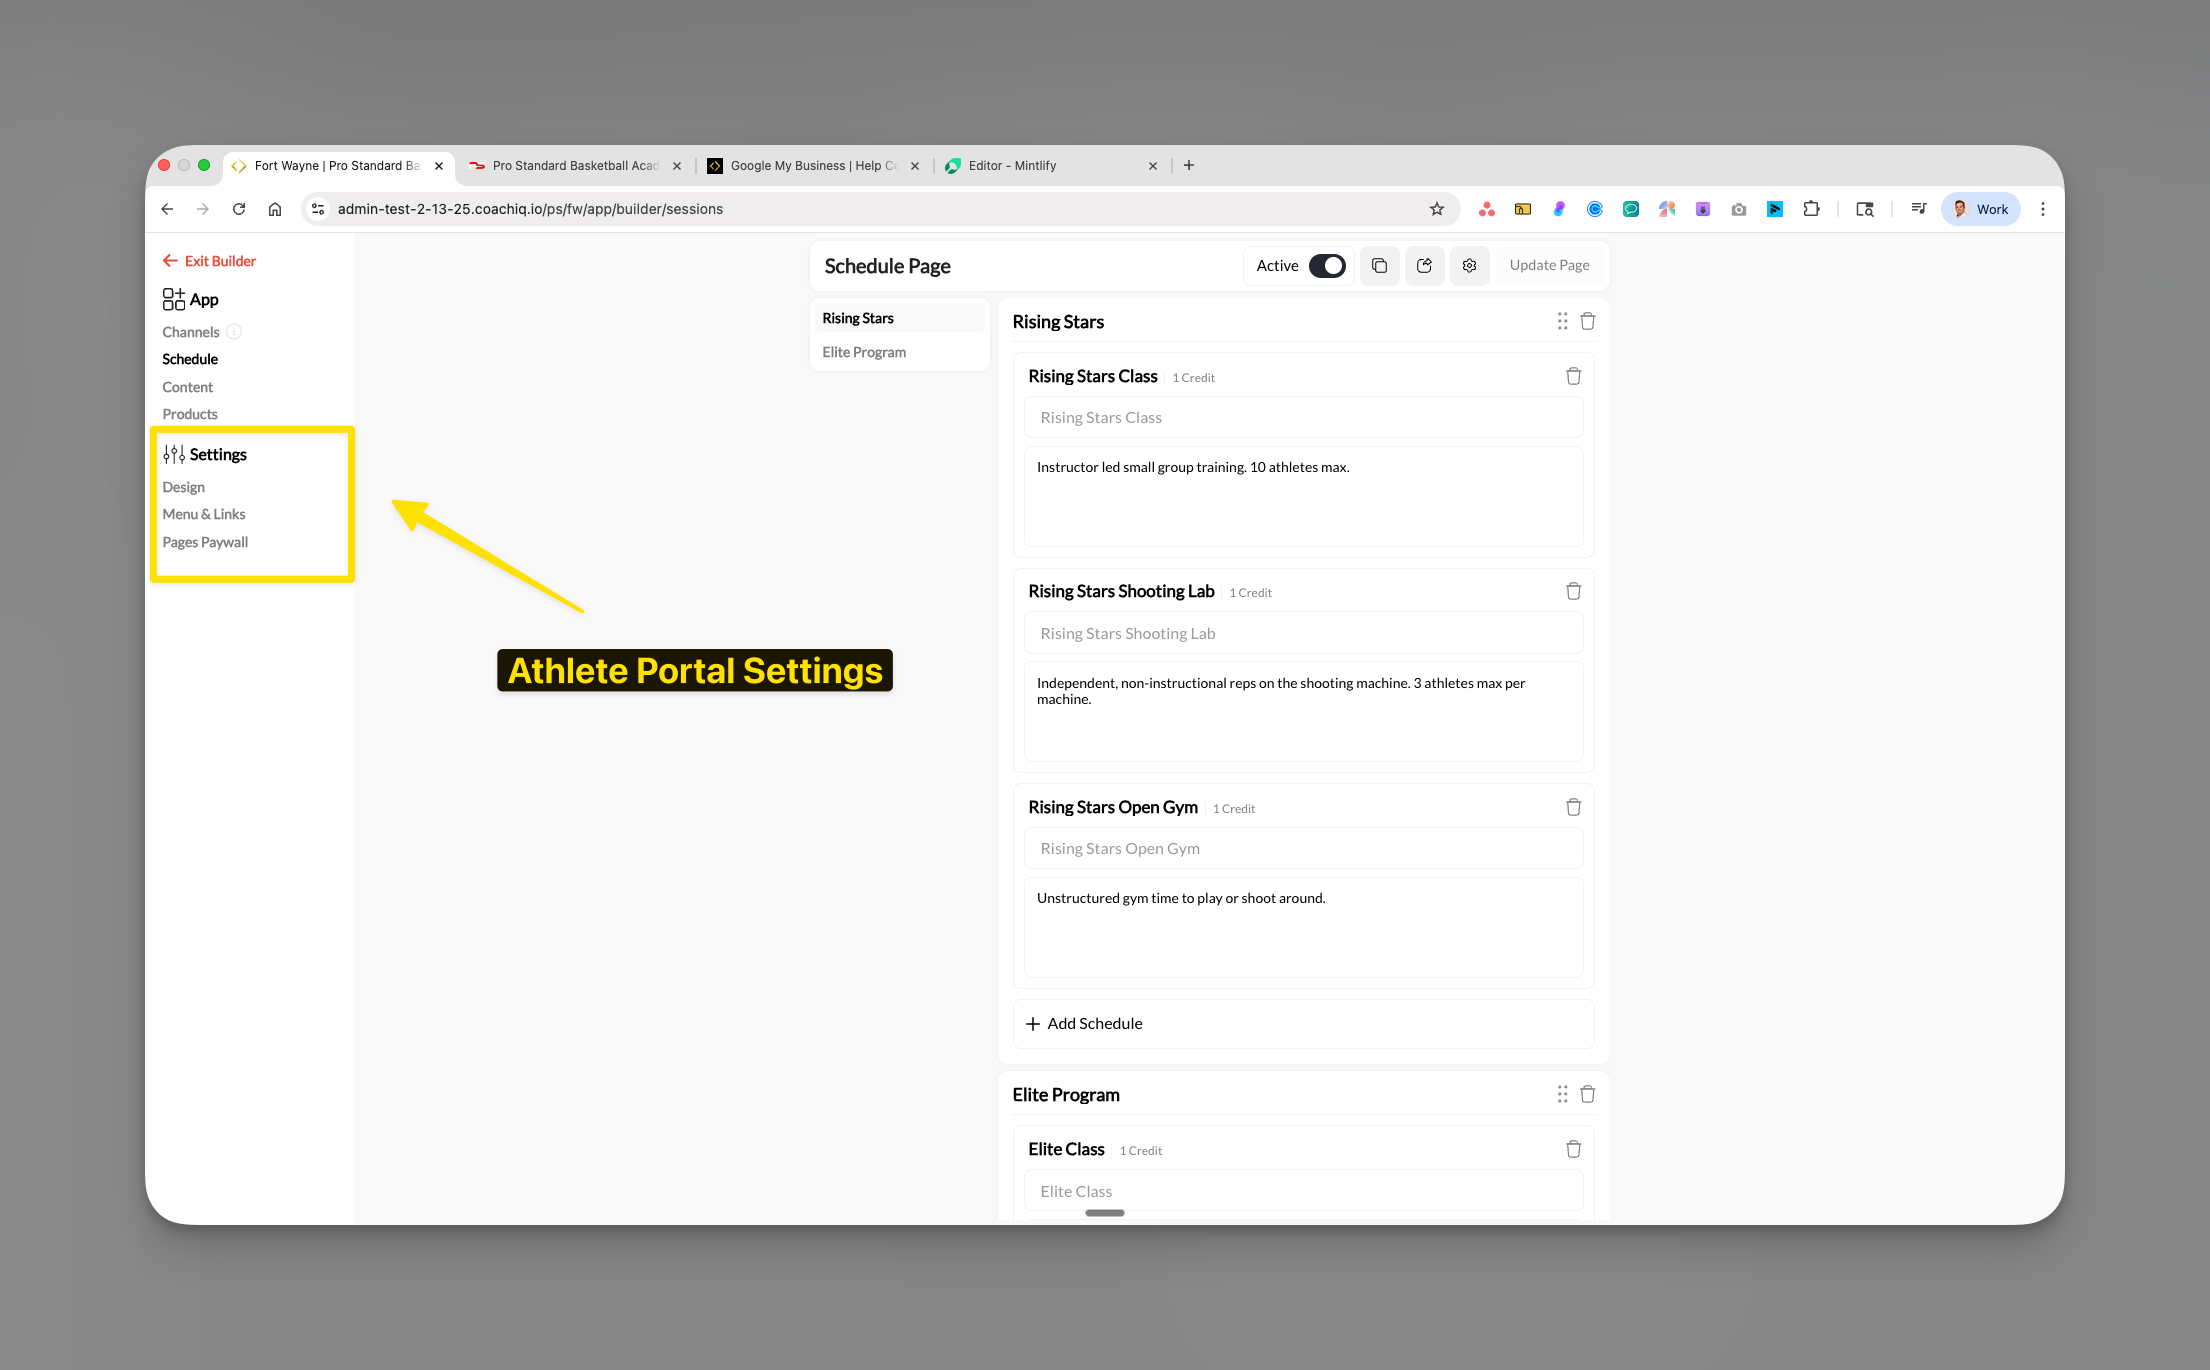
### Settings controls
* **Design**: Themes, colors, and branding
* **Menu & Links**: Navigation and menu visibility
* **Pages Paywall**: Access restrictions and monetization
✅ **Purchases** (Web portal for iOS users)
* Buy memberships and subscriptions
* Purchase session credits
* Register for camps and clinics
* Access paywalled content
## What athletes CANNOT do
Understanding limitations helps set proper expectations:
❌ **Cannot in iOS app**:
* Create new accounts
* Make any purchases or payments
* Add payment methods
❌ **Cannot anywhere**:
* See other athletes' information or bookings
* Message other athletes directly
* Modify program content or materials
* Change session availability or schedules
* Access coach-side features
* View content behind paywalls (without payment)
## Your control center: The App Builder
The App Builder is where you shape the entire athlete experience. Located in your dashboard's left sidebar, it provides:
### Core structure
* **Channels**: Communication hub for messages and announcements
* **Content**: Programs and educational materials
* **Schedule**: Session booking and calendar
* **Products**: Memberships and purchases
### Settings controls
* **Design**: Themes, colors, and branding
* **Menu & Links**: Navigation and menu visibility
* **Pages Paywall**: Access restrictions and monetization
 ### How changes work
* Changes update in real-time as you build
* Use "Update Page" to save your work
* Athletes see changes immediately after publishing
* Preview mode lets you test the athlete experience
## Key concepts to understand
The building blocks of each page. You organize content into sections like "Elite Program" or "Beginner Training" to create logical groupings for athletes.
The four main areas of your portal: Channels (communication), Content (programs), Schedule (bookings), and Products (purchases). Each can be toggled on/off.
Your monetization boundary. Set which pages or content require payment to access. Non-members see a preview with payment options.
Apple's classification for apps that display content purchased elsewhere. This is why iOS users must sign up and pay through your website, not the app.
## Common questions
Apple requires "reader apps" like CoachIQ to handle sign-ups and payments outside the app. This protects you from Apple's 30% commission but means iOS users must start on your website.
For smoothest onboarding:
1. Add them manually in the People section
2. Have them create accounts on your website first
3. Then direct them to download the app
4. Include clear instructions in welcome emails
It's best practice to have separate accounts for tracking and communication, but parents can create accounts to manage younger athletes' bookings.
All purchases for iOS users happen on your website. They can browse products in the app but clicking "purchase" redirects them to the web portal to complete payment.
Always direct new users to your website first to create accounts and handle initial payments. After that, they can use the mobile app for daily access.
## Pro tips for athlete onboarding
**Create an onboarding checklist**: Include steps like:
1. Visit website and create account
2. Purchase membership/credits
3. Download app (with App Store links)
4. Log in with web credentials
5. Enable push notifications
**Bulk import existing clients**: Use **People** → **Import** to add multiple athletes at once, giving them instant app access without the sign-up friction.
**Set clear expectations**: Add a FAQ to your website explaining why iOS users must sign up via web. Frame it as "avoiding Apple's fees keeps your costs lower."
## What's next?
Now that you understand how the Athlete Portal works, you're ready to start building. Begin with:
* [App Builder Setup & Navigation](/athlete-portal/app-builder-navigation-and-interface) - Learn the interface and how to make changes
* [Setting Up Channels](/athlete-portal/channels) - Configure your communication hub
**You're ready!** You now understand the fundamental structure of CoachIQ's Athlete Portal and how athletes access your platform. Time to start building your professional training app!
## Related articles
Display and sell memberships, packages, and products
Restrict page access until athletes purchase a qualifying product
Set up session types, availability, and booking rules
Understand how products, pricing, and visibility work
Communicate with athletes through messages and announcements
Manage programs, lessons, and media for your athletes
### How changes work
* Changes update in real-time as you build
* Use "Update Page" to save your work
* Athletes see changes immediately after publishing
* Preview mode lets you test the athlete experience
## Key concepts to understand
The building blocks of each page. You organize content into sections like "Elite Program" or "Beginner Training" to create logical groupings for athletes.
The four main areas of your portal: Channels (communication), Content (programs), Schedule (bookings), and Products (purchases). Each can be toggled on/off.
Your monetization boundary. Set which pages or content require payment to access. Non-members see a preview with payment options.
Apple's classification for apps that display content purchased elsewhere. This is why iOS users must sign up and pay through your website, not the app.
## Common questions
Apple requires "reader apps" like CoachIQ to handle sign-ups and payments outside the app. This protects you from Apple's 30% commission but means iOS users must start on your website.
For smoothest onboarding:
1. Add them manually in the People section
2. Have them create accounts on your website first
3. Then direct them to download the app
4. Include clear instructions in welcome emails
It's best practice to have separate accounts for tracking and communication, but parents can create accounts to manage younger athletes' bookings.
All purchases for iOS users happen on your website. They can browse products in the app but clicking "purchase" redirects them to the web portal to complete payment.
Always direct new users to your website first to create accounts and handle initial payments. After that, they can use the mobile app for daily access.
## Pro tips for athlete onboarding
**Create an onboarding checklist**: Include steps like:
1. Visit website and create account
2. Purchase membership/credits
3. Download app (with App Store links)
4. Log in with web credentials
5. Enable push notifications
**Bulk import existing clients**: Use **People** → **Import** to add multiple athletes at once, giving them instant app access without the sign-up friction.
**Set clear expectations**: Add a FAQ to your website explaining why iOS users must sign up via web. Frame it as "avoiding Apple's fees keeps your costs lower."
## What's next?
Now that you understand how the Athlete Portal works, you're ready to start building. Begin with:
* [App Builder Setup & Navigation](/athlete-portal/app-builder-navigation-and-interface) - Learn the interface and how to make changes
* [Setting Up Channels](/athlete-portal/channels) - Configure your communication hub
**You're ready!** You now understand the fundamental structure of CoachIQ's Athlete Portal and how athletes access your platform. Time to start building your professional training app!
## Related articles
Display and sell memberships, packages, and products
Restrict page access until athletes purchase a qualifying product
Set up session types, availability, and booking rules
Understand how products, pricing, and visibility work
Communicate with athletes through messages and announcements
Manage programs, lessons, and media for your athletes