> ## Documentation Index
> Fetch the complete documentation index at: https://help.coachiq.io/llms.txt
> Use this file to discover all available pages before exploring further.
# Connecting Stripe to CoachIQ
> Connect your Stripe account to CoachIQ to start accepting payments, processing subscriptions, and managing transactions
**Where to find this**: Settings → Billing → Stripe
## What you need
* Admin access in CoachIQ
* A Stripe account (you can create one during this process)
Only CoachIQ admins can connect payment processing.
## Connect Stripe
From your CoachIQ dashboard:
1. Click **Settings** in the left sidebar
2. Select **Stripe Portal**
 Click the blue **Connect Stripe** button.
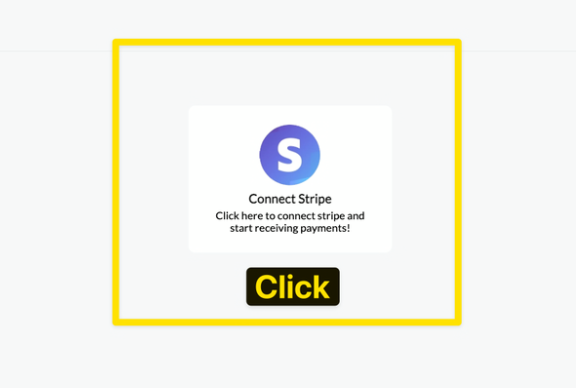 You'll be redirected to Stripe. If you already have a Stripe account, sign in. If not, you'll create one now.
Have multiple Stripe accounts? Make sure you're logged into the correct one before authorizing.
Stripe will ask you to authorize CoachIQ to access your account.
CoachIQ needs this access to:
* Process payments on your behalf
* Create and manage products
* Handle subscription billing
* Issue refunds
* Sync transaction data
Click **Connect** to authorize.
After authorization, you'll return to CoachIQ.
The Stripe settings page now shows:
* **Status**: Connected (green)
* **Account**: Your Stripe email
* **Mode**: Test or Live
**Connected.** You can now accept payments.
## Test mode vs. live mode
Stripe provides two environments:
**Use for setup and testing**
* No real money processes
* Use Stripe's test card numbers
* Test booking flows, subscriptions, refunds
* Safe environment for experimenting
Switch to Test Mode in your Stripe dashboard to test payments without charging real cards.
**Real payments with real money**
* Production environment
* Charges actual credit cards
* Money deposits to your bank
* Switch to Live Mode when ready to accept real payments
Your first payout takes 7-10 days. After that, payouts follow your Stripe schedule (typically daily or weekly).
CoachIQ automatically syncs with whichever mode is active in Stripe. Toggle between modes in your Stripe dashboard.
Once Stripe is connected:
* **Payments section activates**: Create products, view transactions, manage subscriptions
* **Real-time sync**: All transactions, refunds, and subscription changes sync automatically
* **Customer data flows**: Payment methods and billing information sync between platforms
## Related articles
* [Understanding CoachIQ Payments](/payments/getting-started)
* [Stripe Dashboard Basics](/payments/stripe-dashboard)
* [Creating Your First Product](/payments/product-builder)
You'll be redirected to Stripe. If you already have a Stripe account, sign in. If not, you'll create one now.
Have multiple Stripe accounts? Make sure you're logged into the correct one before authorizing.
Stripe will ask you to authorize CoachIQ to access your account.
CoachIQ needs this access to:
* Process payments on your behalf
* Create and manage products
* Handle subscription billing
* Issue refunds
* Sync transaction data
Click **Connect** to authorize.
After authorization, you'll return to CoachIQ.
The Stripe settings page now shows:
* **Status**: Connected (green)
* **Account**: Your Stripe email
* **Mode**: Test or Live
**Connected.** You can now accept payments.
## Test mode vs. live mode
Stripe provides two environments:
**Use for setup and testing**
* No real money processes
* Use Stripe's test card numbers
* Test booking flows, subscriptions, refunds
* Safe environment for experimenting
Switch to Test Mode in your Stripe dashboard to test payments without charging real cards.
**Real payments with real money**
* Production environment
* Charges actual credit cards
* Money deposits to your bank
* Switch to Live Mode when ready to accept real payments
Your first payout takes 7-10 days. After that, payouts follow your Stripe schedule (typically daily or weekly).
CoachIQ automatically syncs with whichever mode is active in Stripe. Toggle between modes in your Stripe dashboard.
Once Stripe is connected:
* **Payments section activates**: Create products, view transactions, manage subscriptions
* **Real-time sync**: All transactions, refunds, and subscription changes sync automatically
* **Customer data flows**: Payment methods and billing information sync between platforms
## Related articles
* [Understanding CoachIQ Payments](/payments/getting-started)
* [Stripe Dashboard Basics](/payments/stripe-dashboard)
* [Creating Your First Product](/payments/product-builder)