> ## Documentation Index
> Fetch the complete documentation index at: https://help.coachiq.io/llms.txt
> Use this file to discover all available pages before exploring further.
# Switching to a seasonal schedule
> Transition from one seasonal availability to another automatically, with no overlap and no manual swap required.
When your schedule changes between seasons — spring to summer, fall to winter, or any transition in between — you can set it up in advance so the switch happens automatically. Add your new seasonal availability as an additional block, set start and end dates on each, and the scheduler flips over on the date you choose with no overlap and no manual changes needed.
**Where to find this:** Schedule → **Schedulers** → open a scheduler → **Availability** section
**Before you begin:** You'll need your incoming seasonal availability already created for each scheduler. If you haven't done that yet, create it first (see Step 1 below), then continue with the rest. If it's already set up, skip to Step 2.
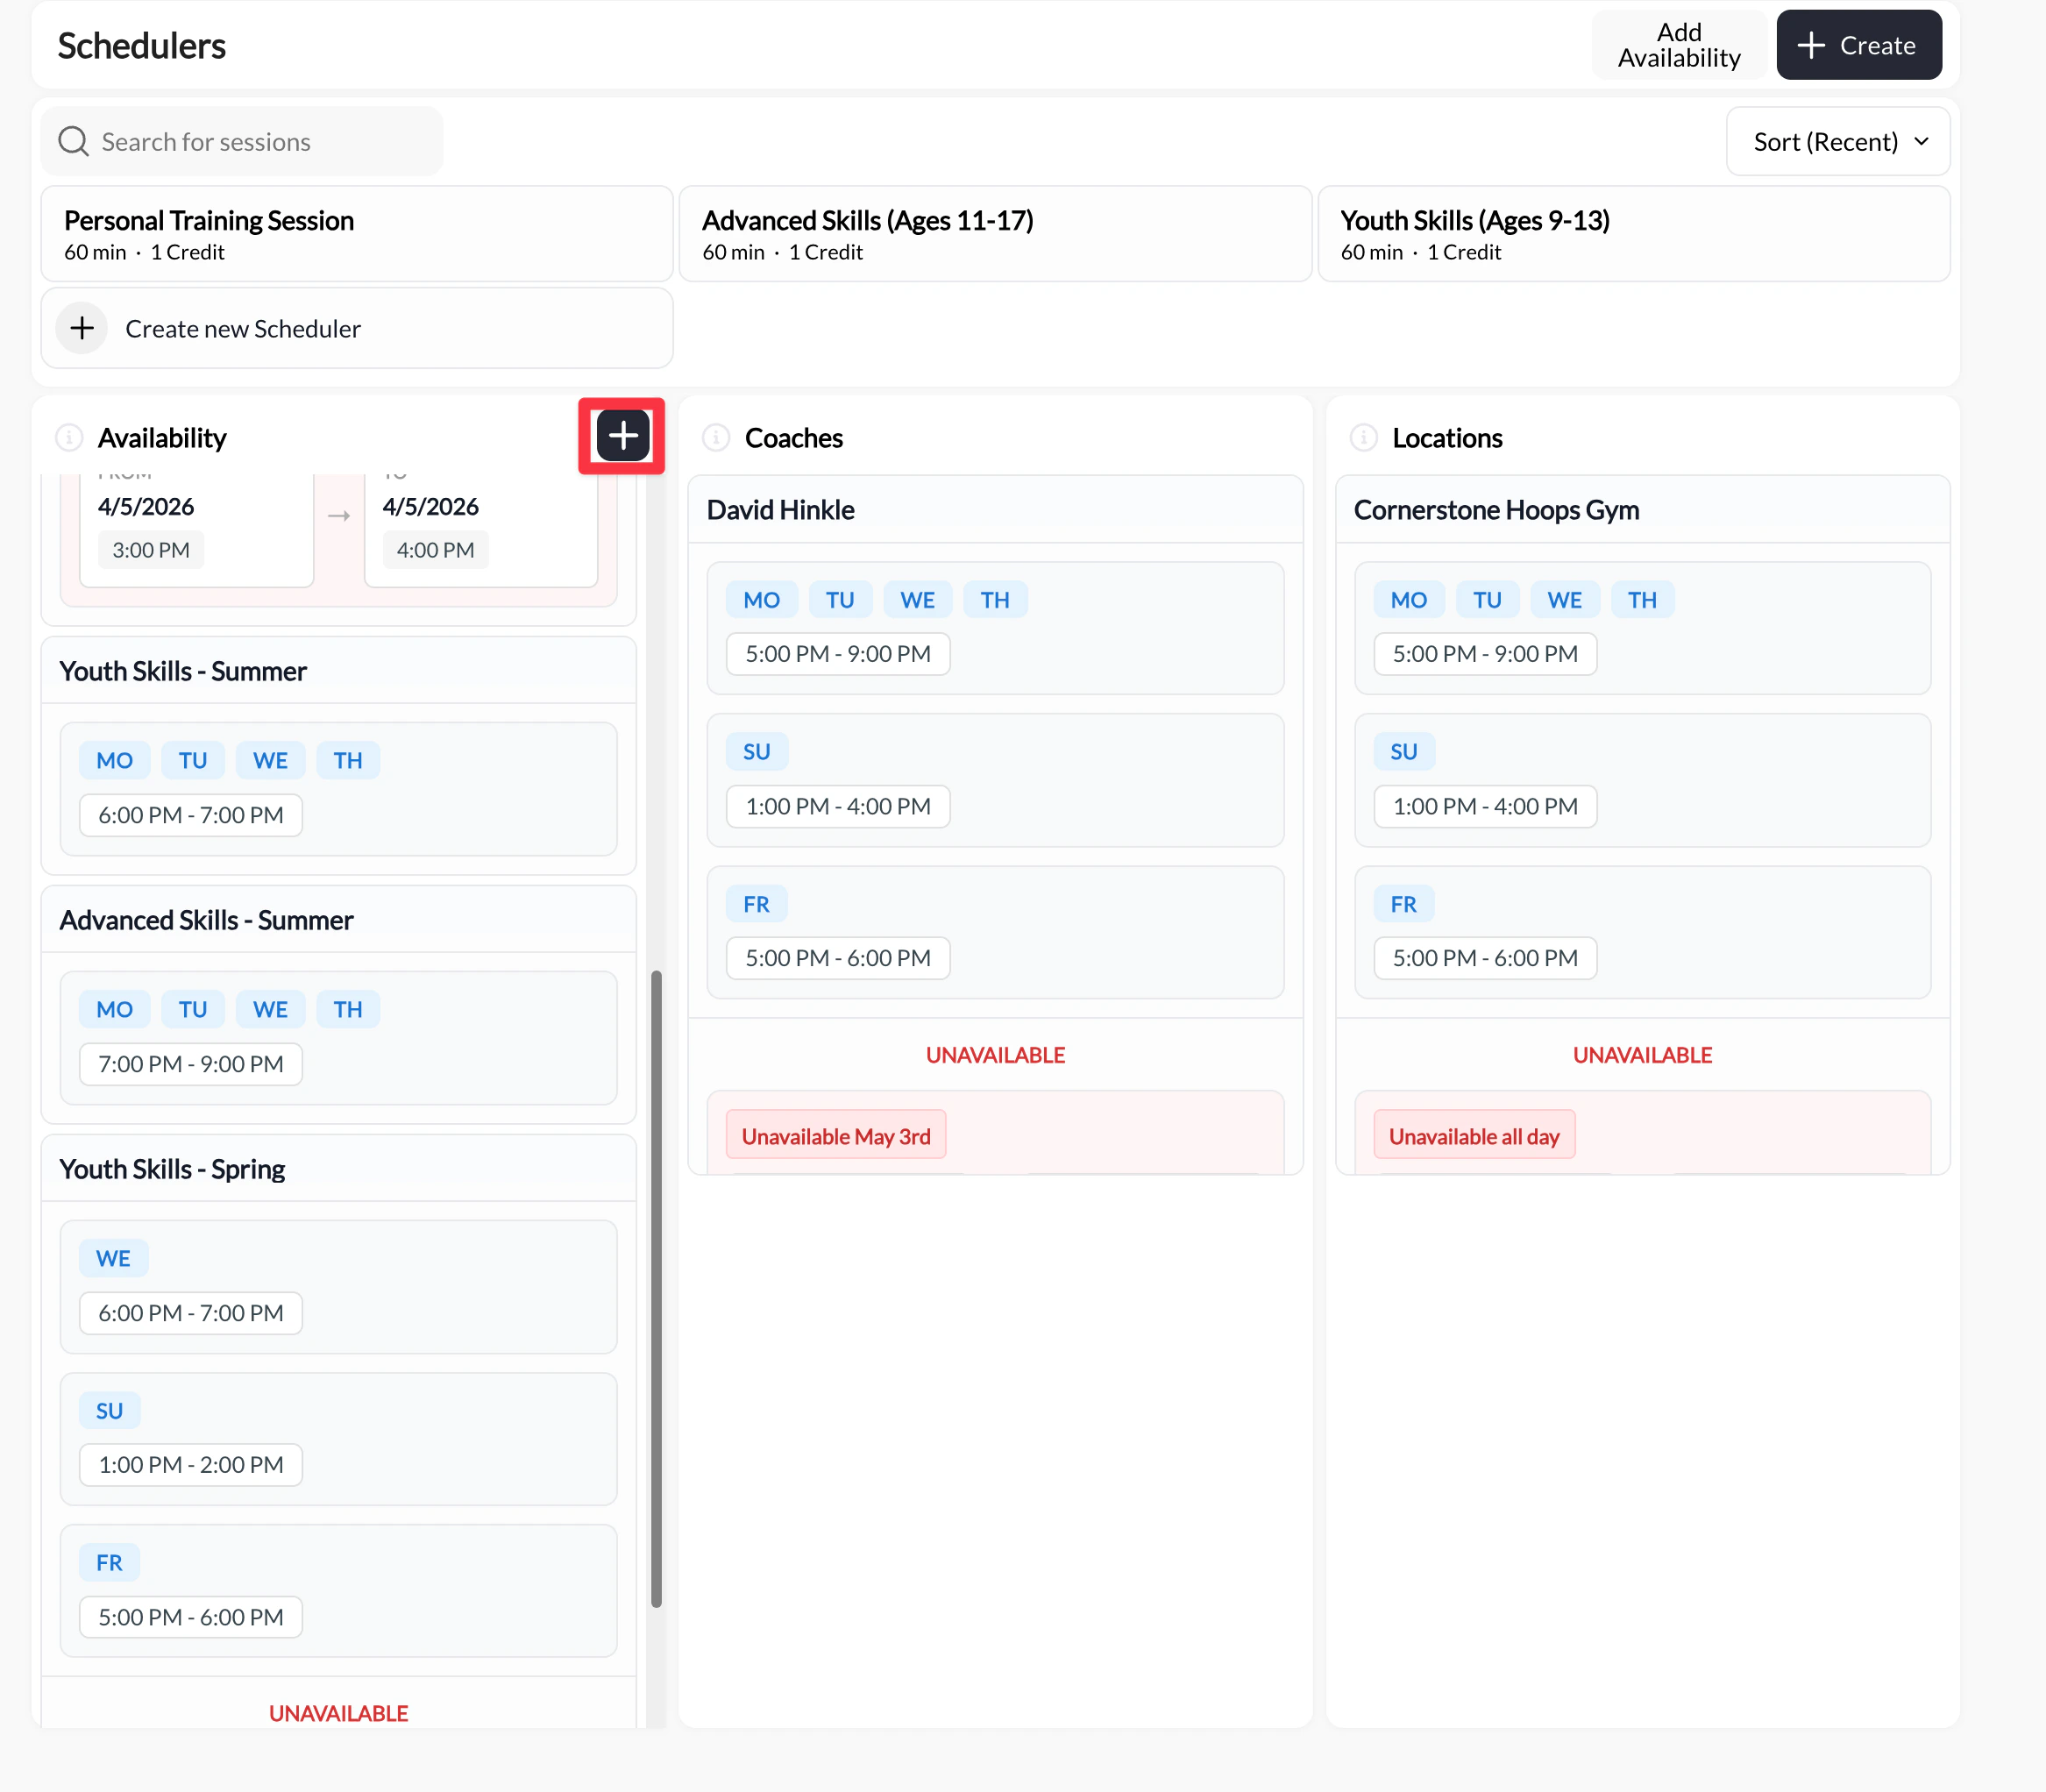
Go to **Schedule** → **Schedulers**. In the **Availability** panel on the left side of the page, click the **+** button to create a new availability.
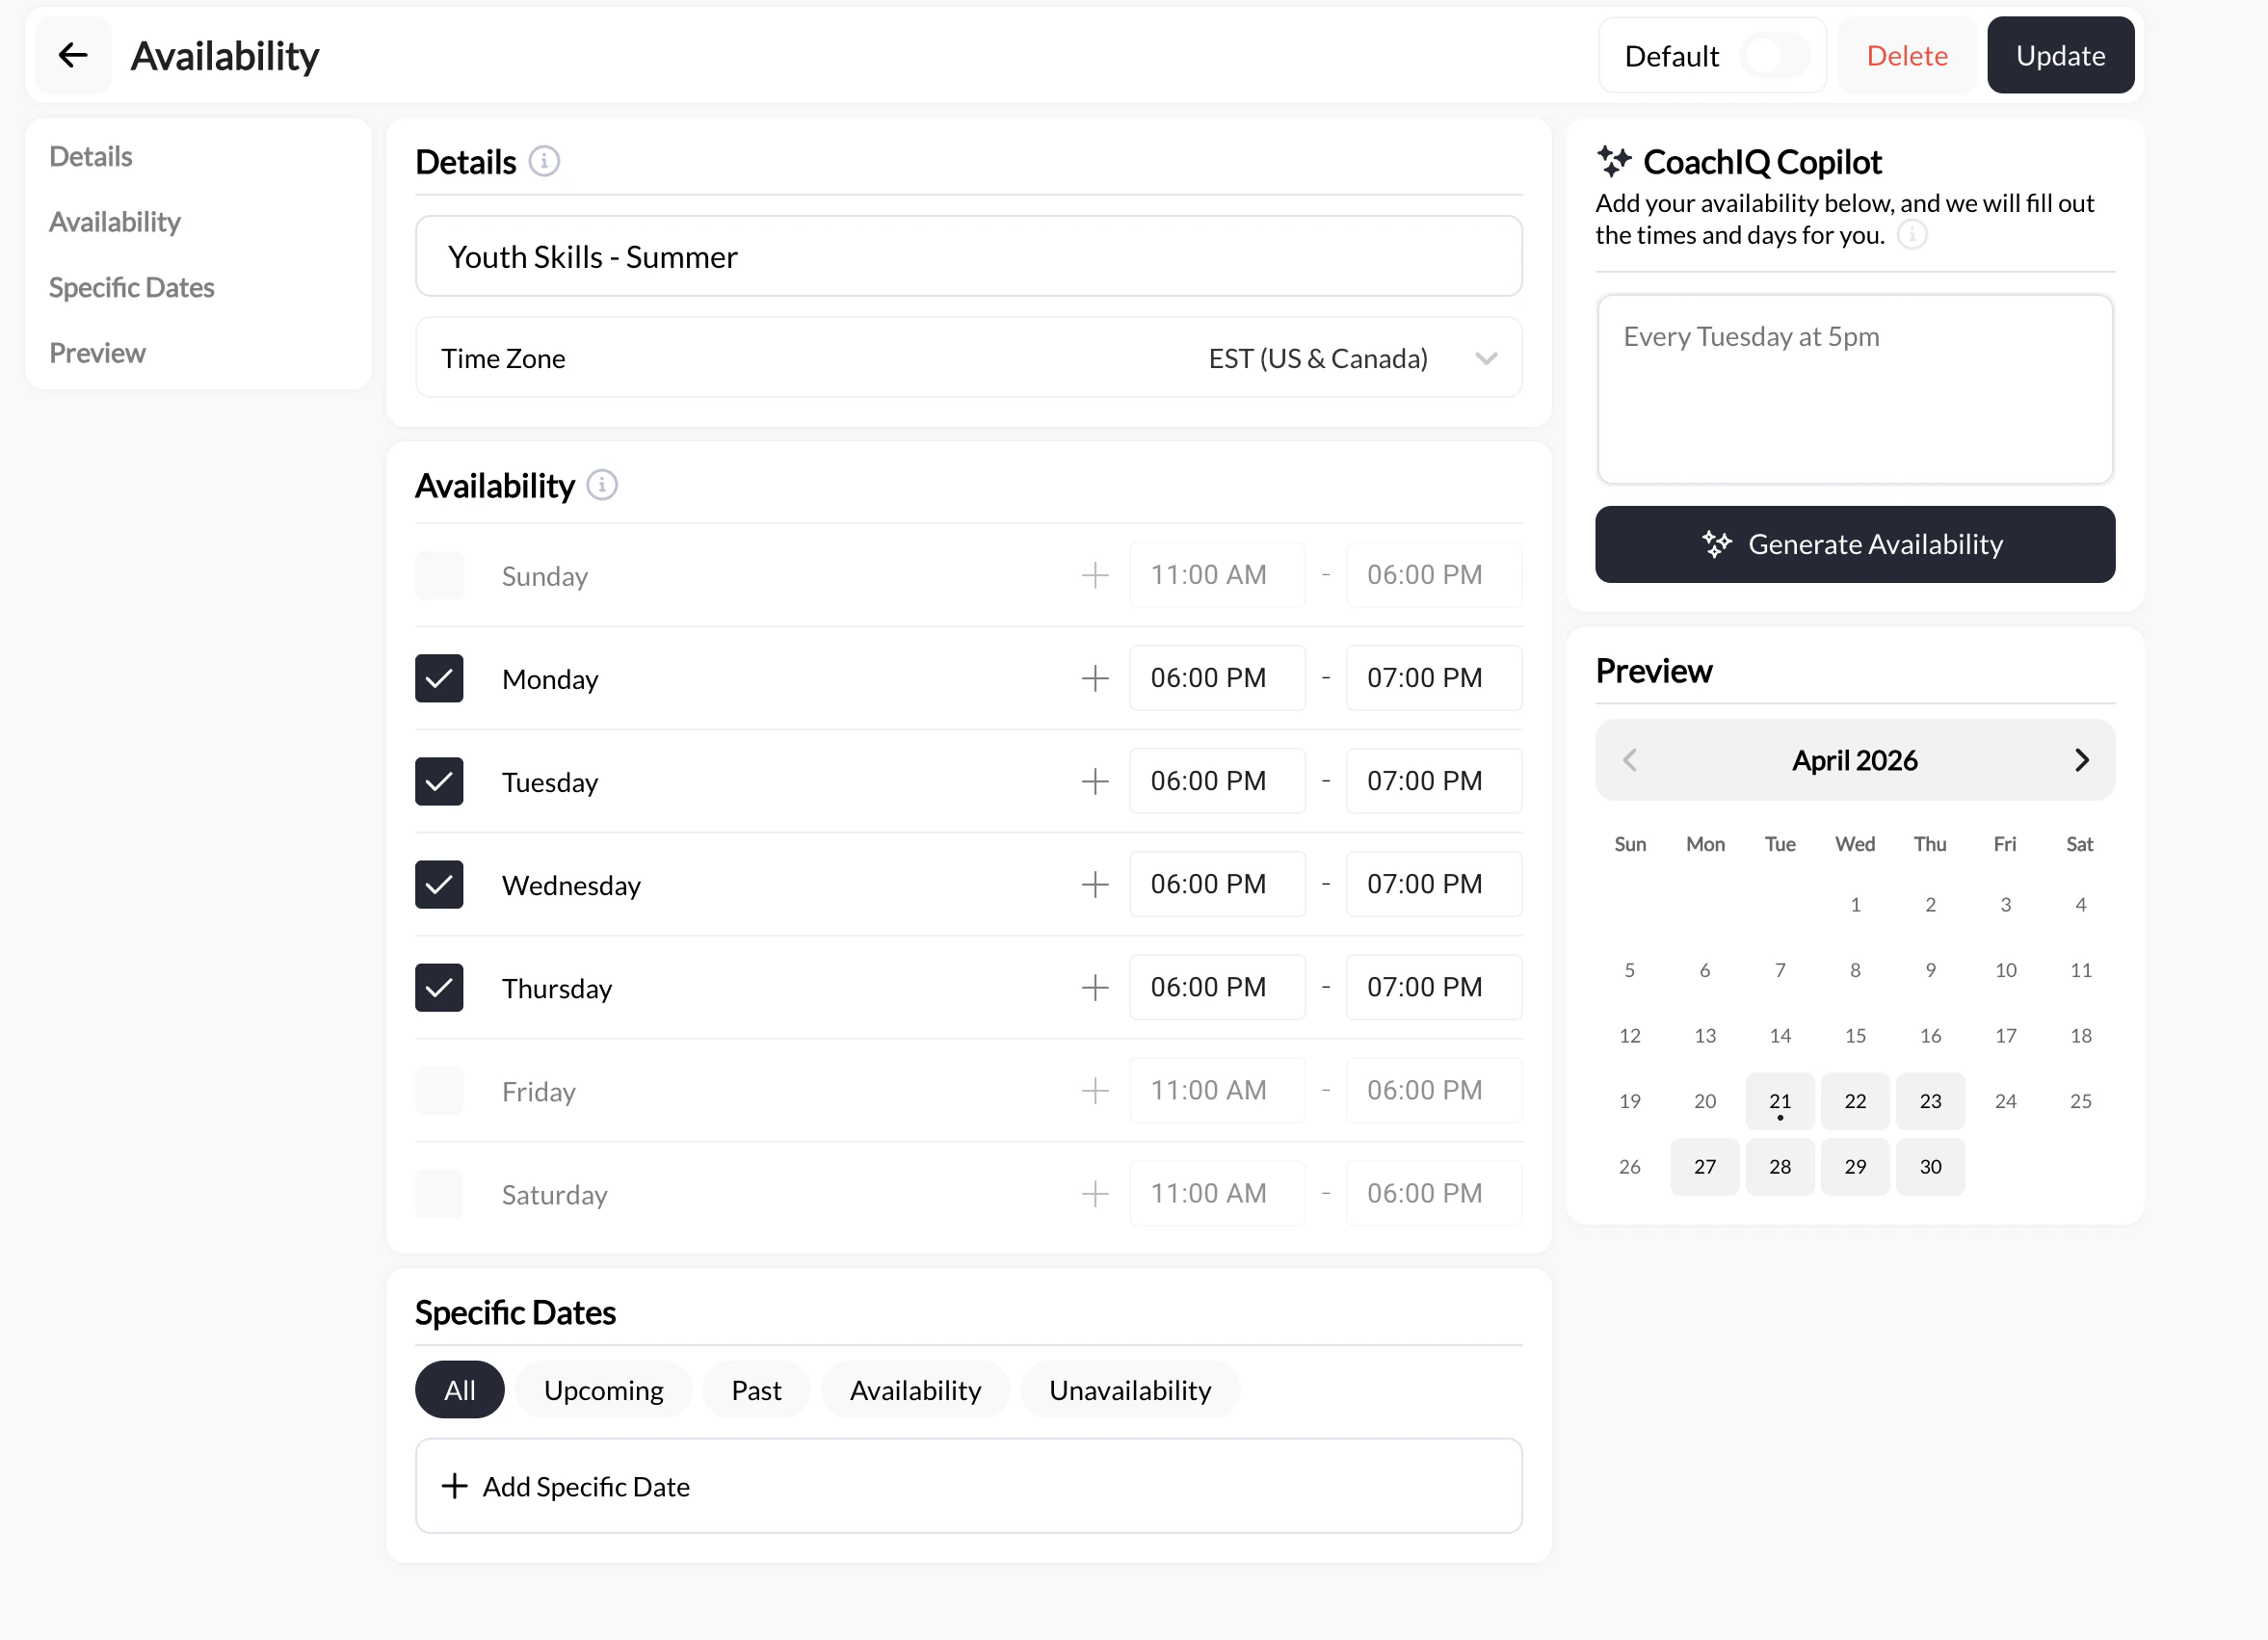
 Give it a descriptive name that reflects the season and session type (for example, "Youth Skills - Summer"). Set the days and times for your new schedule, then click **Update** to save it.
 From the **Schedulers** page, click into the first scheduler you want to transition. Navigate to its **Availability** section in the left sidebar.
Scroll to the **Additional Availability** section and click **+ Add Additional Availability**. Select your new seasonal availability from the dropdown.
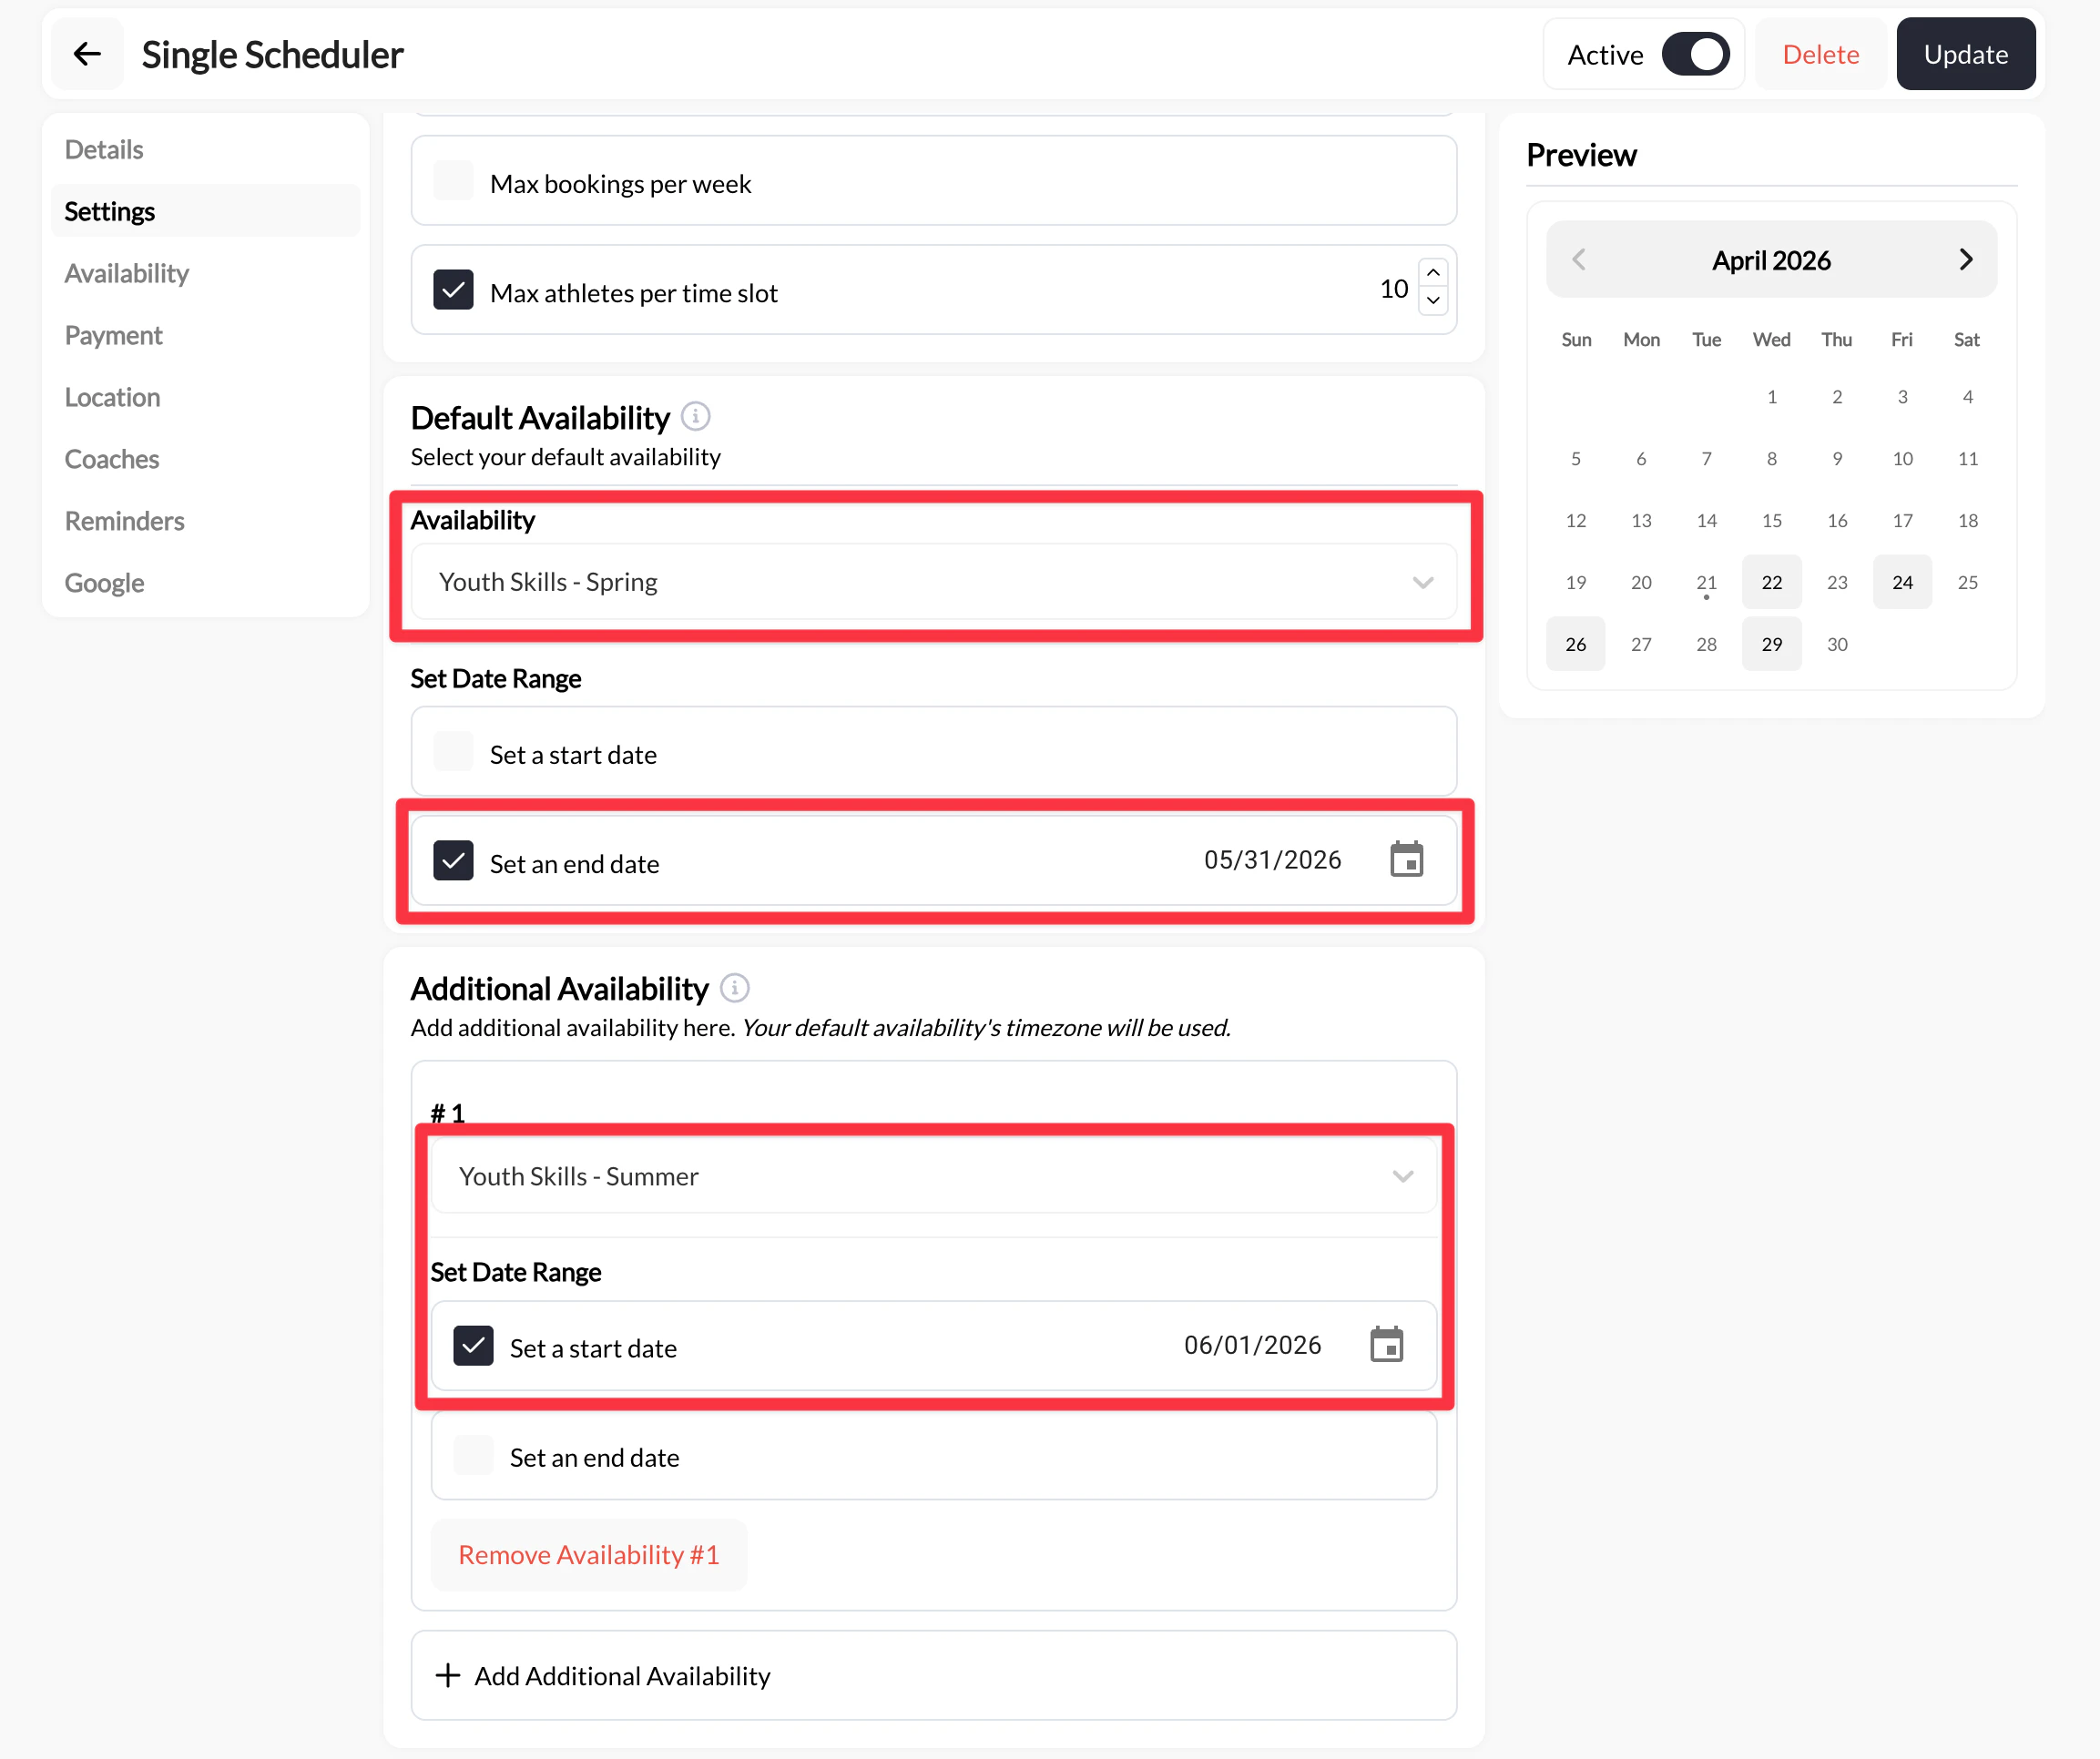
With the new availability block added, check **Set a start date** and enter the date your new season begins — for example, 06/01/2026 for a spring-to-summer switch.
Then scroll up to your **Default Availability** block, check **Set an end date**, and enter the last day of your current season — for example, 05/31/2026.
From the **Schedulers** page, click into the first scheduler you want to transition. Navigate to its **Availability** section in the left sidebar.
Scroll to the **Additional Availability** section and click **+ Add Additional Availability**. Select your new seasonal availability from the dropdown.
With the new availability block added, check **Set a start date** and enter the date your new season begins — for example, 06/01/2026 for a spring-to-summer switch.
Then scroll up to your **Default Availability** block, check **Set an end date**, and enter the last day of your current season — for example, 05/31/2026.
 | Setting | What it controls |
| ------------------------------------ | ---------------------------------------- |
| **End Date** on current availability | Last day your current season is bookable |
| **Start Date** on new availability | First day your new season is bookable |
Set them as consecutive dates and there will be zero overlap or gap.
Check the **Preview** calendar on the right side of the page to confirm the transition looks correct — your current hours should show up through the end date and your new seasonal hours from the start date onward.
When everything looks right, click **Update**.
Go through each of your remaining schedulers and repeat Steps 2–5. Each scheduler manages its own availability blocks independently, so you'll need to update them one at a time.
Both availability blocks will be active at the same time and athletes will see slots from both seasons. Always set an **End Date** on your current availability to prevent overlap.
Yes. Go back into the scheduler, find either availability block, and update the **Start Date** or **End Date**. Changes apply immediately to future-available slots — existing bookings are not affected.
The availability must be created before it can be attached to a scheduler. Go to **Schedule** → **Schedulers**, click the **+** button in the Availability panel to create it, then return to the scheduler you're updating and it will appear in the dropdown.
Yes — each scheduler manages its own availability blocks. If you have three schedulers, you'll need to set the start/end dates in each one individually.
Set up a new availability block from scratch before attaching it to a scheduler.
Full walkthrough of scheduler settings, including the Availability section.
Block specific dates without changing your overall availability.
Understand how availability blocks connect to schedulers and generate bookable slots.
| Setting | What it controls |
| ------------------------------------ | ---------------------------------------- |
| **End Date** on current availability | Last day your current season is bookable |
| **Start Date** on new availability | First day your new season is bookable |
Set them as consecutive dates and there will be zero overlap or gap.
Check the **Preview** calendar on the right side of the page to confirm the transition looks correct — your current hours should show up through the end date and your new seasonal hours from the start date onward.
When everything looks right, click **Update**.
Go through each of your remaining schedulers and repeat Steps 2–5. Each scheduler manages its own availability blocks independently, so you'll need to update them one at a time.
Both availability blocks will be active at the same time and athletes will see slots from both seasons. Always set an **End Date** on your current availability to prevent overlap.
Yes. Go back into the scheduler, find either availability block, and update the **Start Date** or **End Date**. Changes apply immediately to future-available slots — existing bookings are not affected.
The availability must be created before it can be attached to a scheduler. Go to **Schedule** → **Schedulers**, click the **+** button in the Availability panel to create it, then return to the scheduler you're updating and it will appear in the dropdown.
Yes — each scheduler manages its own availability blocks. If you have three schedulers, you'll need to set the start/end dates in each one individually.
Set up a new availability block from scratch before attaching it to a scheduler.
Full walkthrough of scheduler settings, including the Availability section.
Block specific dates without changing your overall availability.
Understand how availability blocks connect to schedulers and generate bookable slots.