

Check your Apple account before you continue
Your Apple Account (formerly Apple ID) is your sign-in. Your Apple Developer Program membership has an enrollment type. Creating an Apple Account or adding a business name to it does not create an Organization membership.Working alone is different from enrolling as an Individual. Choose based on your business’s legal entity, not how many coaches you employ. Apple verifies whether your business qualifies for Organization enrollment.
What you’ll need for iOS
Gather these before starting enrollment:- Business verification: legal entity name, address, phone number, and registration documents. Use the legal name on your records, which may differ from your app’s brand name.
- D-U-N-S number: look up your business through Apple’s D-U-N-S guidance. Check that the name, address, and legal status match. If no record exists, follow the request process; if it is incorrect, correct it with Dun & Bradstreet before enrolling.
- Business website and email: a working public website on your business domain and an email address using that domain. A social profile or parked domain is insufficient.
- Account Holder: someone authorized to enter agreements for the business, with their own Apple Account and two-factor authentication enabled. Use the person’s legal name for the sign-in identity.
- Membership payment: Apple currently lists USD 99 per membership year, with regional pricing shown during enrollment.
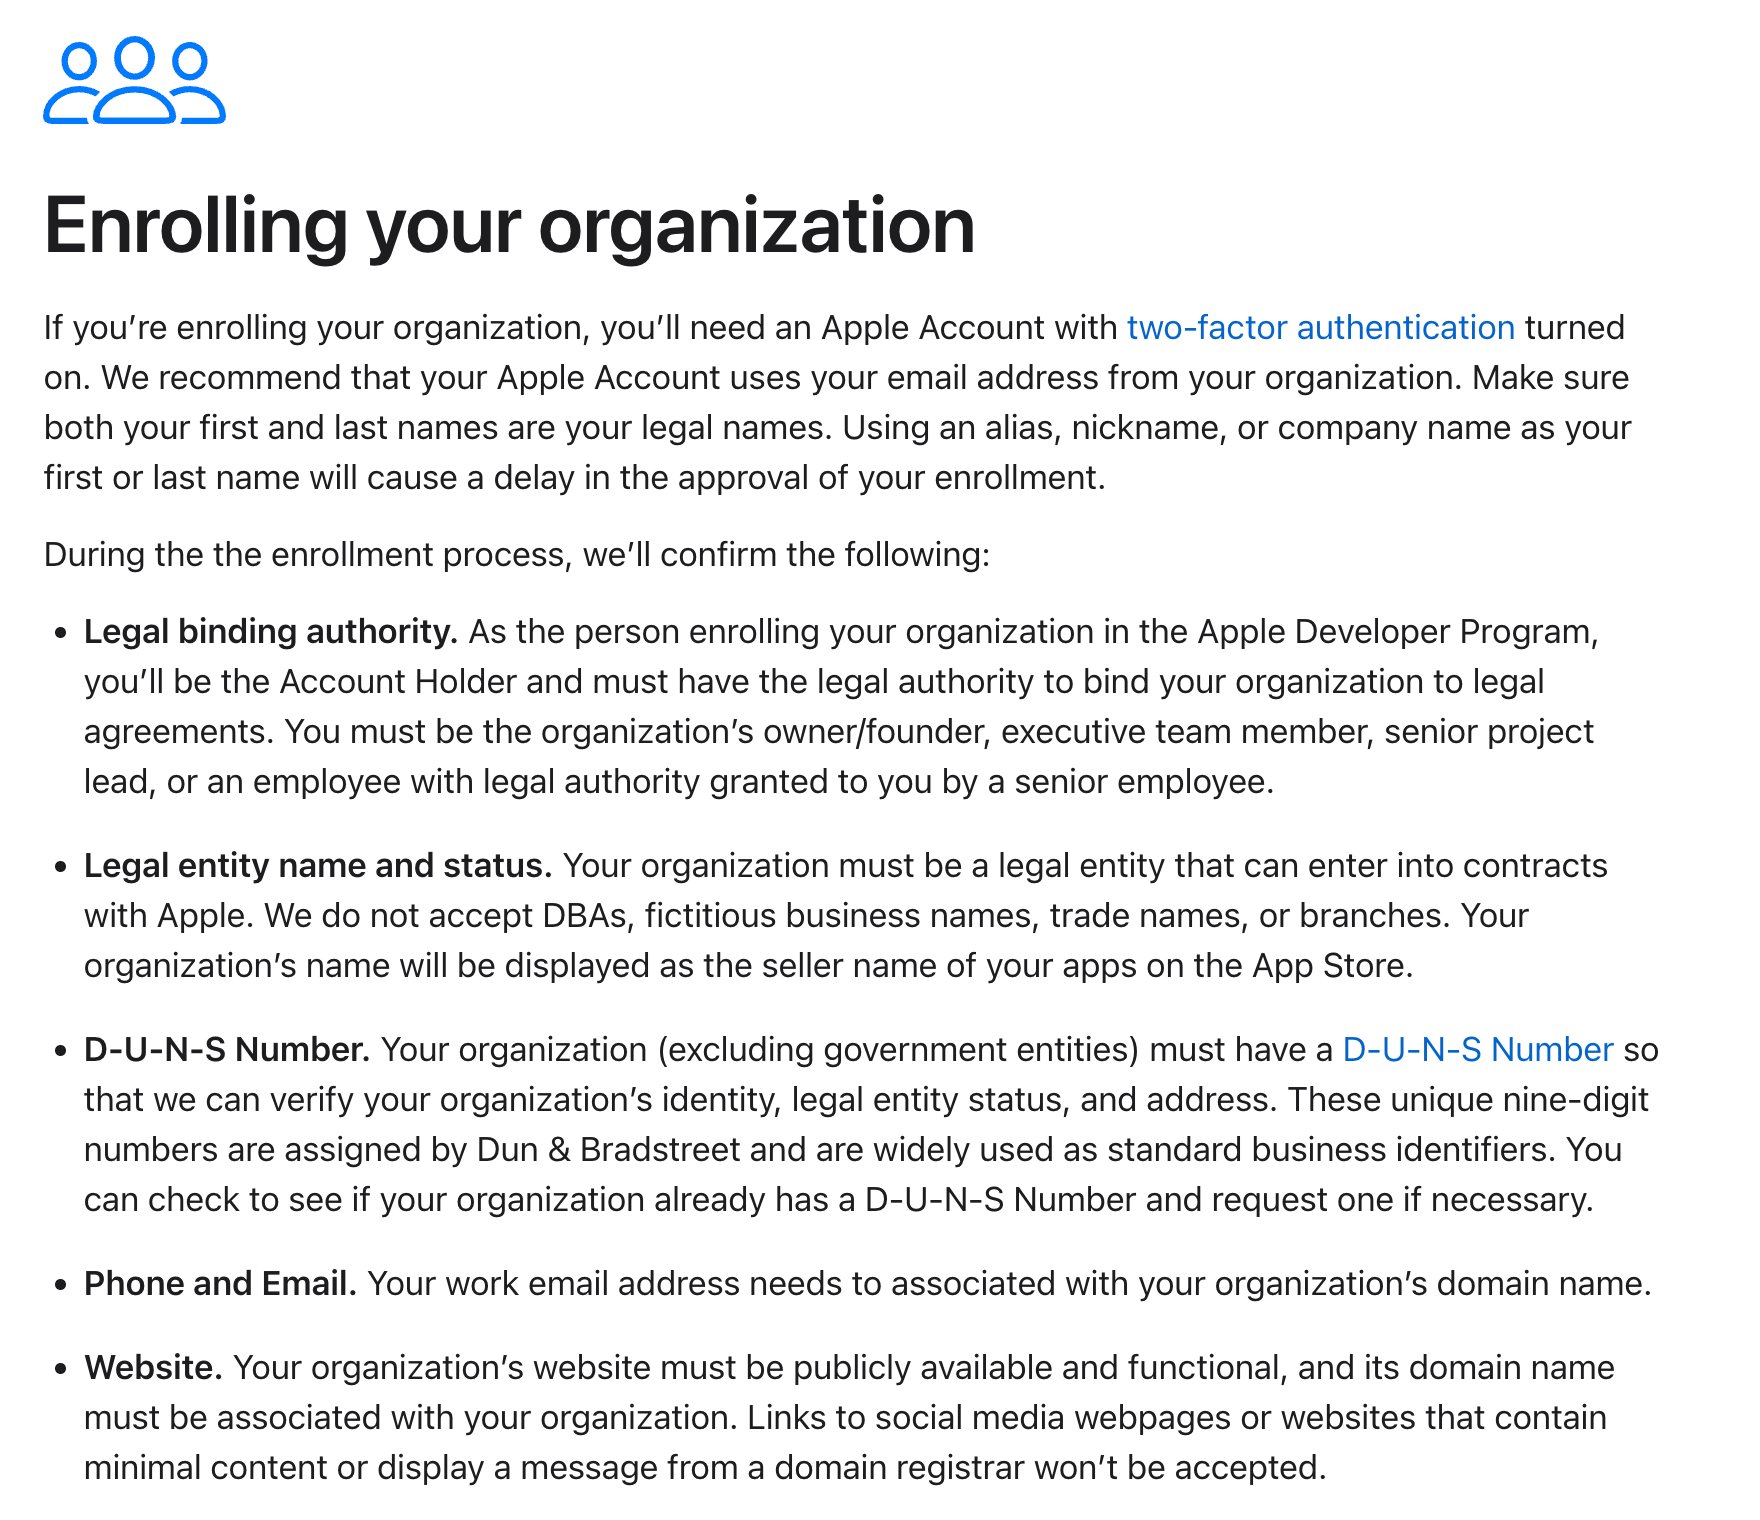
Apple's public enrollment guide: use the Organization section for your business. Screenshot captured September 22, 2026; this is the requirements page, not the enrollment form.
iOS setup process
1
Enroll your business as an Organization
Open Apple Developer Program enrollment, sign in, and start enrollment. Choose Company / Organization as the entity type. Use the standard Apple Developer Program for an App Store app.Enter the business details you prepared. Respond to Apple’s verification requests, then complete the agreement and membership payment when Apple asks you to do so.Before continuing: confirm that Apple has approved your membership, that it is active, and that Membership details shows the correct organization. A submitted application or a free developer sign-in is not a completed membership.
2
Invite CoachIQ after Organization enrollment is active
Follow the invitation instructions below. Use dev@coachiq.io, the Admin role, and access to Certificates, Identifiers & Profiles.Before continuing: ask CoachIQ to confirm that the invitation has been accepted and the required developer access works. Sending the invitation alone does not confirm readiness.
3
Provide your branding and review the app
Send the team your desired app name, high-resolution logo, app icon, brand colors, and business description. Identify the person who will review the test build and store listing.CoachIQ prepares the build and listing with you. Review the branding and test the main actions your athletes use, then send your feedback or approval to the team before submission.
Invite CoachIQ to your Apple Developer account
Prerequisite: your business has an active Organization membership. Sign in as the Account Holder, or an Admin authorized to manage the organization’s users.- Open App Store Connect. If you belong to multiple teams, select the correct business.
- Open Users and Access → People, then click +.
- Enter the required name fields for the CoachIQ team contact and use dev@coachiq.io as the email address. Ask CoachIQ for the contact name if you do not have it.
- Select the Admin role.
- Confirm access to Certificates, Identifiers & Profiles. Apple grants this by default to Admins on an Organization team; if a control is shown, make sure access is enabled.
- Continue through Next, if shown, then click Invite.
- Tell CoachIQ which business sent the invitation so the team can accept and verify access.

CoachIQ invitation quick reference. This is an illustrated checklist, not a screenshot of Apple's interface.
Already enrolled as an Individual?
Keep your existing account and ask Apple about converting the membership:- Sign in as the Account Holder and open Apple’s instructions for updating an Individual membership to an Organization.
- Use the submit a request link in that section. Apple requires the founder or cofounder to request the change and may ask for your D-U-N-S number and business documents.
- Tell CoachIQ that conversion is pending. Wait for Apple to approve the change.
- Confirm your membership now shows the organization, then send or review CoachIQ’s invitation and permissions.
What happens next for iOS
The team confirms your launch estimate. Account verification, your feedback, and store review can affect the date. Approval of your developer membership does not mean Apple has approved your app.
Android setup
Android Personalized Apps are available. Tell the CoachIQ team you need Android, including if you already have an iOS app. No Power-Up request is required.- Confirm whether you need Android only or both platforms.
- Provide your app name, logo, app icon, colors, and listing description.
- Confirm the Google Play publishing-account type, ownership, and access requirements with CoachIQ before creating or paying for an account. The Apple Organization enrollment above applies to iOS and does not configure Google Play.
- Review the Android build and listing with the team.
- Share the Google Play download link only after CoachIQ confirms the listing is live.
Keep your app ready for updates
Keep your Apple Developer membership active and your Account Holder’s contact details current. Review renewal settings and respond when Apple asks you to accept updated agreements or verify information. Let CoachIQ know if you change account access or receive a notice that may block an update.Troubleshooting
I can invite users, but CoachIQ cannot access certificates
I can invite users, but CoachIQ cannot access certificates
Check the membership type in your Apple Developer account first. An Individual membership can show Users and Access without providing developer-team access. If it is Individual, follow the conversion steps above. If it is Organization, confirm that you selected the correct team, invited dev@coachiq.io as Admin, and that CoachIQ has accepted the invitation. Share the exact error with CoachIQ if access still fails.
Apple says my business is not a legal entity or the details do not match
Apple says my business is not a legal entity or the details do not match
Compare your enrollment details with your D-U-N-S record and registration documents. A trading name or a D-U-N-S number by itself does not establish eligibility. Follow Apple’s D-U-N-S troubleshooting to correct the record. Contact CoachIQ if your business is a sole proprietorship; do not switch to Individual to bypass the issue.
My invitation is pending or expired
My invitation is pending or expired
Check Users and Access for dev@coachiq.io and tell CoachIQ if it is still pending. Apple invitations expire after three days; resend an expired invitation and let the team know. Confirm acceptance before assuming setup is complete.
I cannot find Users and Access or the option to add a user
I cannot find Users and Access or the option to add a user
Open App Store Connect, rather than the regular Apple Account settings page. Confirm the membership is active and you are on the correct business team. Ask the Account Holder to send the invitation if your role cannot manage users.
My business already has an app with another provider
My business already has an app with another provider
Tell CoachIQ before creating a new account or app listing. Share the existing store links and confirm who owns the current developer membership. The team needs to review the existing setup before advising on the next steps.