Set up camp registration, collect payment, and automate the entire experience — from landing page to post-camp follow-up.
Camps are different from memberships. Anyone can attend a camp — they don’t need to be an existing member. Your website is the storefront, not the Athlete Portal. Keep registration simple: landing page, form, payment, done.
Your setup depends on how your camp is structured. Pick the path that fits:
Simple Camp
One day, one group, everyone shows up at the same time. This is 99% of camps. Use a form + product + website page. No scheduling needed.
Multi-Day or Segmented Camp
Multiple days, age groups, or “pick your session” camps. Use separate products per segment and automations to auto-book athletes into the right sessions.
This is the camp fee that parents pay at checkout.
1
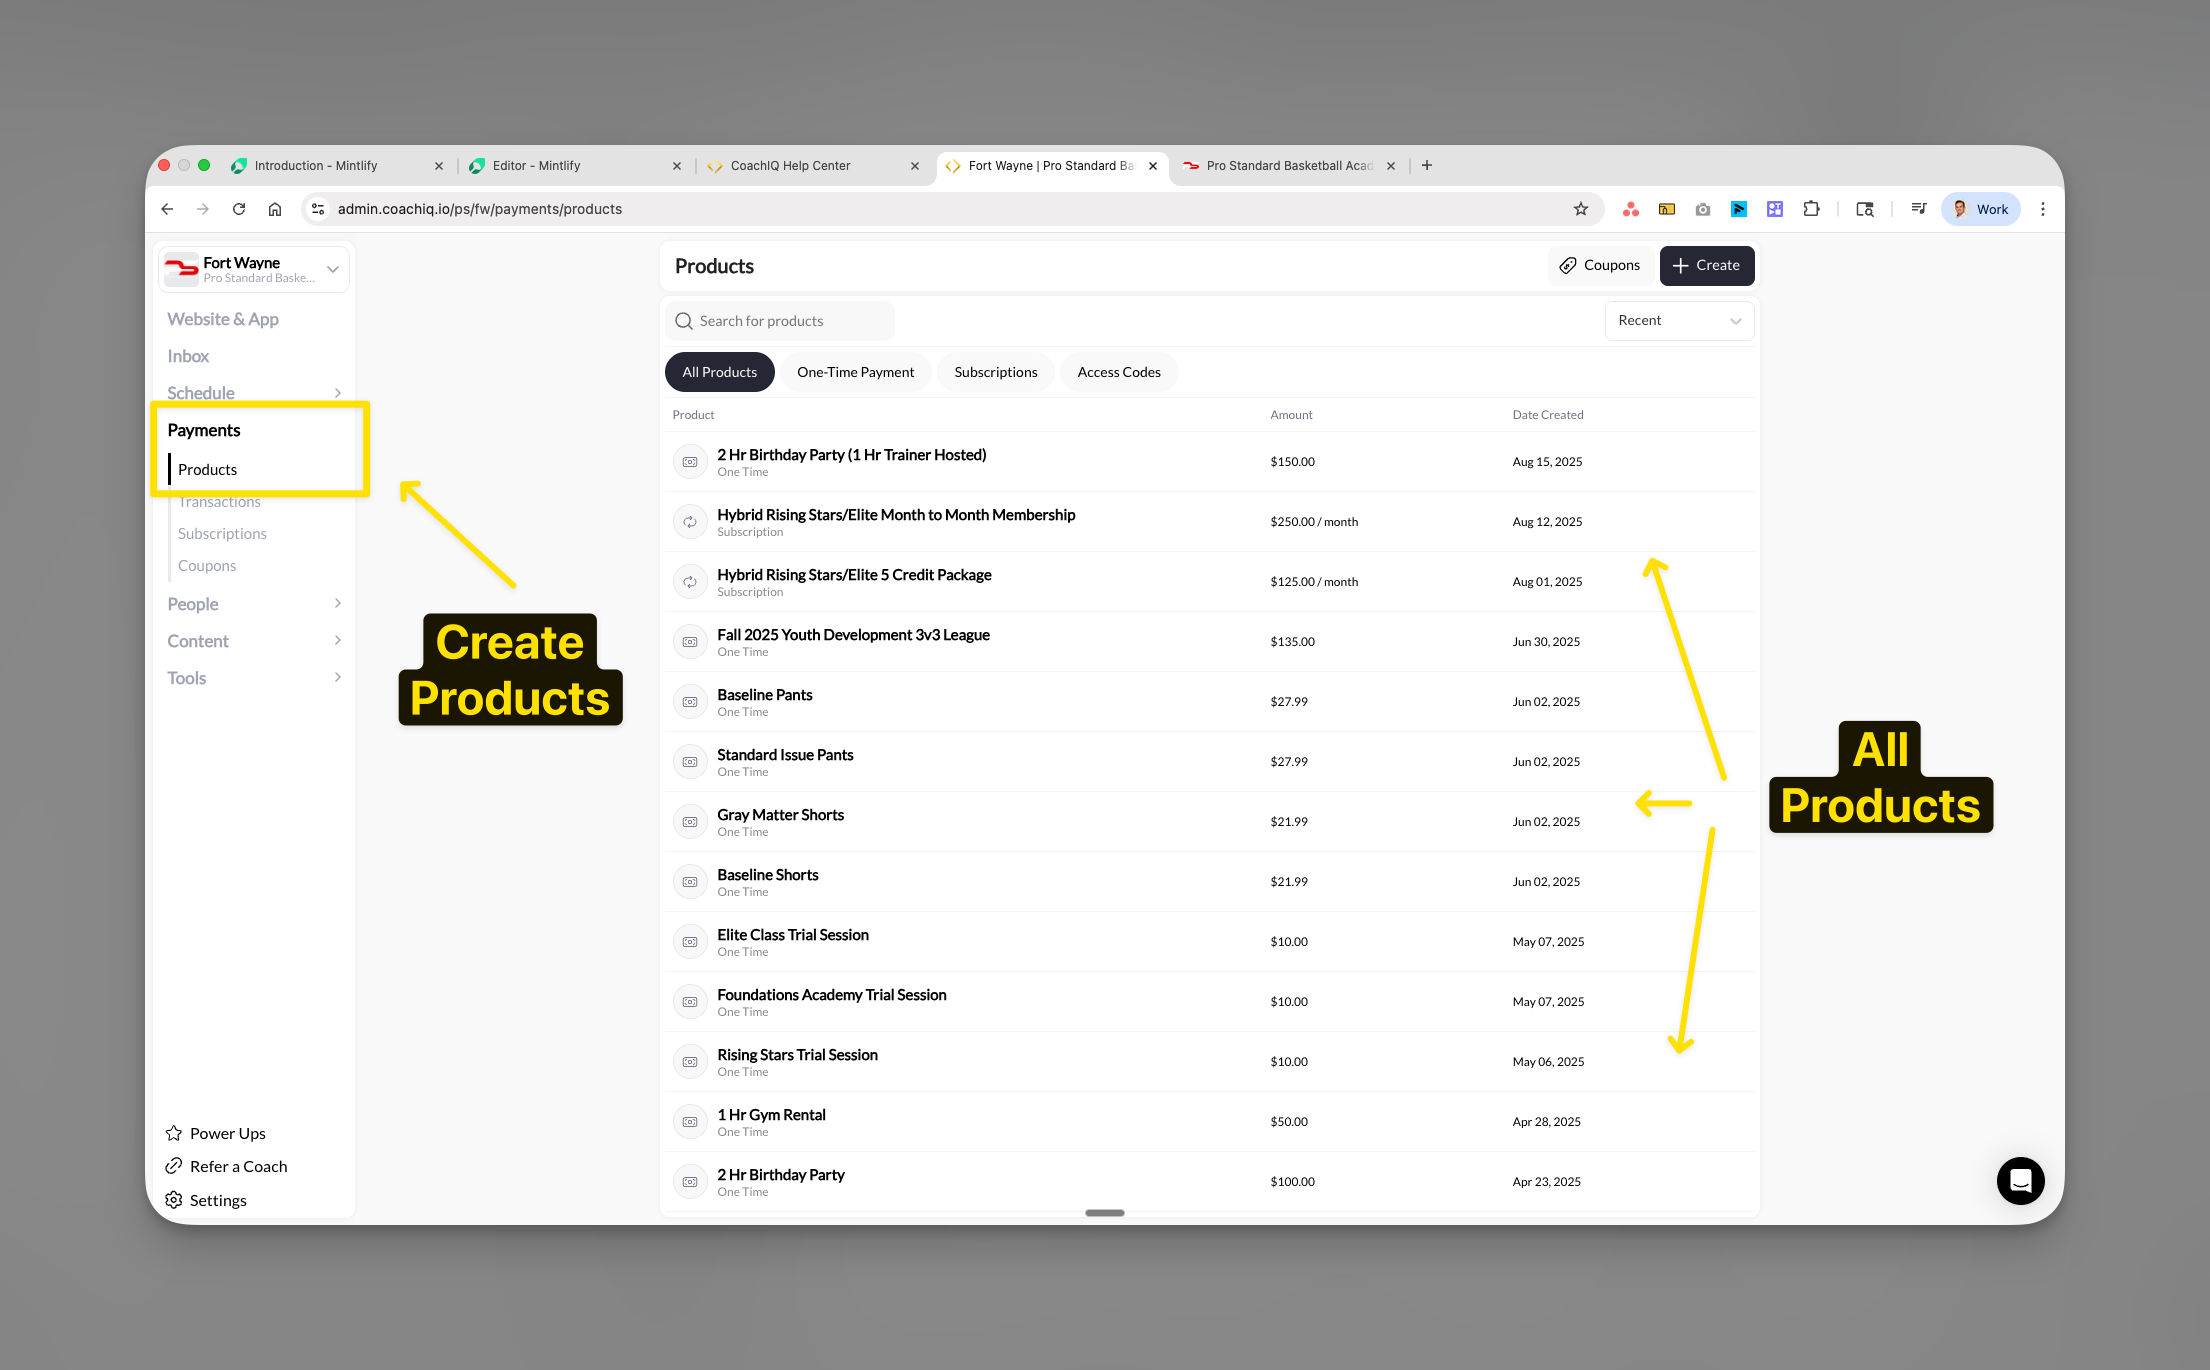
Go to Payments → Products
Click Add Product to create a new product.
2
Configure the product
Fill in the details:
Field
What to enter
Name
Something specific — “Summer Skills Camp - June 14”
Price
Your camp fee (e.g., $149)
Type
One-time
Description
Dates, times, what’s included
3
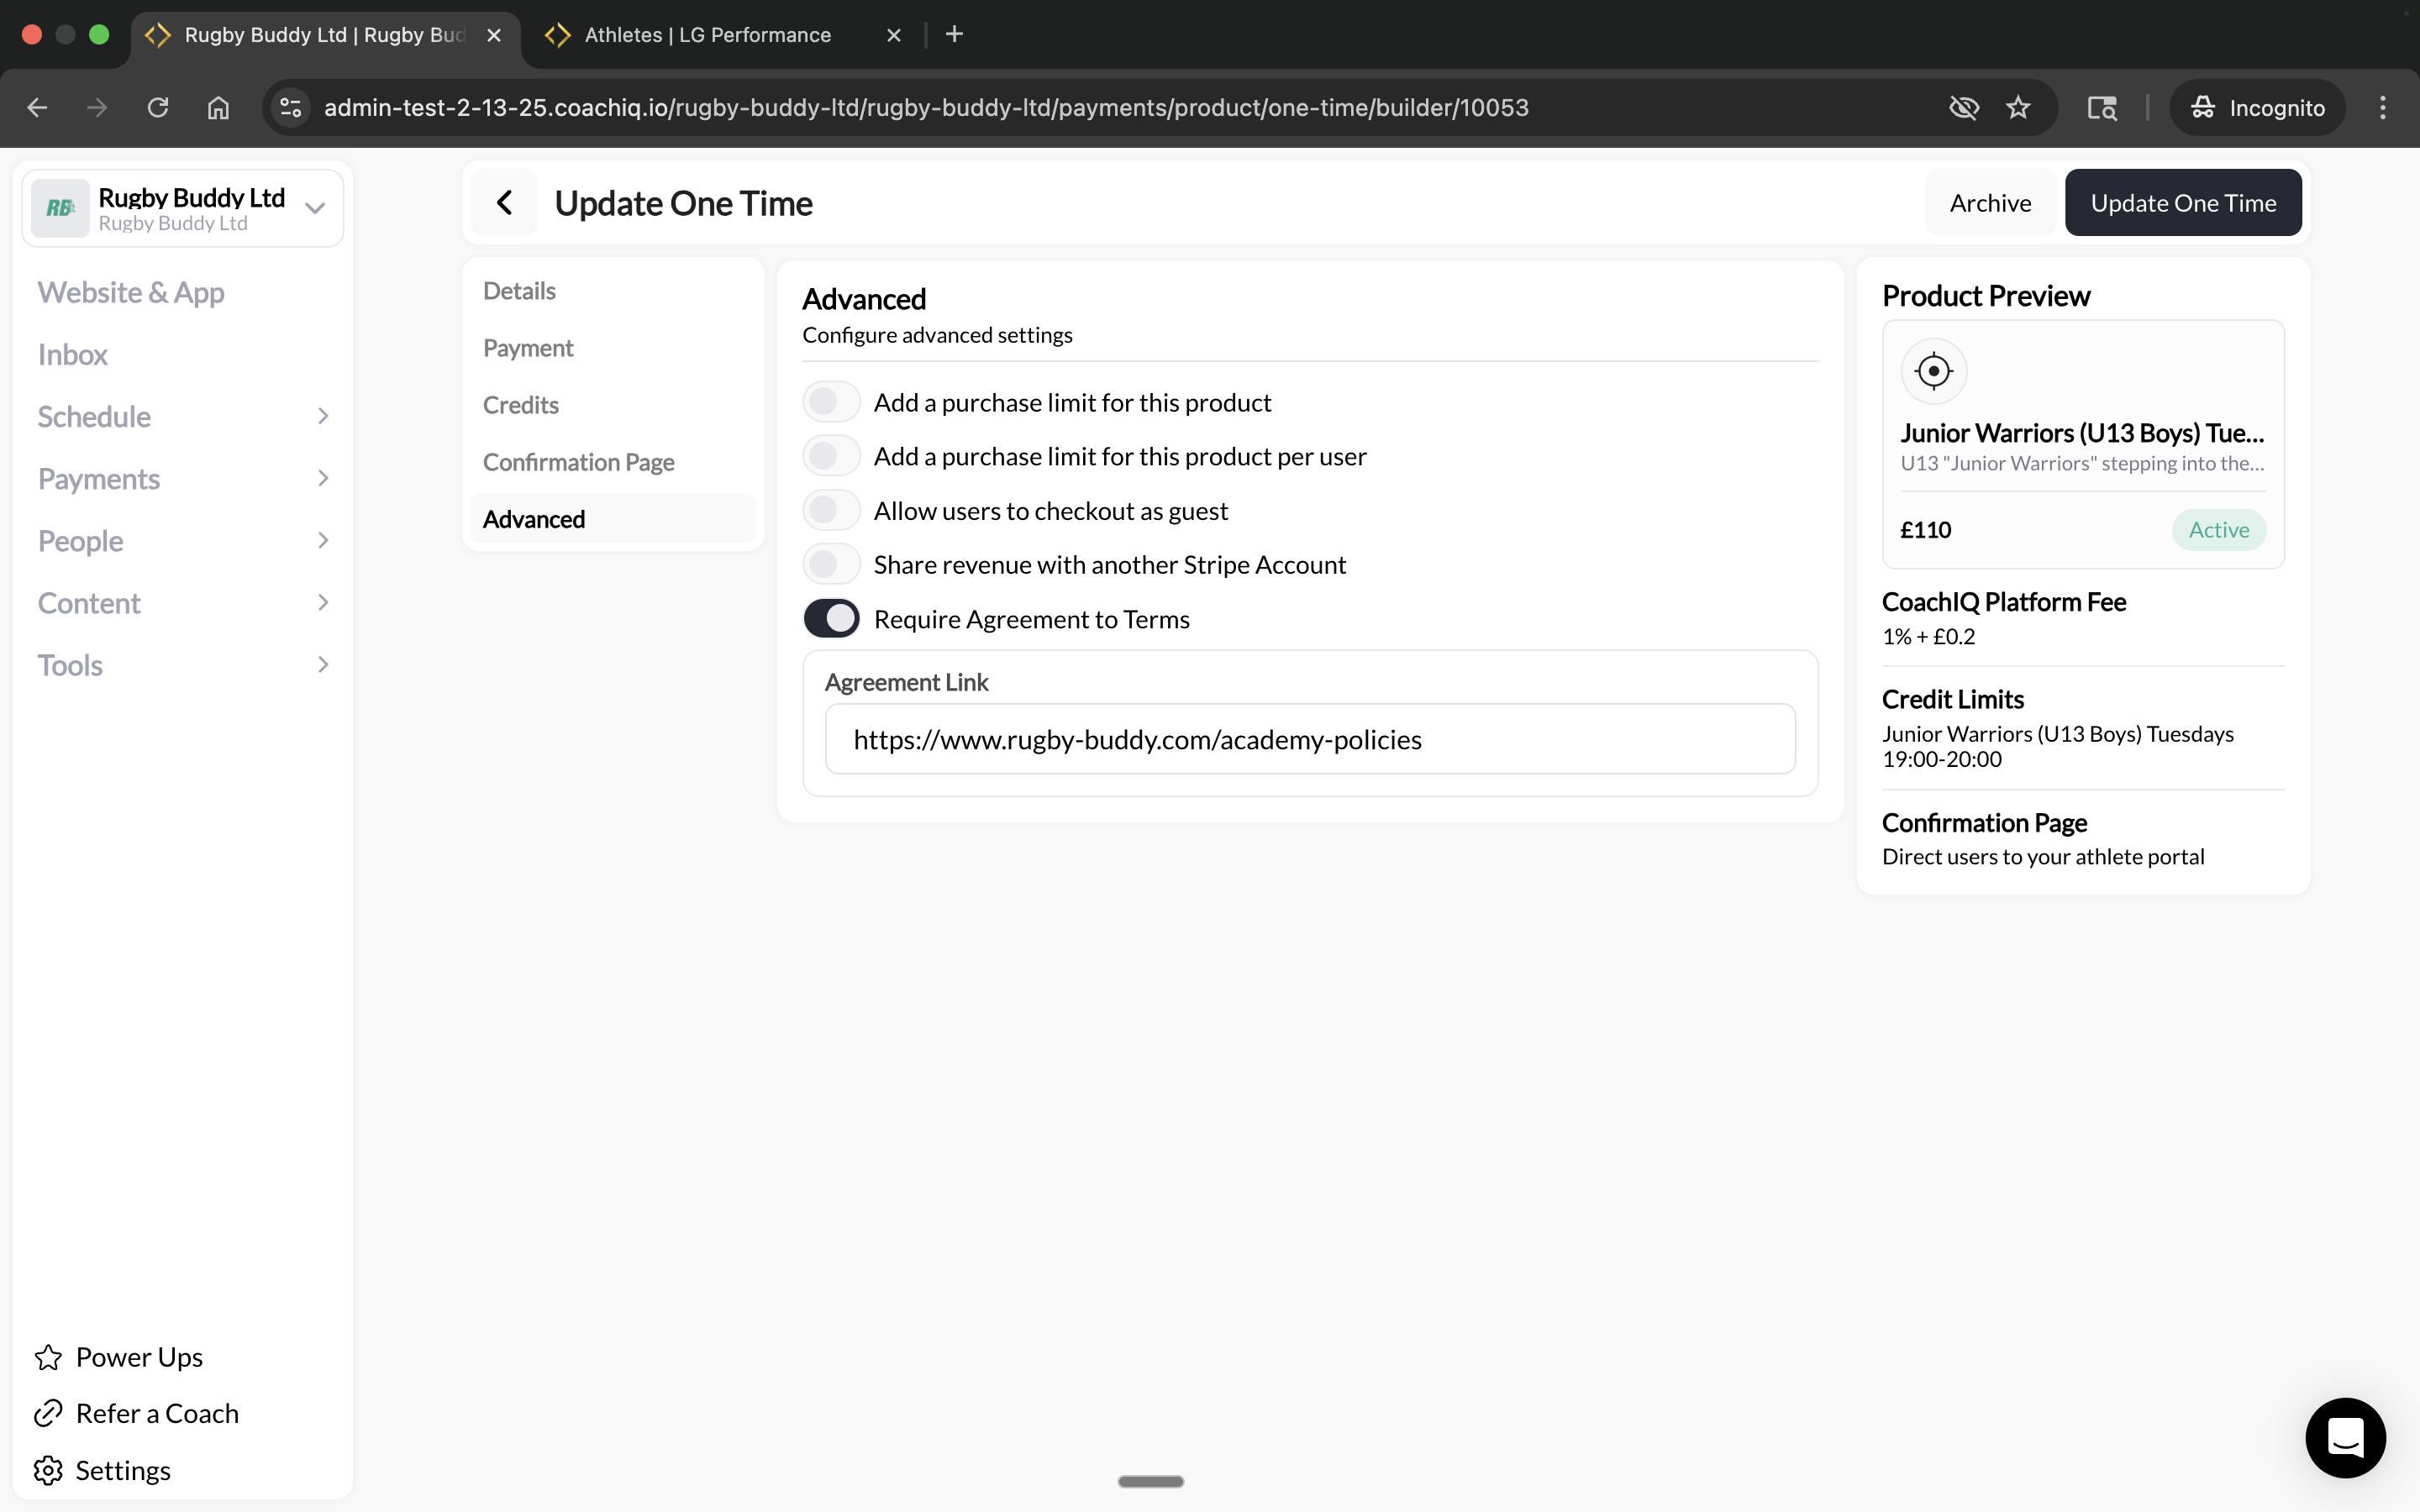
Add a waiver (recommended)
Under product settings, enable Terms & Conditions and add your liability waiver. Parents will be required to accept it during checkout.
Camp waivers: Include liability release, medical authorization, and photo/video consent. Parents sign once during checkout — no separate paperwork needed.
Don’t manually email every parent. Let automations handle confirmations and reminders.
1
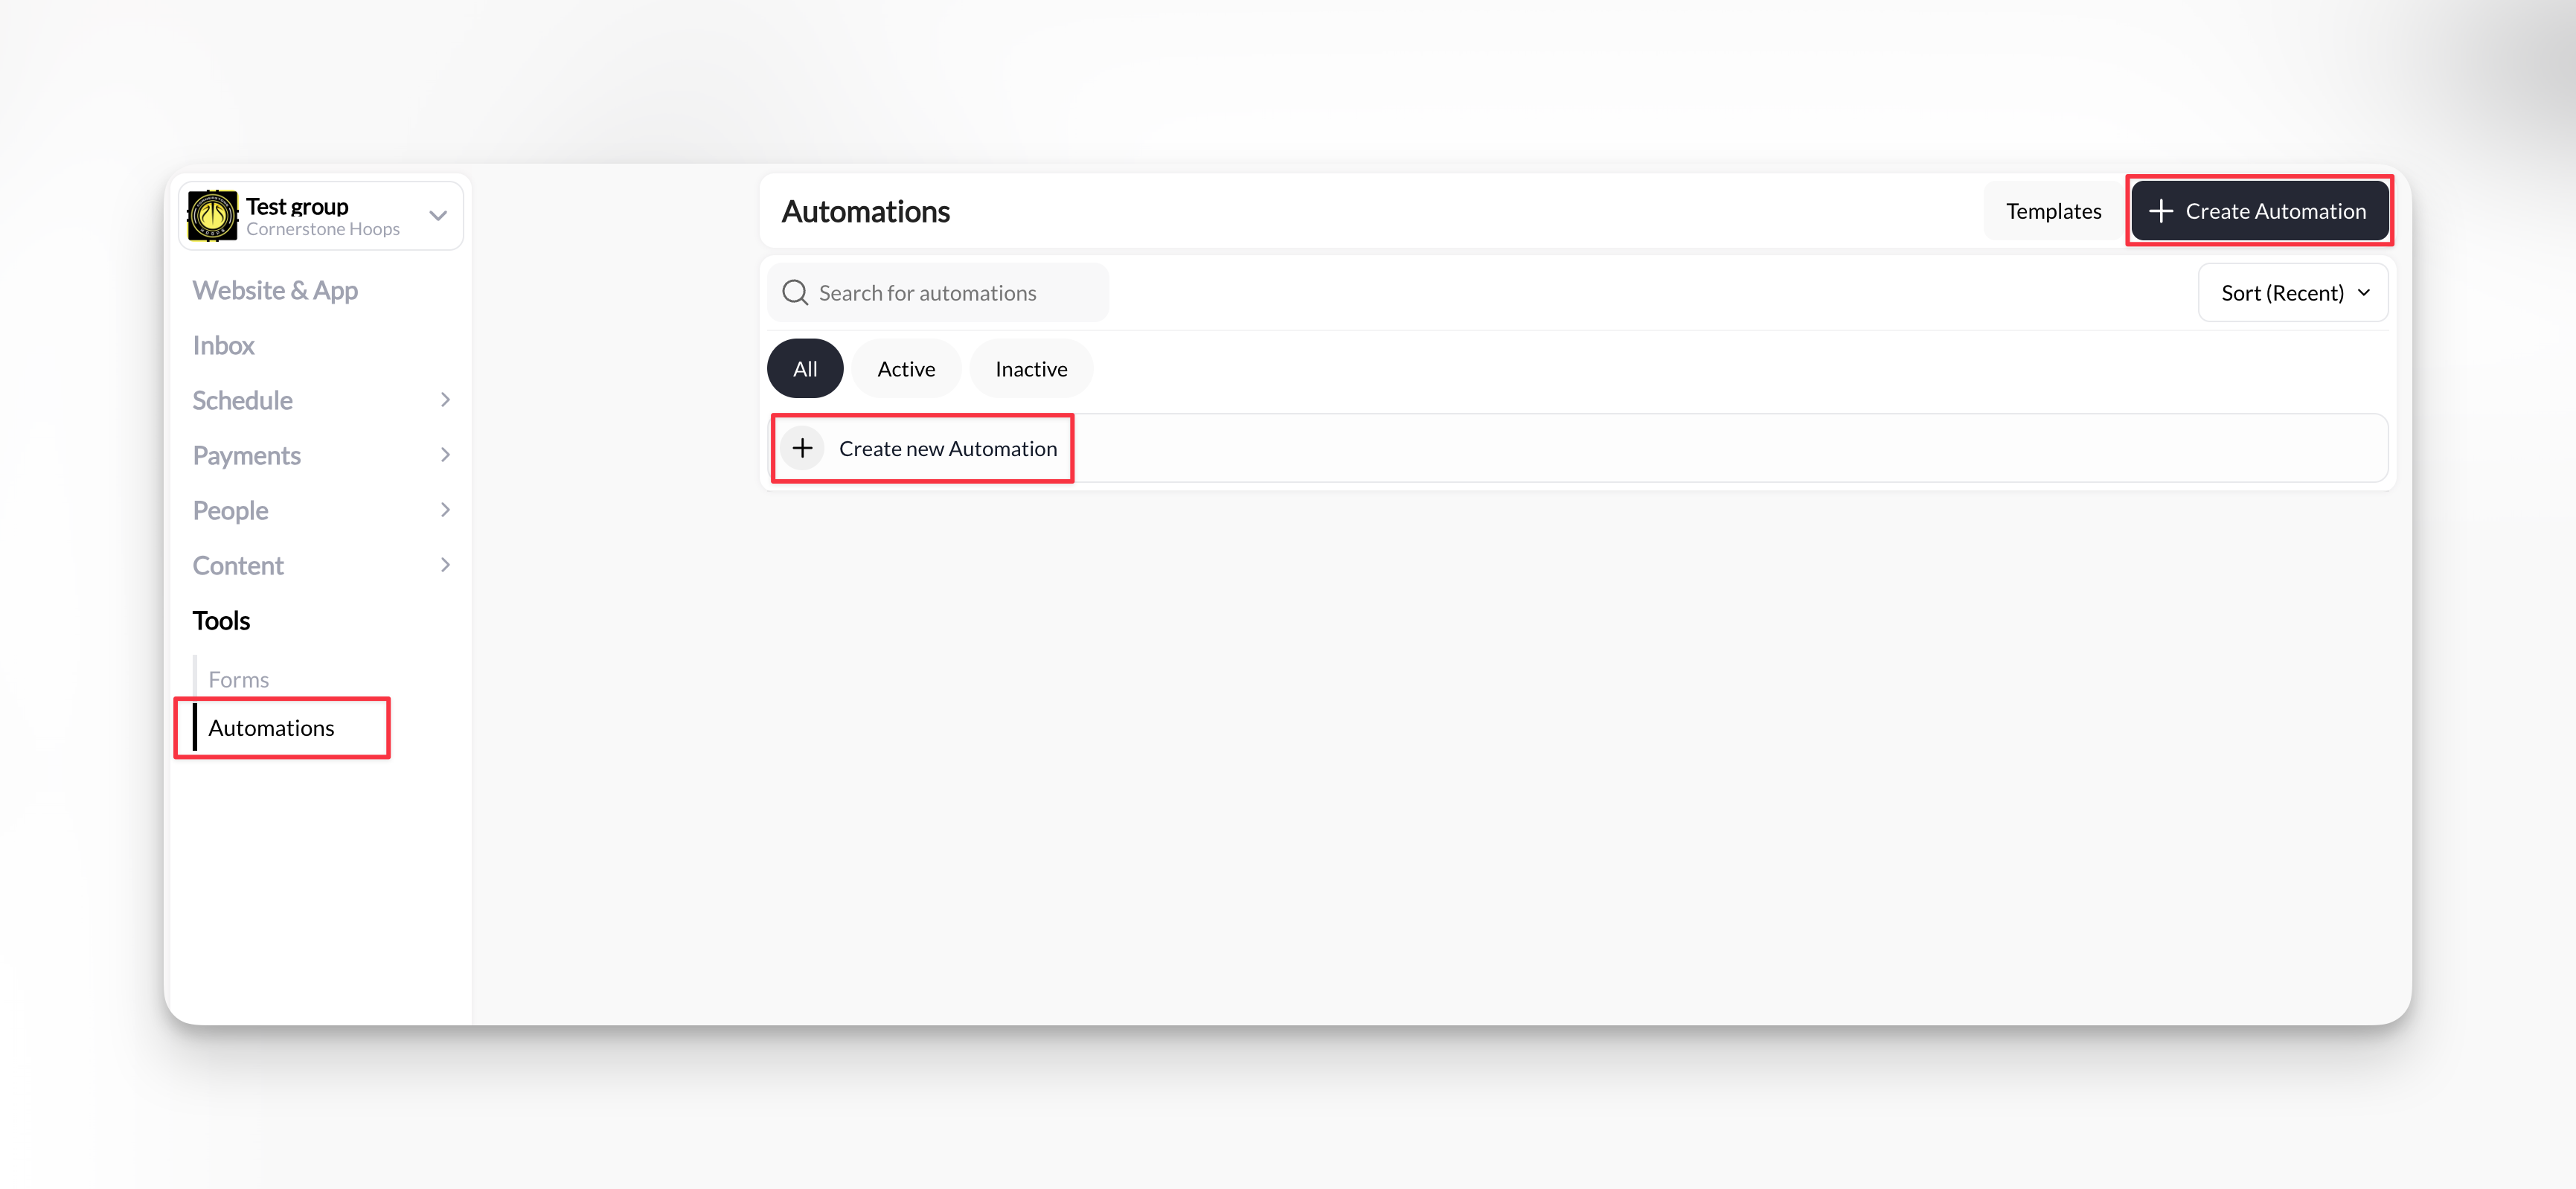
Go to Tools → Automations
Click Create Automation.
2
Build a confirmation automation
Setting
Value
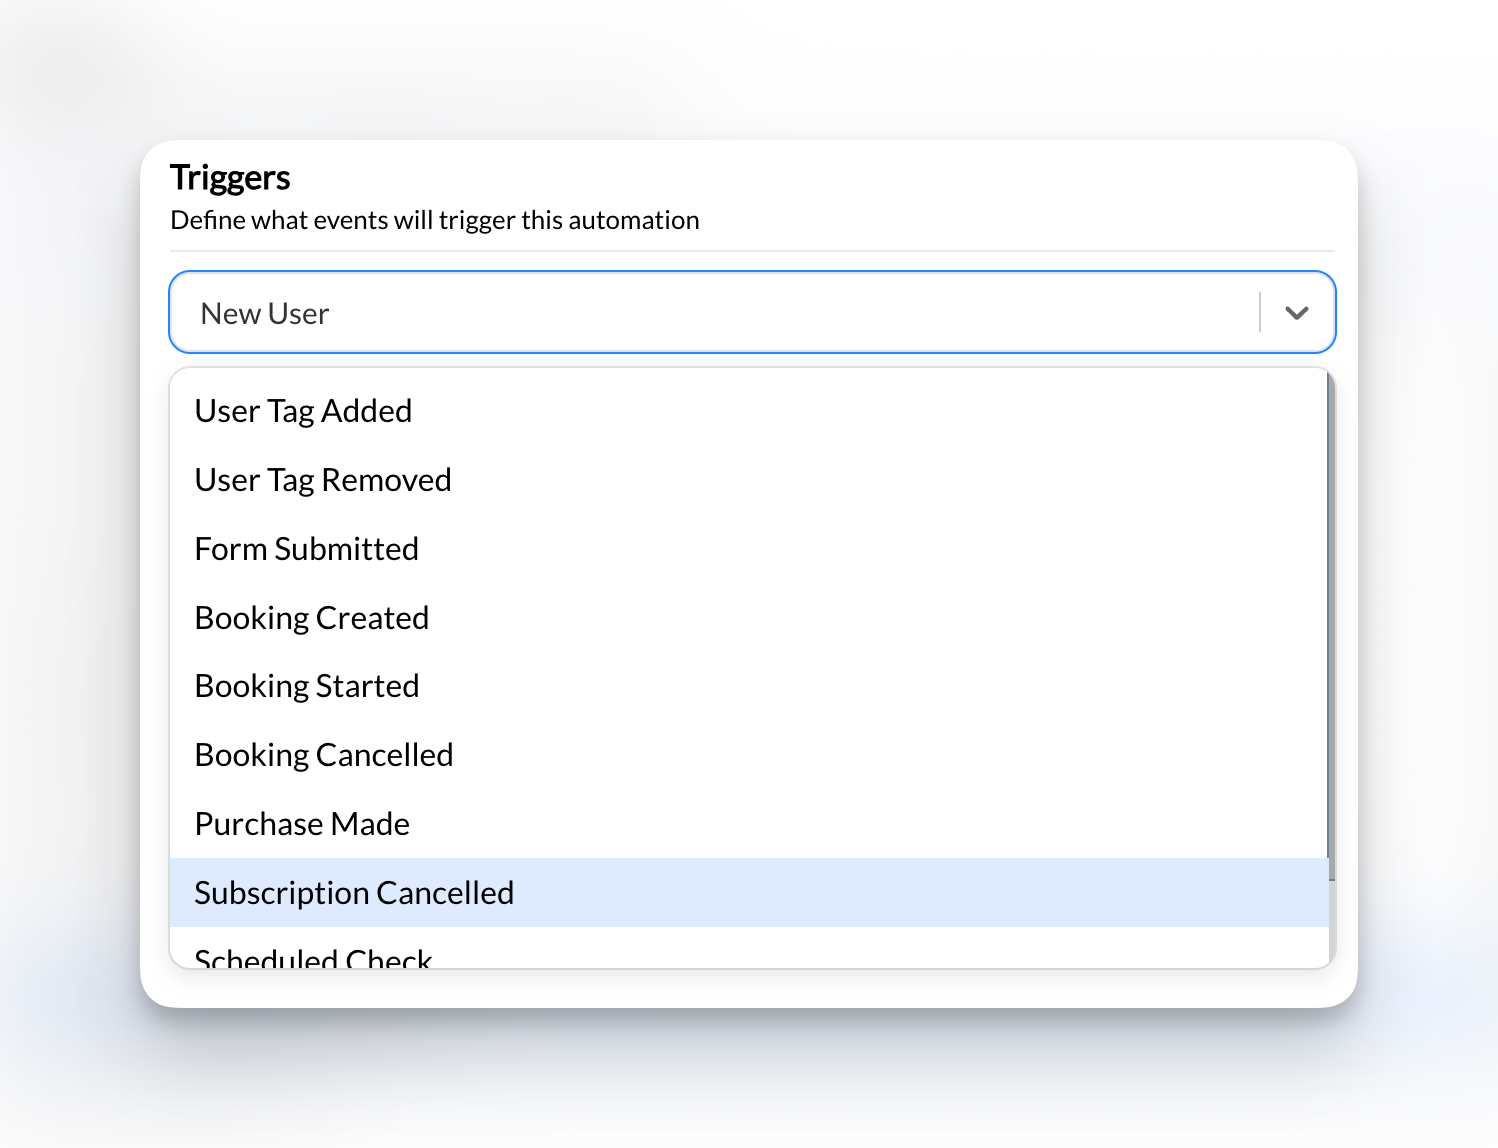
Trigger
New Purchase
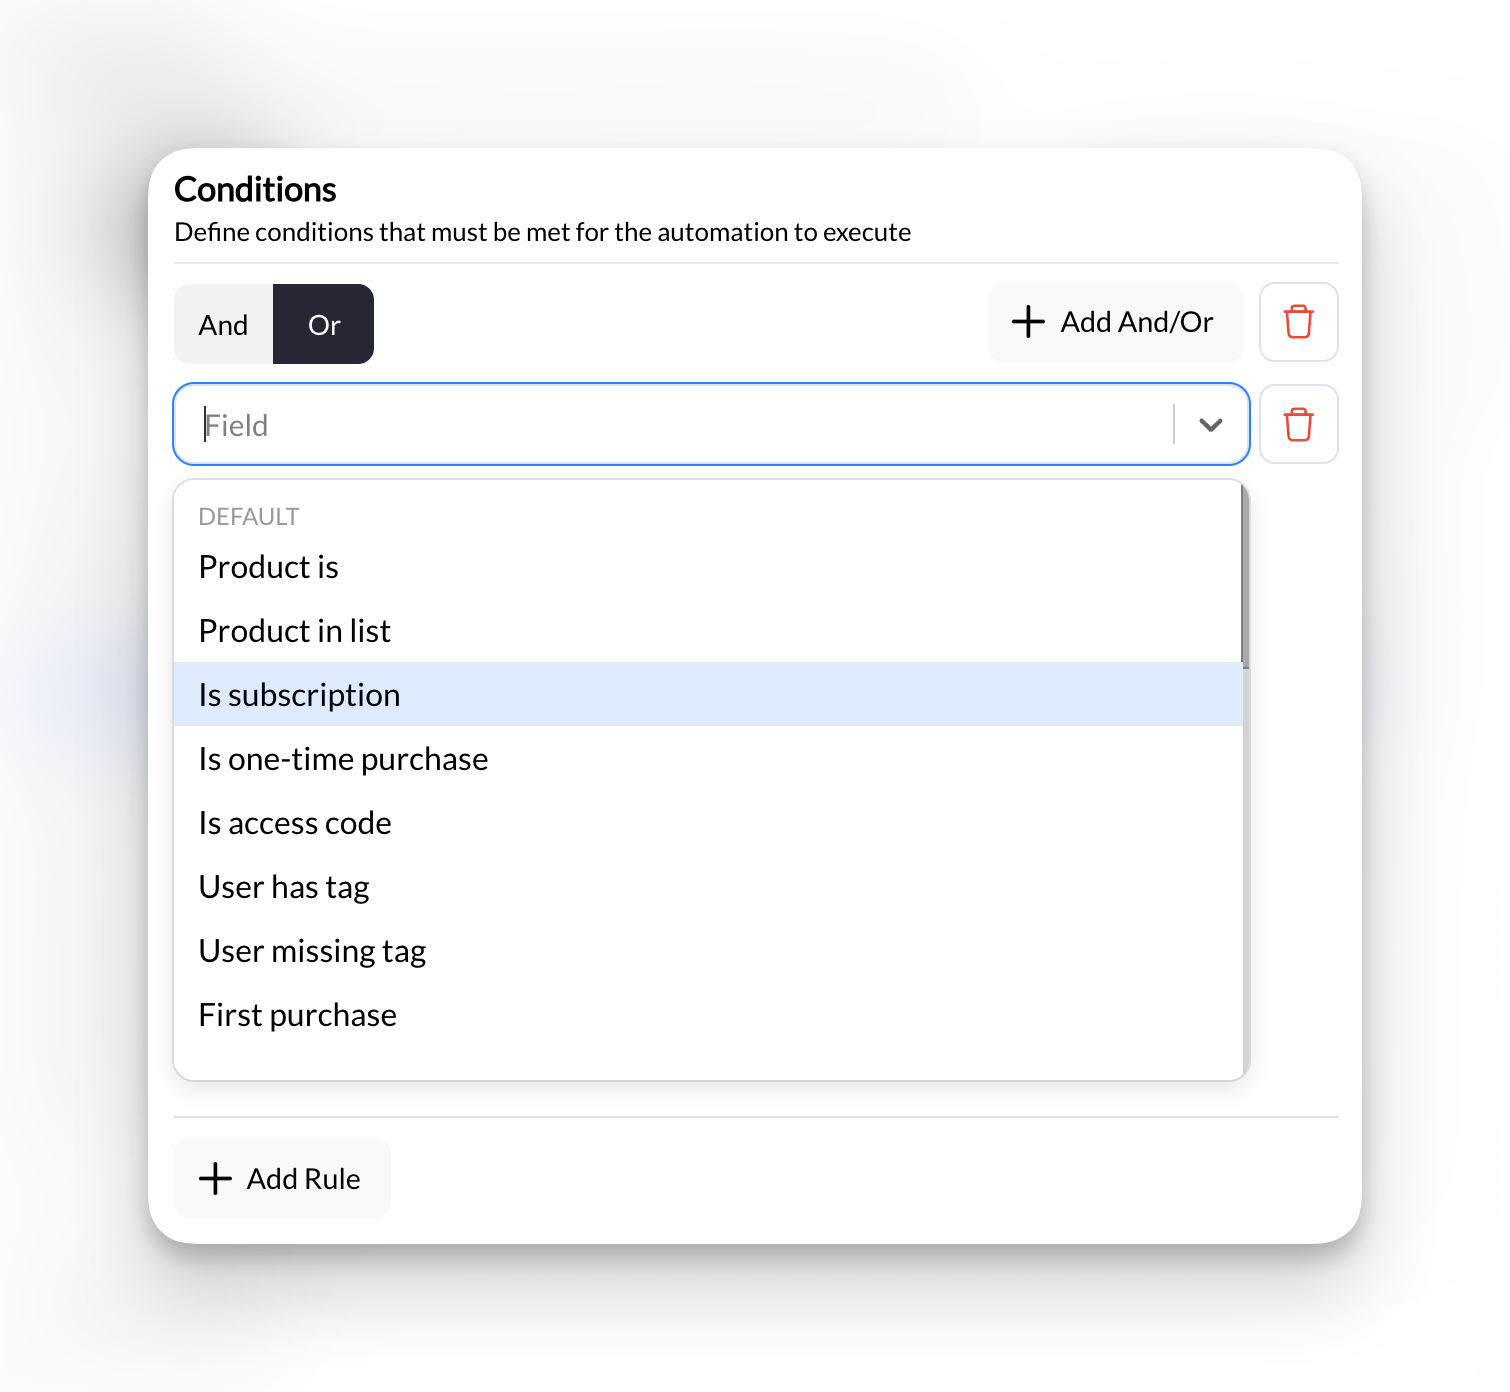
Condition
Is a specific product → your camp product
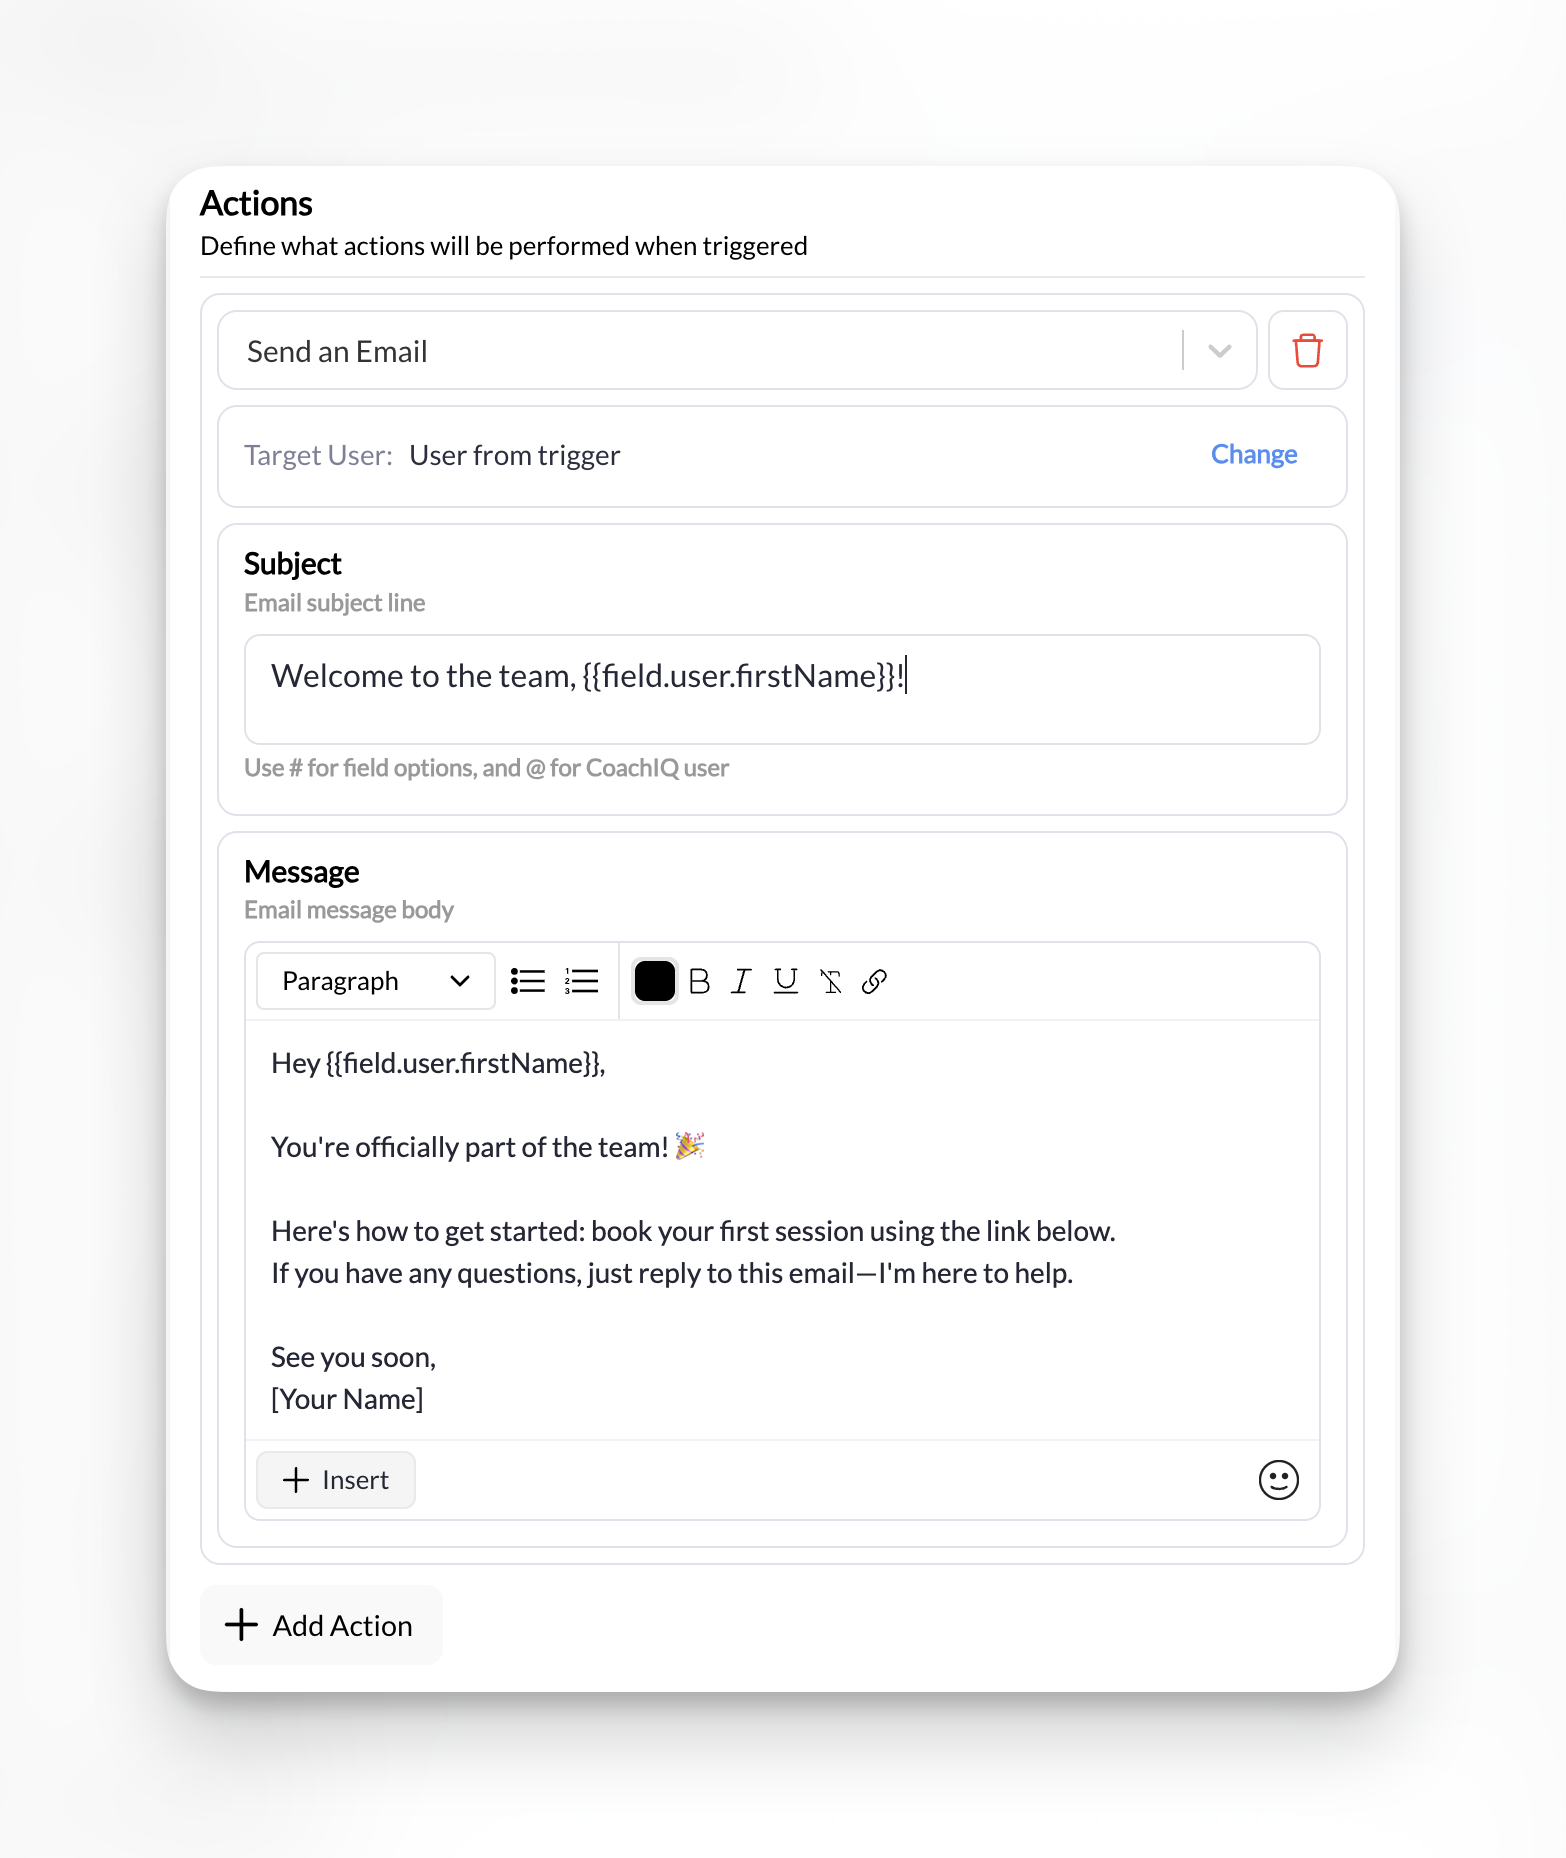
Action 1
Send an Email — confirmation with camp details (date, time, location, what to bring)
Action 2
Add a Tag — “Summer Camp 2026” (for easy filtering later)
3
Build a pre-camp reminder automation
Create a second automation using the Scheduled Check trigger:
Setting
Value
Trigger
Scheduled Check
Schedule
Run once, the day before camp
Condition
Has tag → “Summer Camp 2026”
Action
Send an Email — reminder with what to bring, arrival time, parking info
Post-camp follow-up: Create a third automation that runs the day after camp. Thank parents, ask for feedback, and promote your next camp or membership.
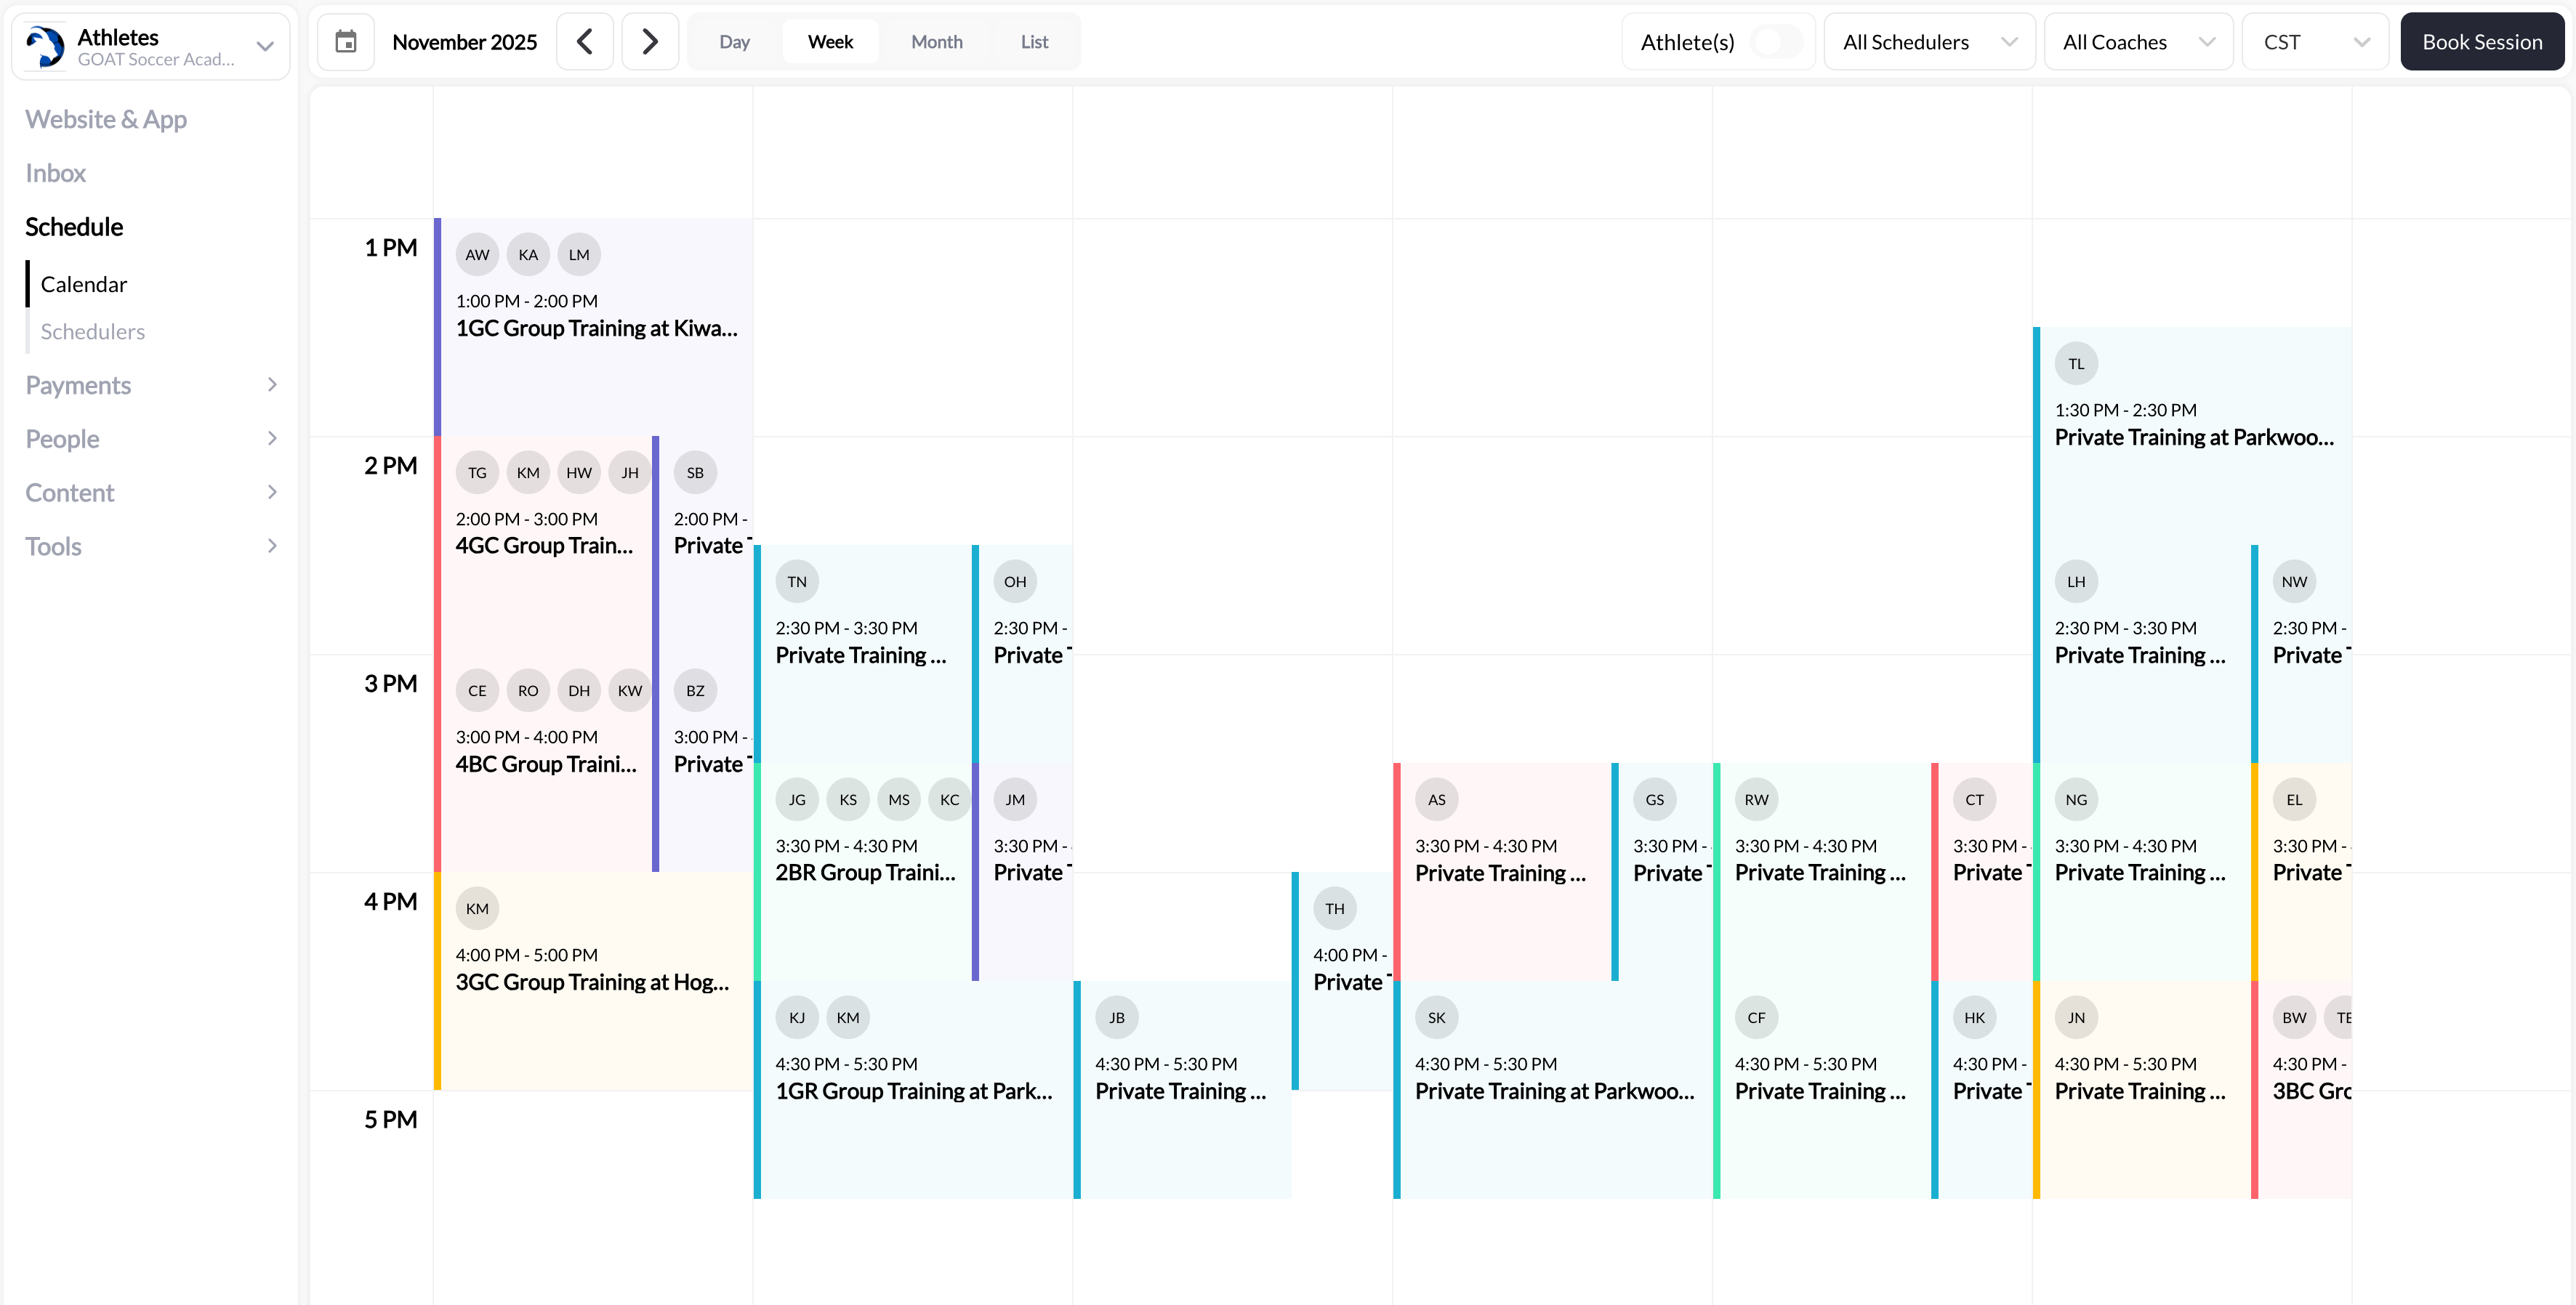
If you want the camp on your own schedule for tracking, create a manual session.
1
Go to Schedule → Calendar
Click on the camp date and manually create a session. This is for your reference only — athletes don’t need to book it.
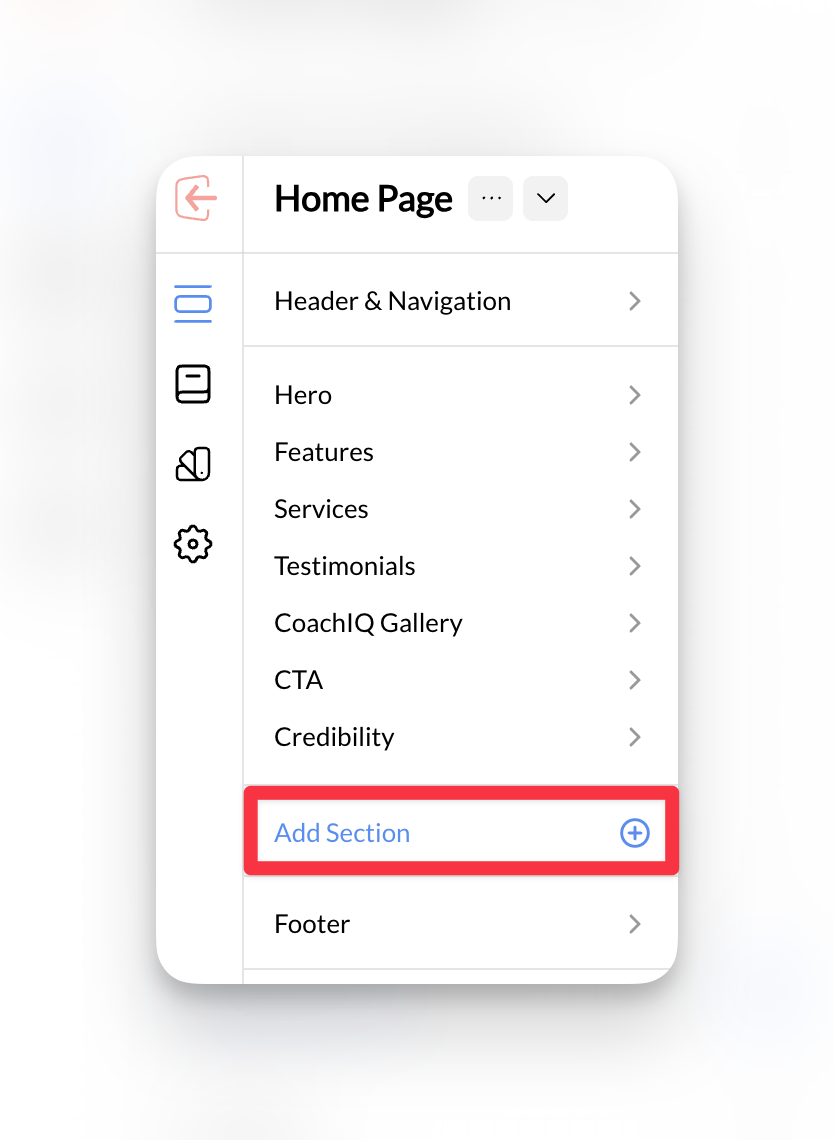
Your simple camp is set up! You have a product, form, landing page, and automations. Share the page link everywhere and registrations roll in automatically.
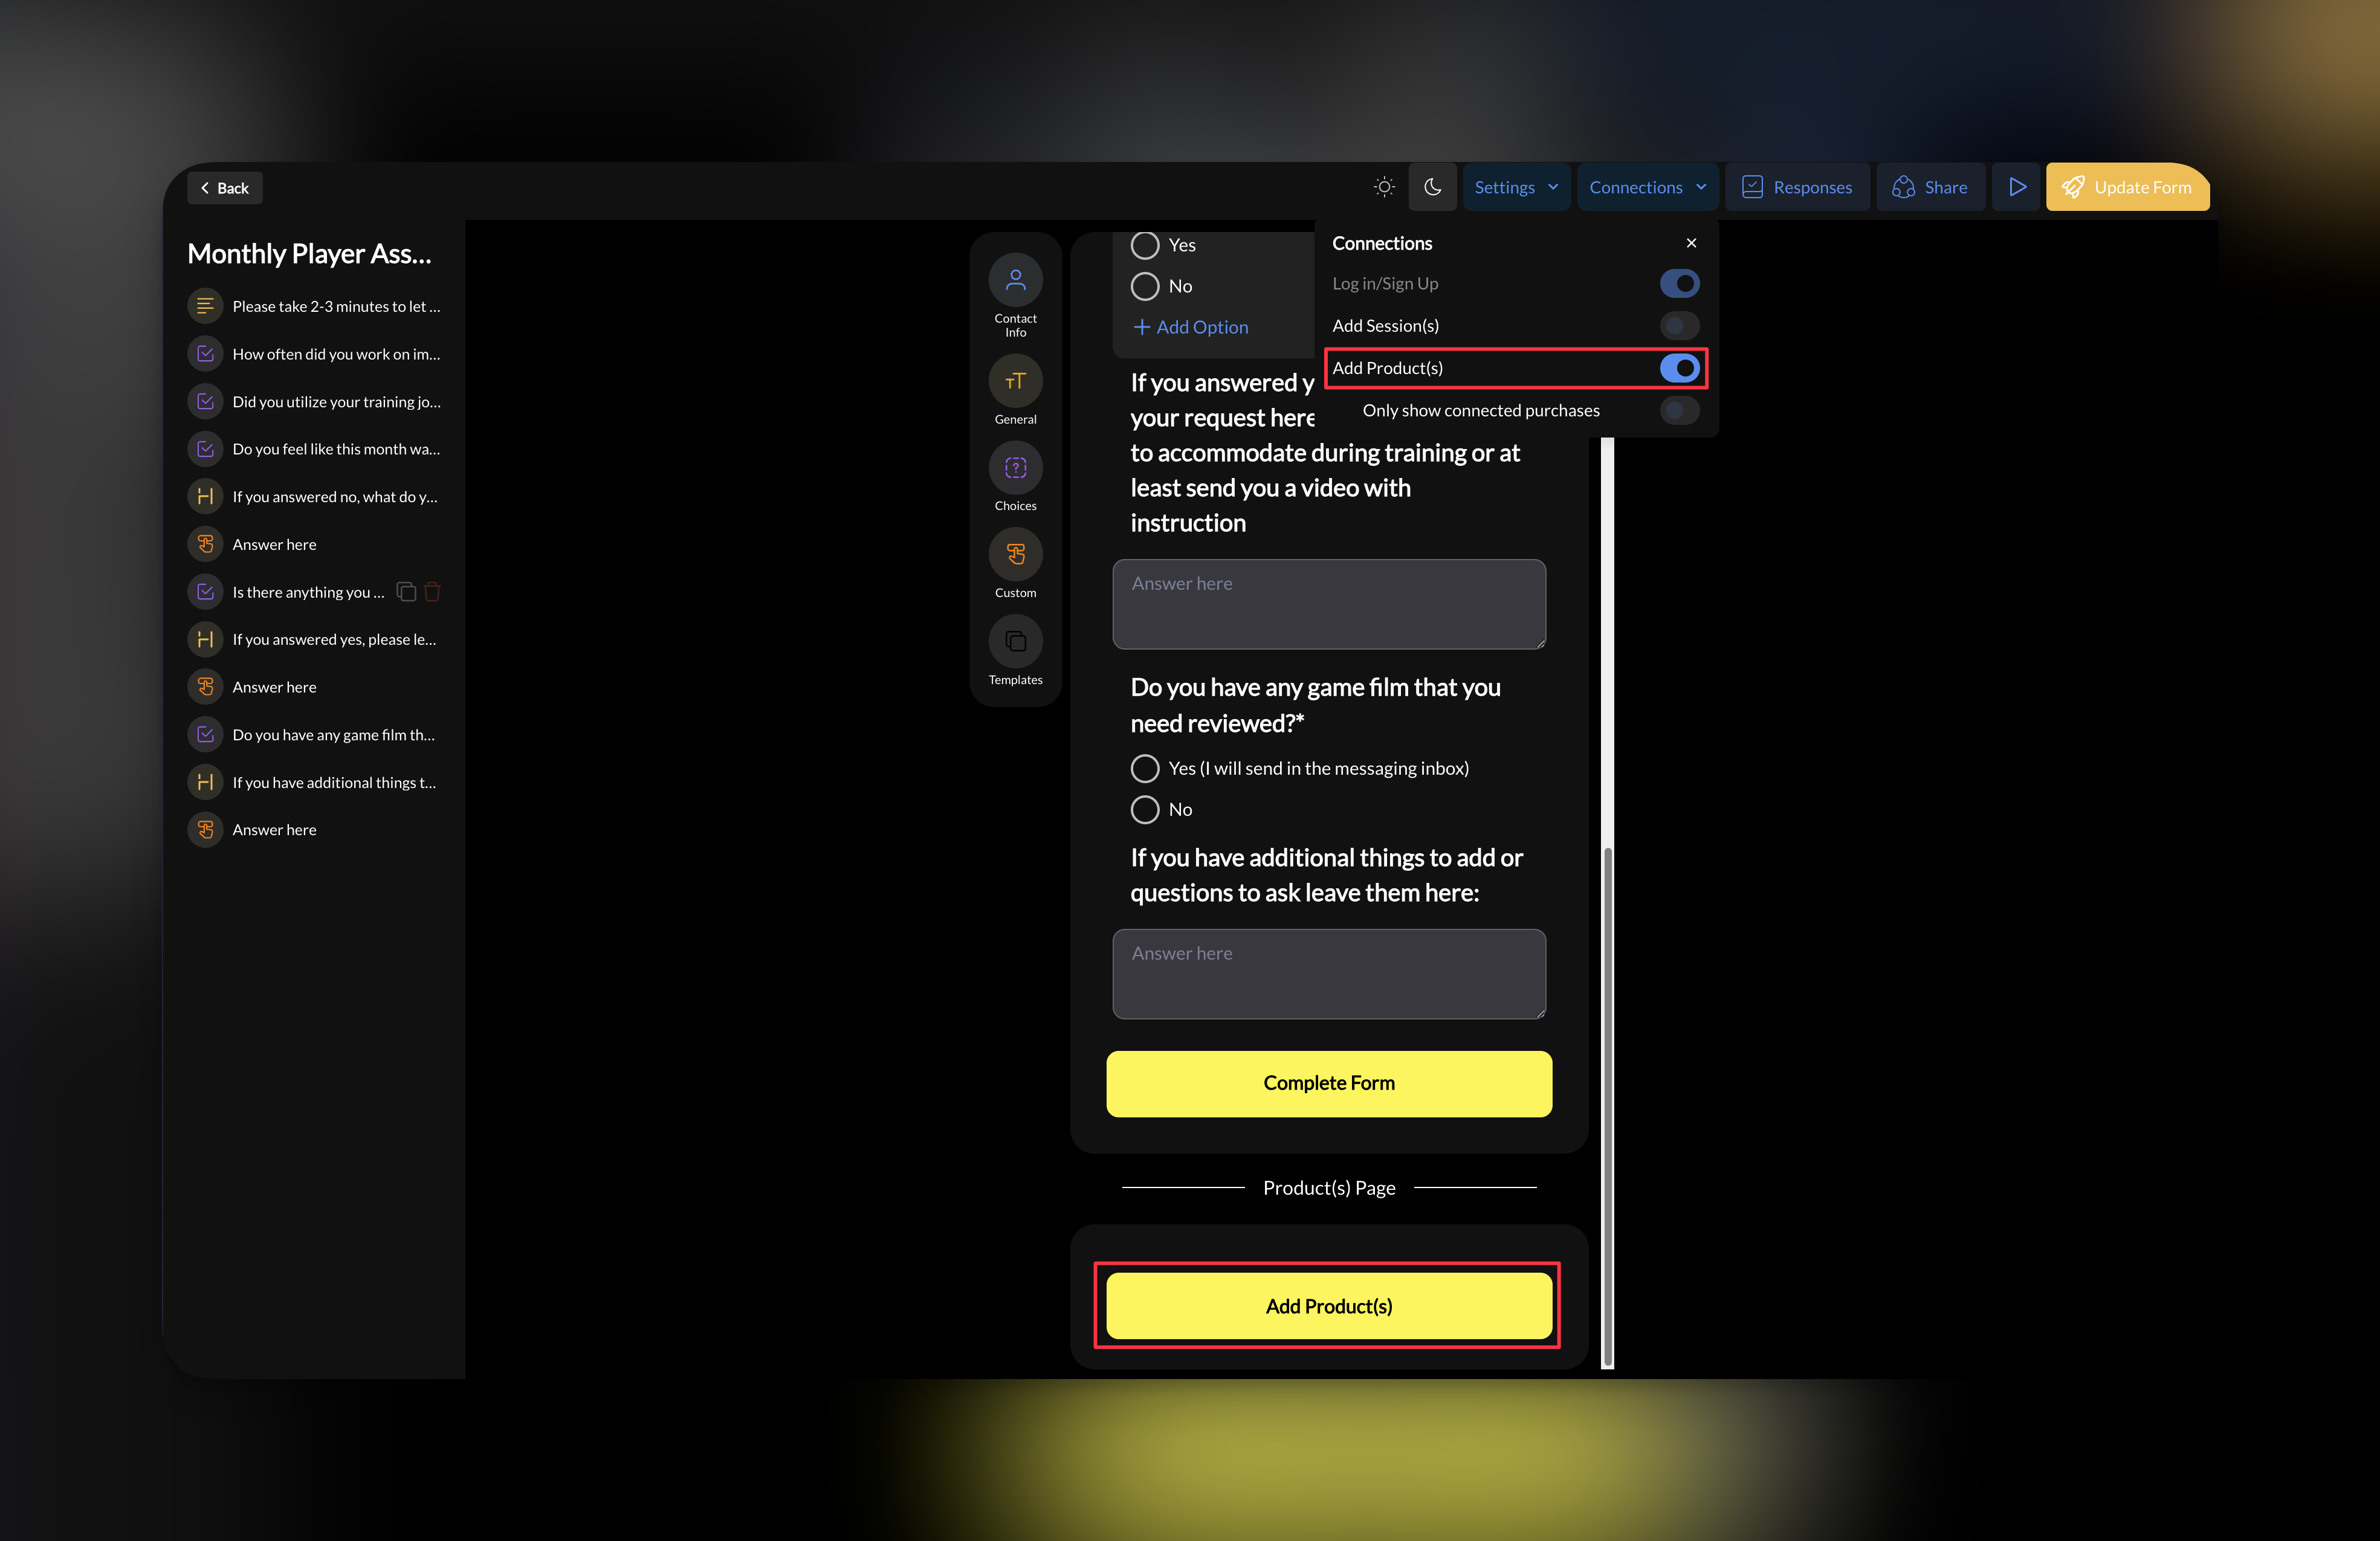
Use this when your camp has multiple days, age groups, or any variation where different athletes attend different sessions. The key difference: automations book athletes into the right session automatically based on what they purchase.
You don’t need schedulers for this. Instead of making athletes pick from a scheduler, create a separate product for each segment and let automations handle the booking. It’s cleaner and removes friction.
Go to Payments → Products and create a product for each camp variation:
Product
Example
By age group
”Middle School Camp - $99” and “High School Camp - $129”
By day
”Camp Day 1 (Saturday) - $79” and “Camp Day 2 (Sunday) - $79”
By package
”Single Day - $79” and “Both Days - $139”
Set each as a one-time product with your waiver attached.
2
Create sessions on your calendar
Go to Schedule → Calendar and manually create sessions for each camp day/segment. Set the correct date, time, and capacity.
These sessions are what automations will book athletes into. Make sure the date, time, and session name are clear (e.g., “Middle School Camp - Saturday June 14, 9am-12pm”).
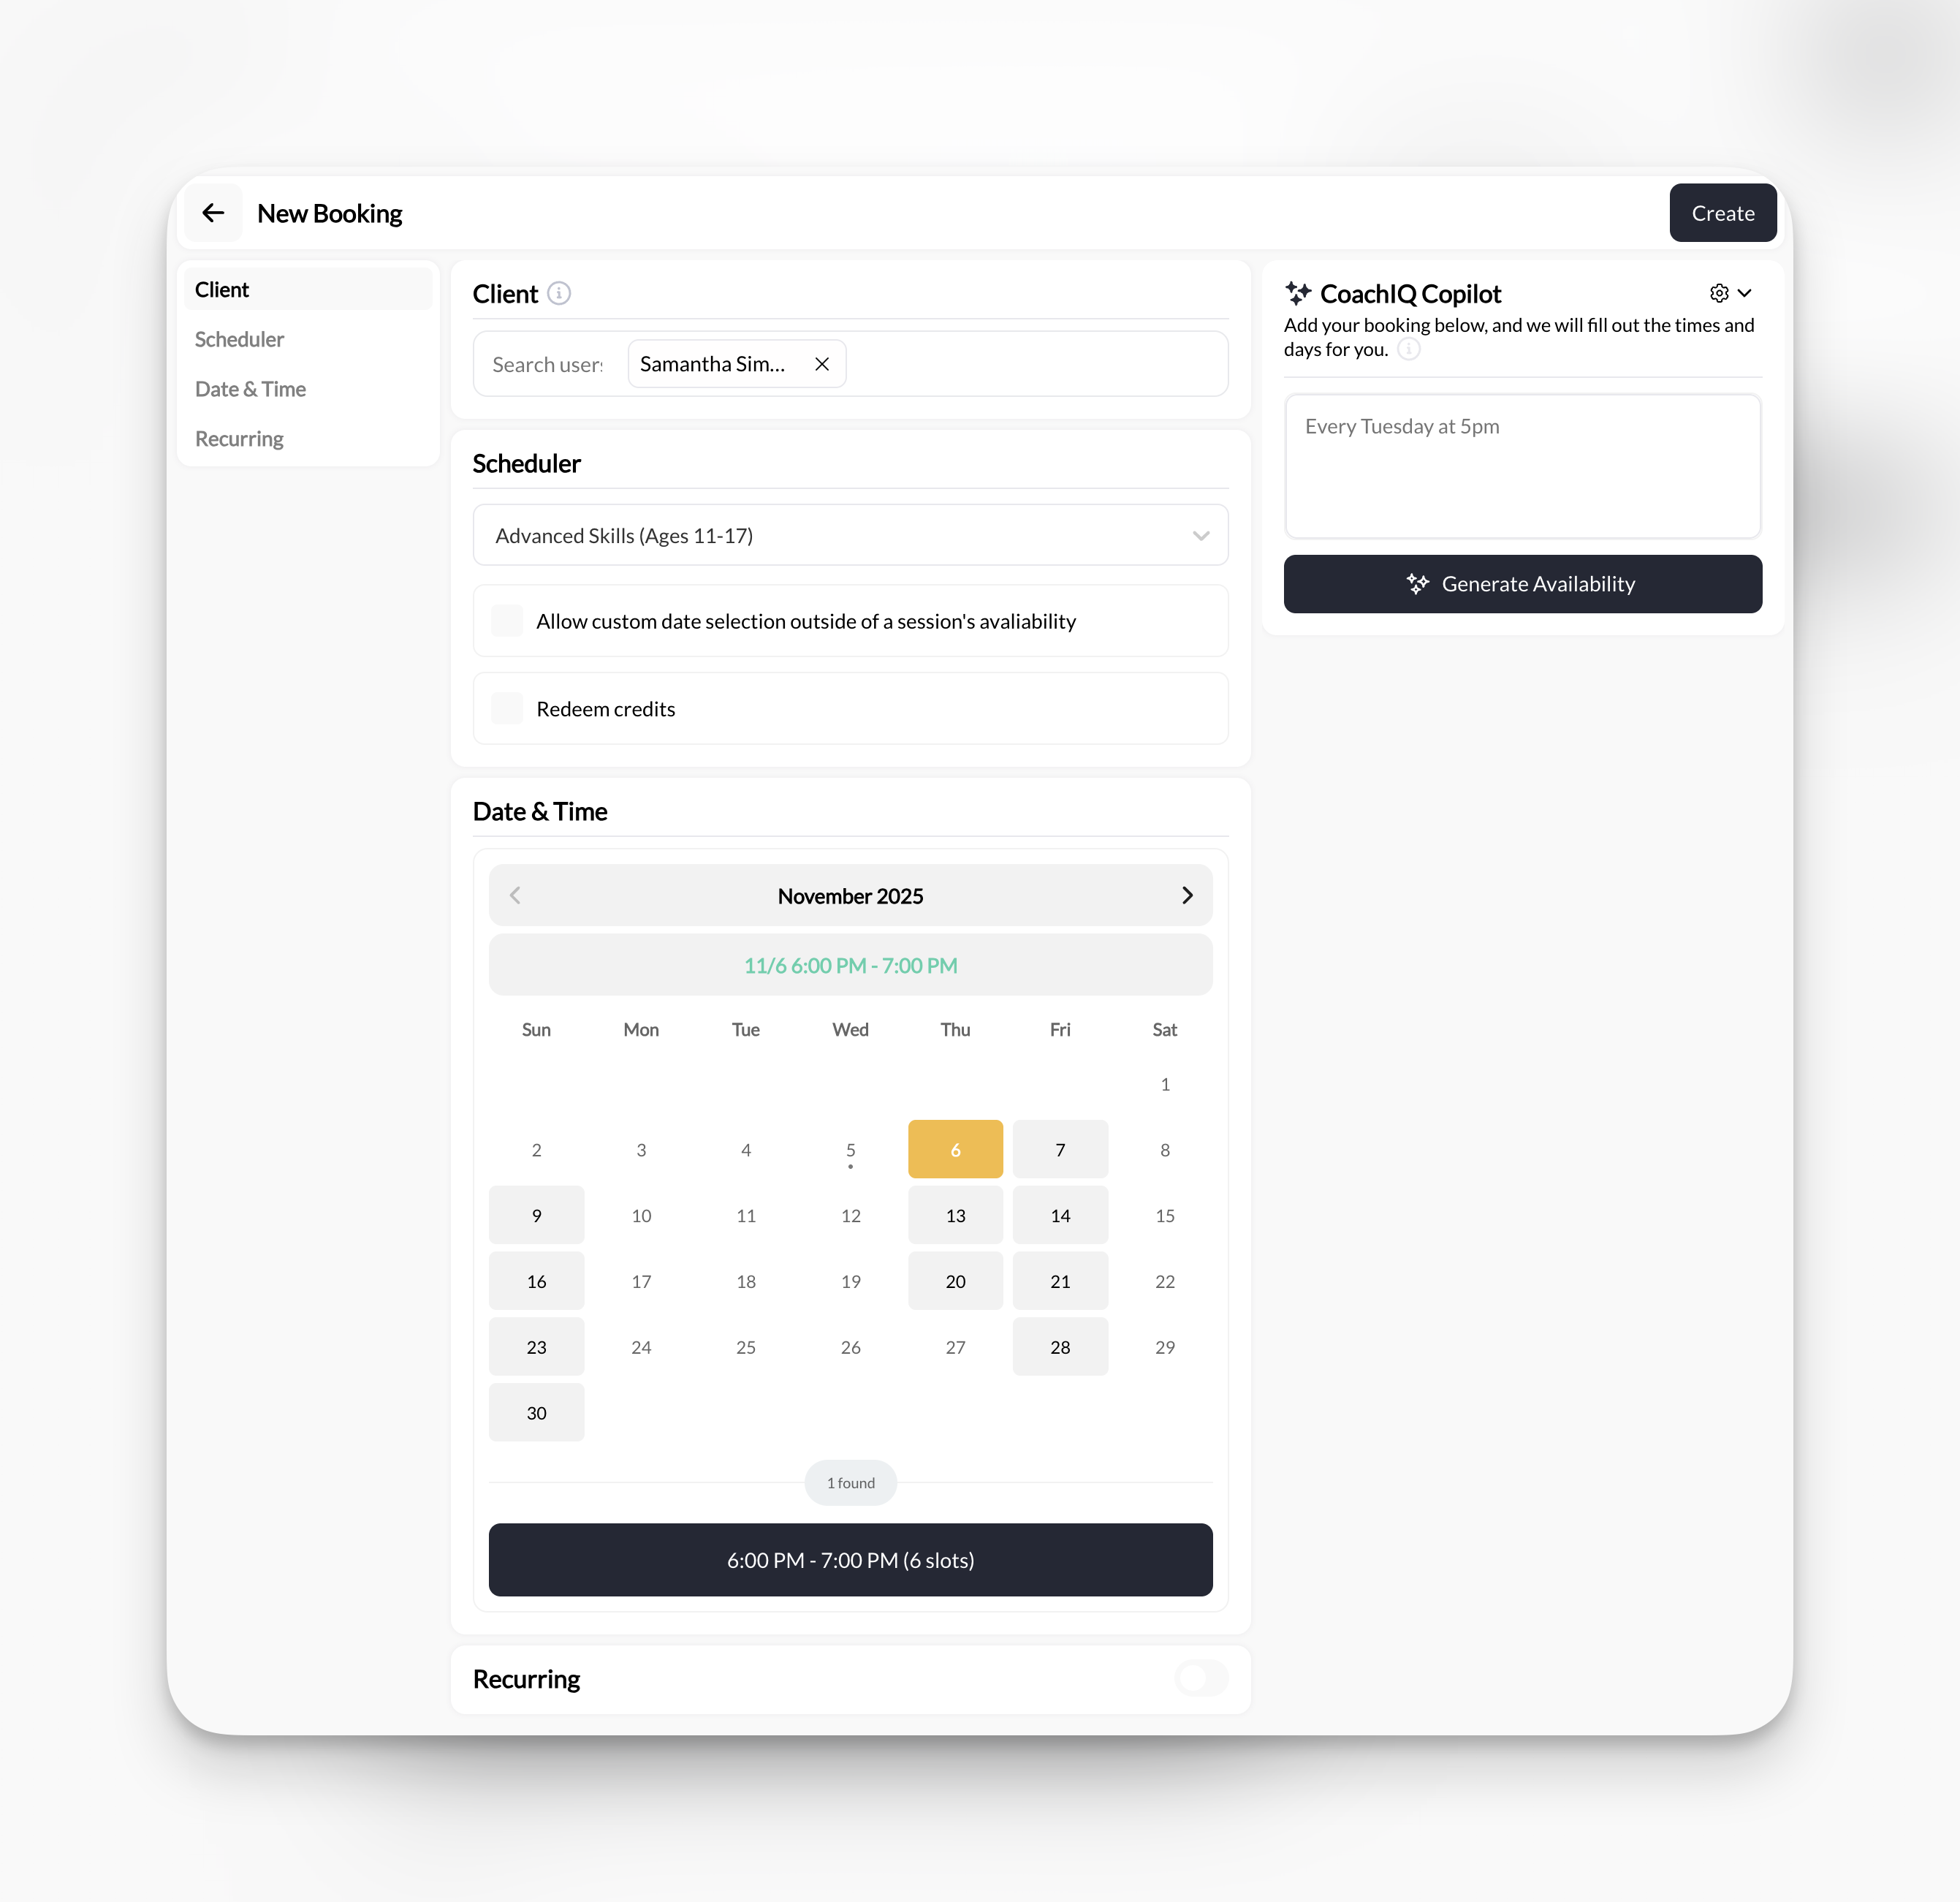
This is what makes the segmented camp work hands-free. When a parent purchases a specific product, the automation books their athlete into the correct session.
1
Create an automation for each segment
Go to Tools → Automations and create one automation per product/session pair.Example — Middle School Camp automation:
Setting
Value
Trigger
New Purchase
Condition
Is a specific product → “Middle School Camp”
Action 1
Book User for Session → select the middle school camp session + date/time
Action 2
Send an Email → confirmation with camp details
Action 3
Add a Tag → “Middle School Camp 2026”
2
Repeat for each segment
Create the same automation for your other camp segments:
High School Camp automation → Books into high school session
Day 2 automation → Books into Day 2 session
And so on for each product/session pair
3
Add reminder automations
Use Scheduled Check automations to send pre-camp reminders to each tagged group:
3 days before → “Camp is this weekend! Here’s what to bring”
Day before → “See you tomorrow! Arrive at 8:45am”
Day after → “Thanks for coming! Here’s a feedback form”
Your multi-day camp is set up! Athletes buy the right product, get auto-booked into the right session, and receive all reminders automatically. It’s on their calendar, your calendar, and fully hands-off.
Yes. Set a stock/quantity limit on your product. Once it sells out, athletes can no longer purchase. You can also manually remove the form from your website when you’re full.
What if someone wants to pay in person?
You have two options: they can register on their phone right there (send them to your website), or you can manually add them from People → Add and use the Add Product Purchase to User action to grant them access without online payment.
Do parents need to create an account?
If you enable Guest Checkout on your product, parents can pay without creating a full account. However, if you’re using automations to book them into sessions, they’ll need an account so the booking appears on their calendar. For most camps, requiring account creation is the better choice.
How do I handle refunds?
Go to Payments → Transactions, find the transaction, and issue a refund. Refunds are processed through Stripe. You can issue full or partial refunds.
Can I reuse this setup for my next camp?
Absolutely. Duplicate your product, update the name and dates, duplicate your form, swap the connected product, and update your website page. Your automation templates stay the same — just update the trigger product and session.
Should I use a scheduler instead of automations?
Only if athletes genuinely need to choose between multiple time slots within the same camp (e.g., “morning session” vs. “afternoon session” on the same day). For most camps — including multi-day and age-group camps — separate products with auto-booking automations are simpler and create less friction for parents.
How do I track attendance on camp day?
Open your Calendar, click on the camp session, and use the participant list to check athletes in as they arrive. This updates their attendance record automatically.