Where to find responses: Open any form in the builder → click Responses in the top bar
Viewing form responses
Every submission is captured in your form’s Responses tab.1
Open your form
Go to Tools → Forms and click on the form you want to review.
2
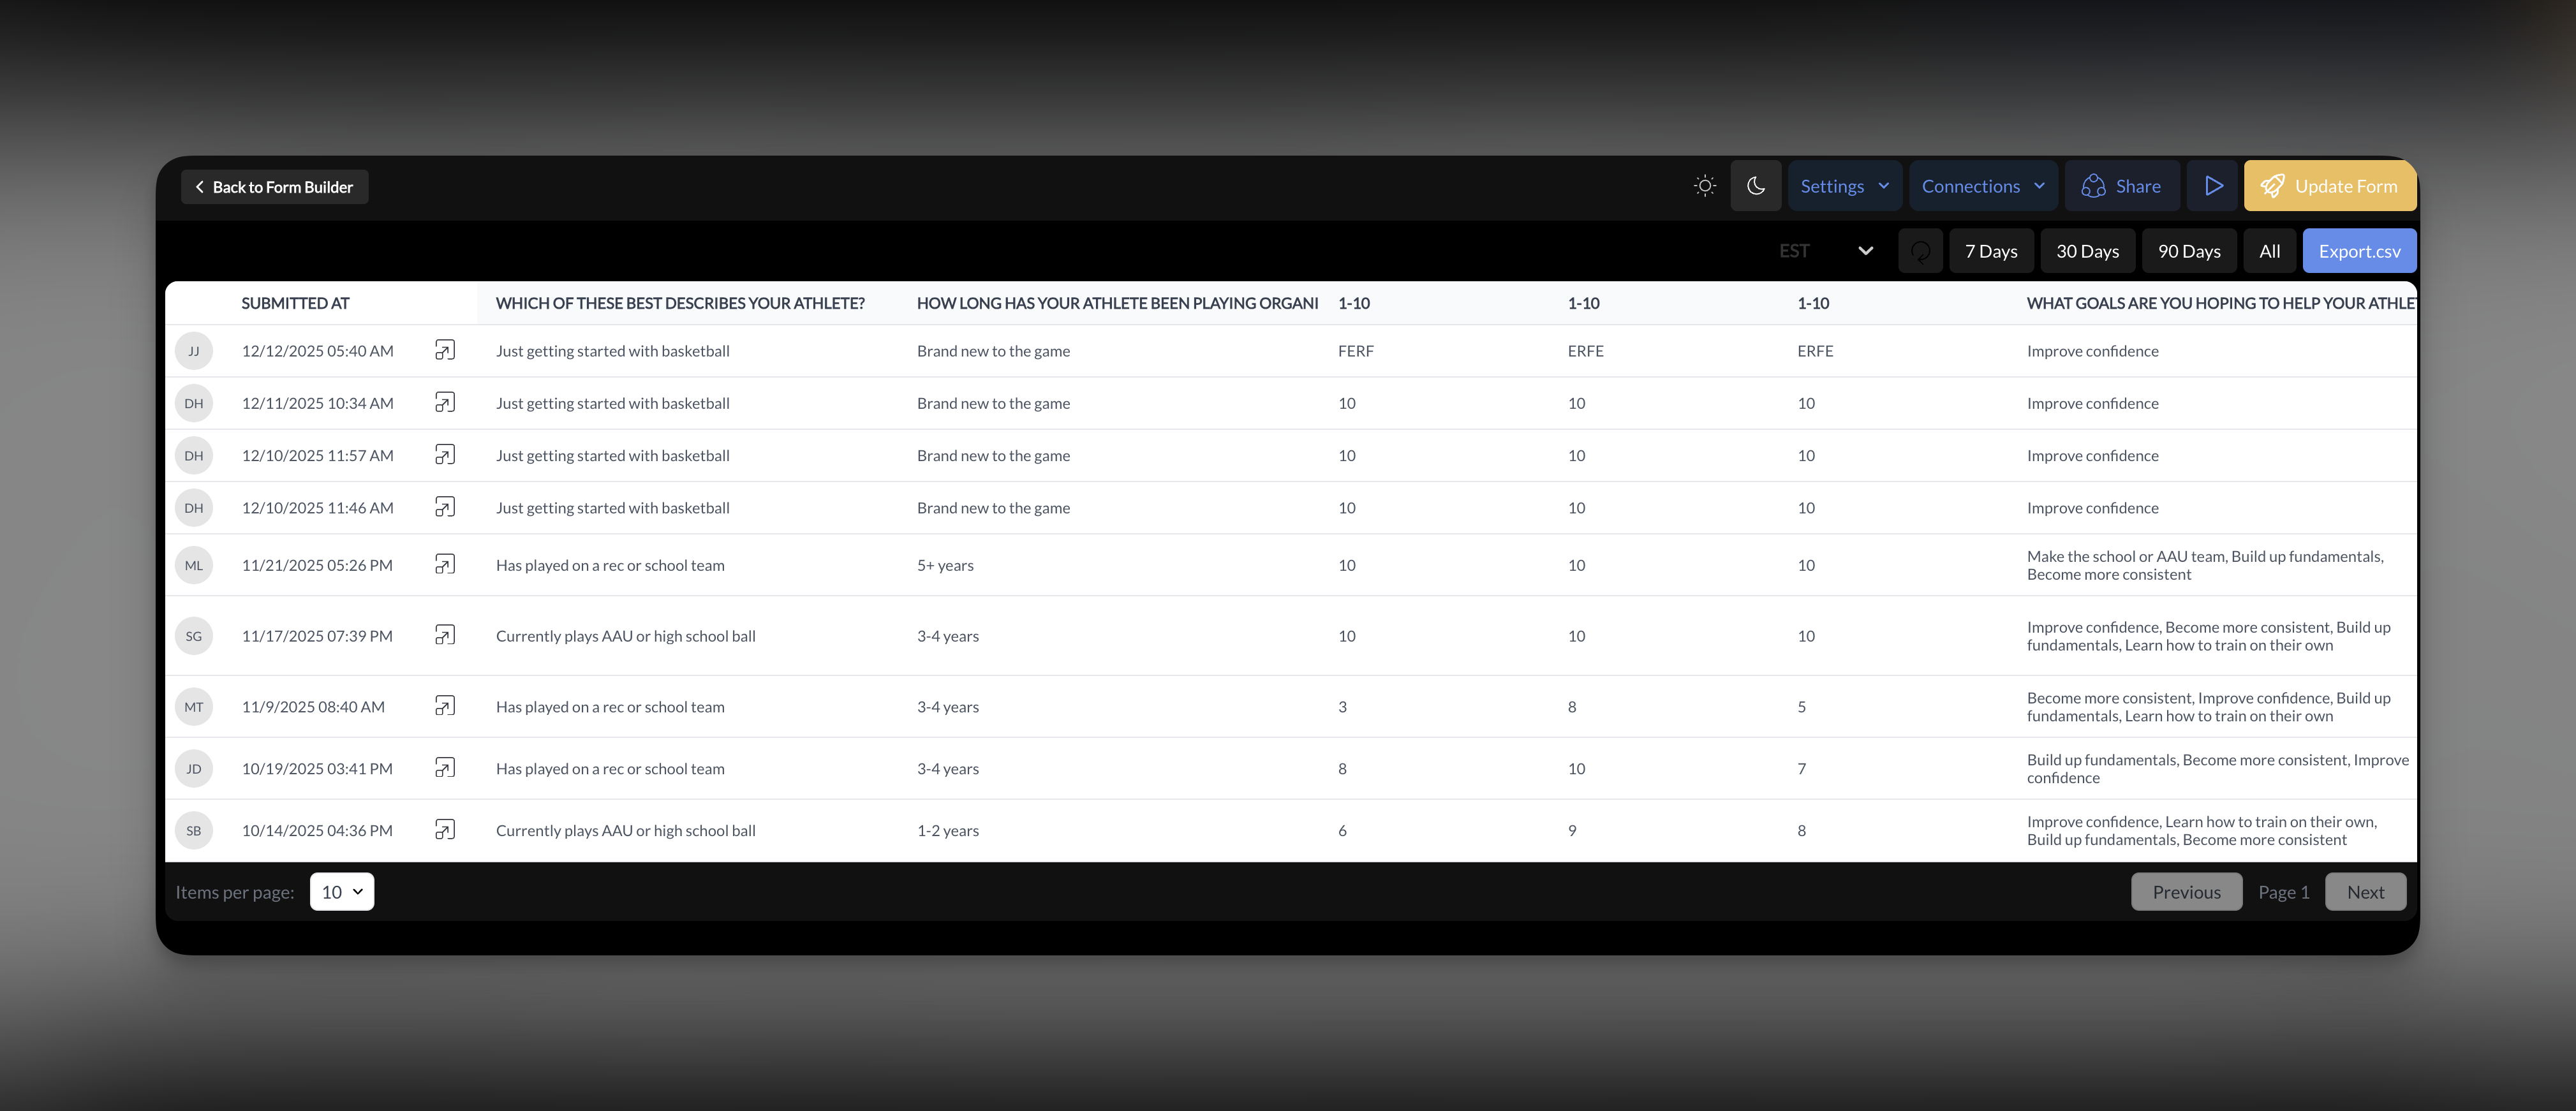
Click Responses
In the top bar, click Responses to see all submissions.
3
Browse submissions
You’ll see a list of all responses with submission date and respondent info (if login was required).
4
View individual responses
Click any submission to see the complete response — every field and answer.
What you see per response
Exporting responses
Export your form data to CSV for analysis, reporting, or backup.1
Open Responses
Navigate to your form’s Responses tab.
2
Click Export
Click the export button to download all responses as a CSV file.
3
Open in spreadsheet
Open the CSV in Excel, Google Sheets, or your preferred tool.
How responses connect to People
When you require Login/Signup on a form, submissions link to athlete profiles.Viewing form activity on a profile
When login is required:- Go to People → Clients
- Click on an athlete
- View their activity — form submissions appear in their history
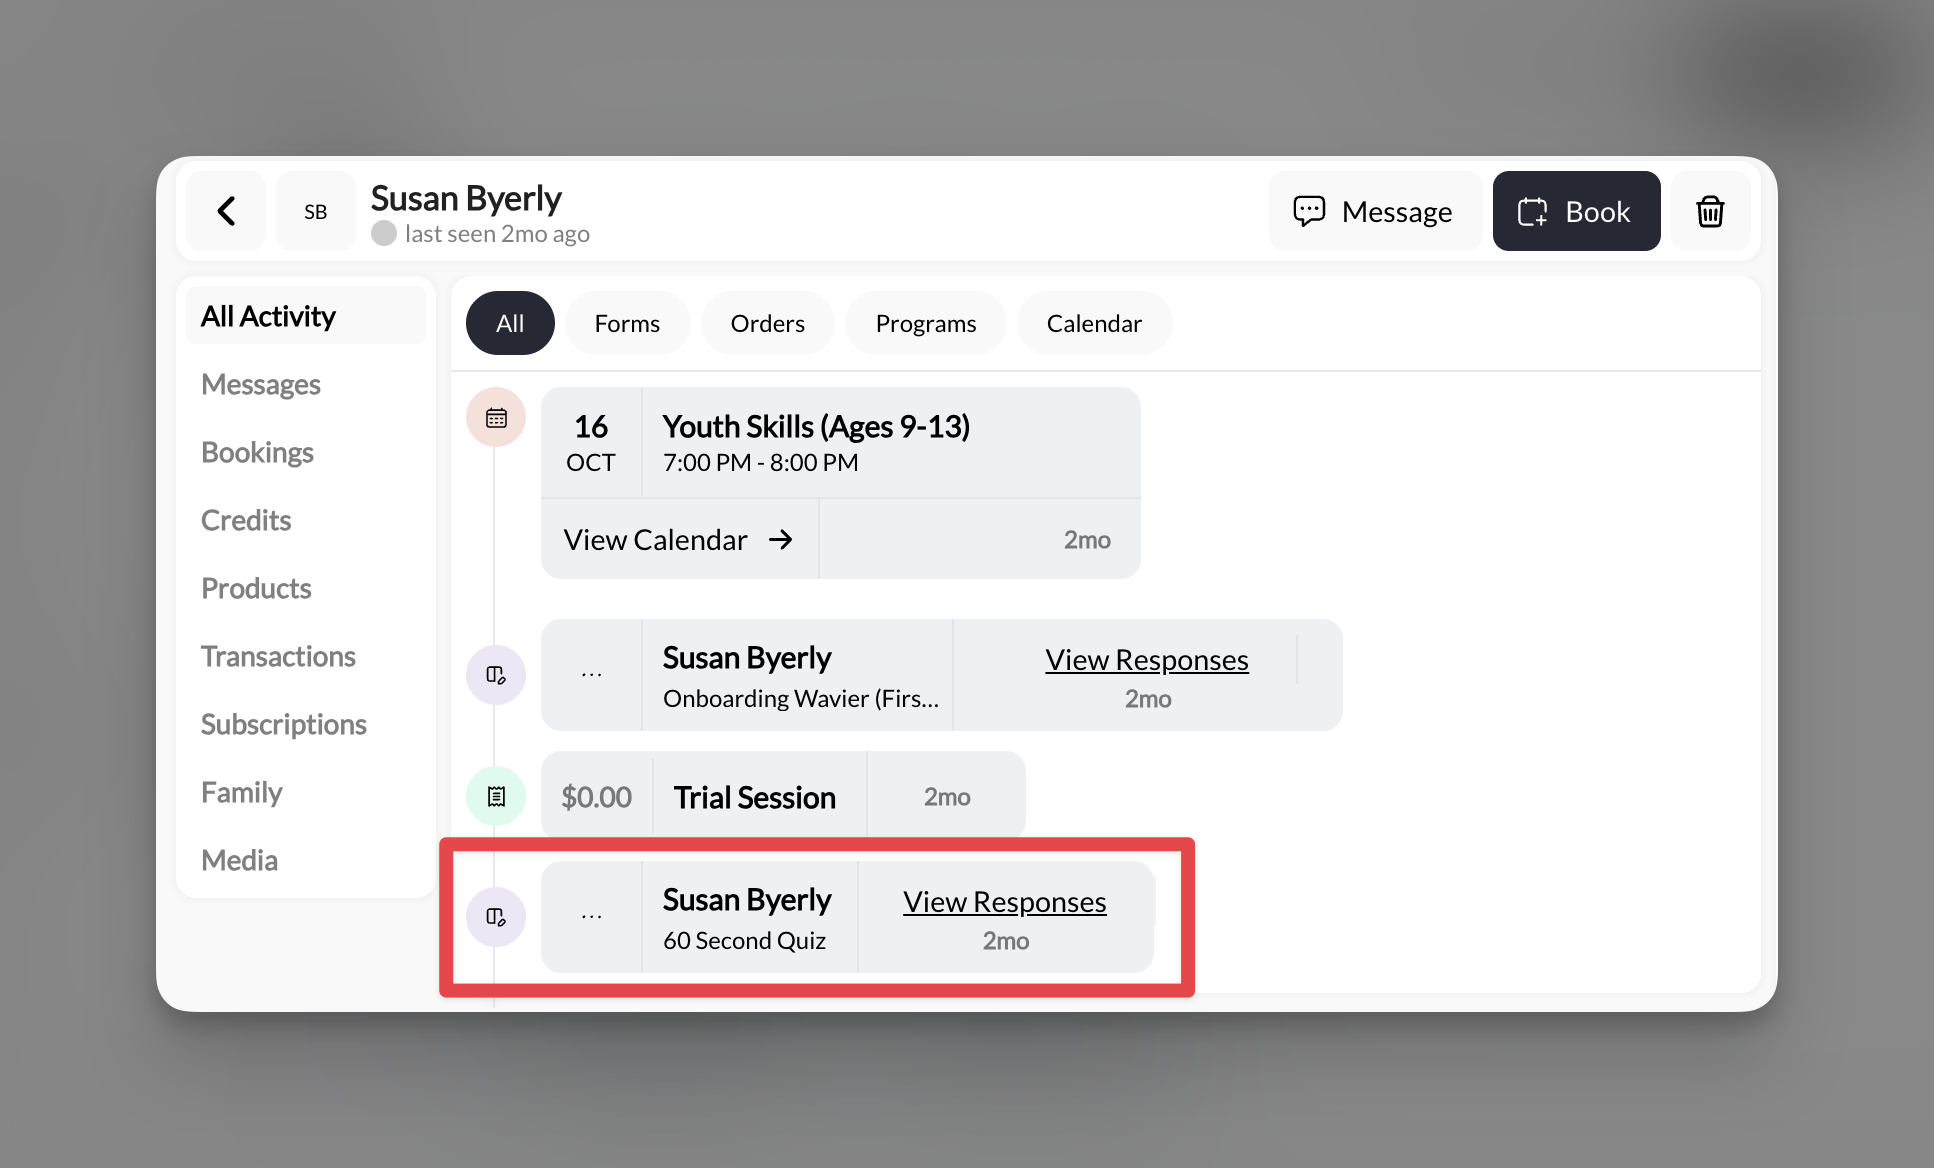
- Confirming a specific athlete signed a waiver
- Seeing all forms an athlete has completed
- Tracking engagement over time
Automations triggered by forms
Forms can trigger automations when submitted — sending messages, adding tags, or assigning credits automatically.What you can do
What you can’t do
Setting up a form automation
1
Go to Automations
Navigate to Tools → Automations.
2
Create new automation
Click to create a new automation.
3
Select trigger
Choose Form Submitted as your trigger, then select which form.
4
Add actions
Configure what happens: send message, add tag, remove tag, add credits, etc.
5
Activate
Save and activate your automation. It will now run every time that form is submitted.
Common form automation recipes
New lead welcome
Trigger: Website lead form submitted Actions:- Add tag “New Lead”
- Send SMS: “Thanks for your interest in training! Here’s how to book your first session: [link]“
Waiver signed confirmation
Trigger: Waiver form submitted Actions:- Add tag “Waiver Signed”
- Remove tag “Needs Waiver”
Camp registration follow-up
Trigger: Camp registration form submitted Actions:- Add tag “Summer Camp 2025”
- Send in-app message with camp details, schedule, and what to bring
Post-eval feedback request
Trigger: Evaluation feedback form submitted Actions:- Add tag “Feedback Received”
- Send SMS: “Thanks for your feedback! We’d love a Google review if you have a minute: [link]”
Automations require Login/Signup on the form. To send messages or add tags, the system needs to know who submitted. Anonymous submissions can’t trigger personalized actions.
Response analytics
CoachIQ provides basic response tracking:
For deeper analysis, export your data and use external tools (Excel, Google Sheets, etc.).
Tips for managing responses
Check responses regularly
Check responses regularly
Don’t let leads sit. Check your website form responses daily — those are potential customers waiting to hear from you.
Use automations to respond instantly
Use automations to respond instantly
A same-day response beats a next-week response. Set up auto-messages so leads hear from you immediately, even if you’re coaching.
Tag for segmentation
Tag for segmentation
Use form automations to tag athletes by source, interest, or status. Later, you can message everyone with a specific tag.
Export before deleting
Export before deleting
If you need to delete a form, export responses first. Once a form is deleted, responses are gone.
Require login for anything important
Require login for anything important
Waivers, registrations, onboarding — anything you need tied to a specific athlete should require login. Anonymous responses have limited utility.
Summary
Related articles
Forms Overview
Overview of forms and how they connect to your CoachIQ system
Creating & Customizing Forms
Build forms from templates or scratch — complete field reference
Collecting Payments & Bookings
Add products and schedulers to your form flow
Sharing Your Forms
Get links, embed on websites, configure completion actions
What Are Automations?
Understand how automated workflows connect to form submissions
Build Your First Automation
Step-by-step guide to creating a form-triggered automation
People Overview
See how form submissions link to athlete profiles