Where to find Programs: Dashboard → Content → Programs
Why programs matter
While Media Hub stores your content and Lesson Builder creates interactive experiences, Programs are what athletes actually access. Key points:- Athletes only see Programs—they never access your Media Hub or raw lessons directly
- Programs can be sold as paid products or shared free
- Programs track progress—you see who’s completed what
- Programs collect responses—quiz answers, form submissions, and uploads all live here
How to create a training program
Go to Programs
Navigate to Content → Programs and click the + Create Program button in the top right.
Set program details
Enter your program name and configure basic settings. This is what athletes will see in their app.
Add content from the sidebar
In the left sidebar under Coaching Materials, you’ll see:
- Lesson: Your interactive lessons from Media Hub
- Media: Standalone videos and images
Arrange your content
Drag nodes up or down in the visual flow to reorder chapters. Athletes will progress through them in the order you set.
Configure progression
Click Complete & Progress in the top bar to choose how athletes move through content (more on this below).
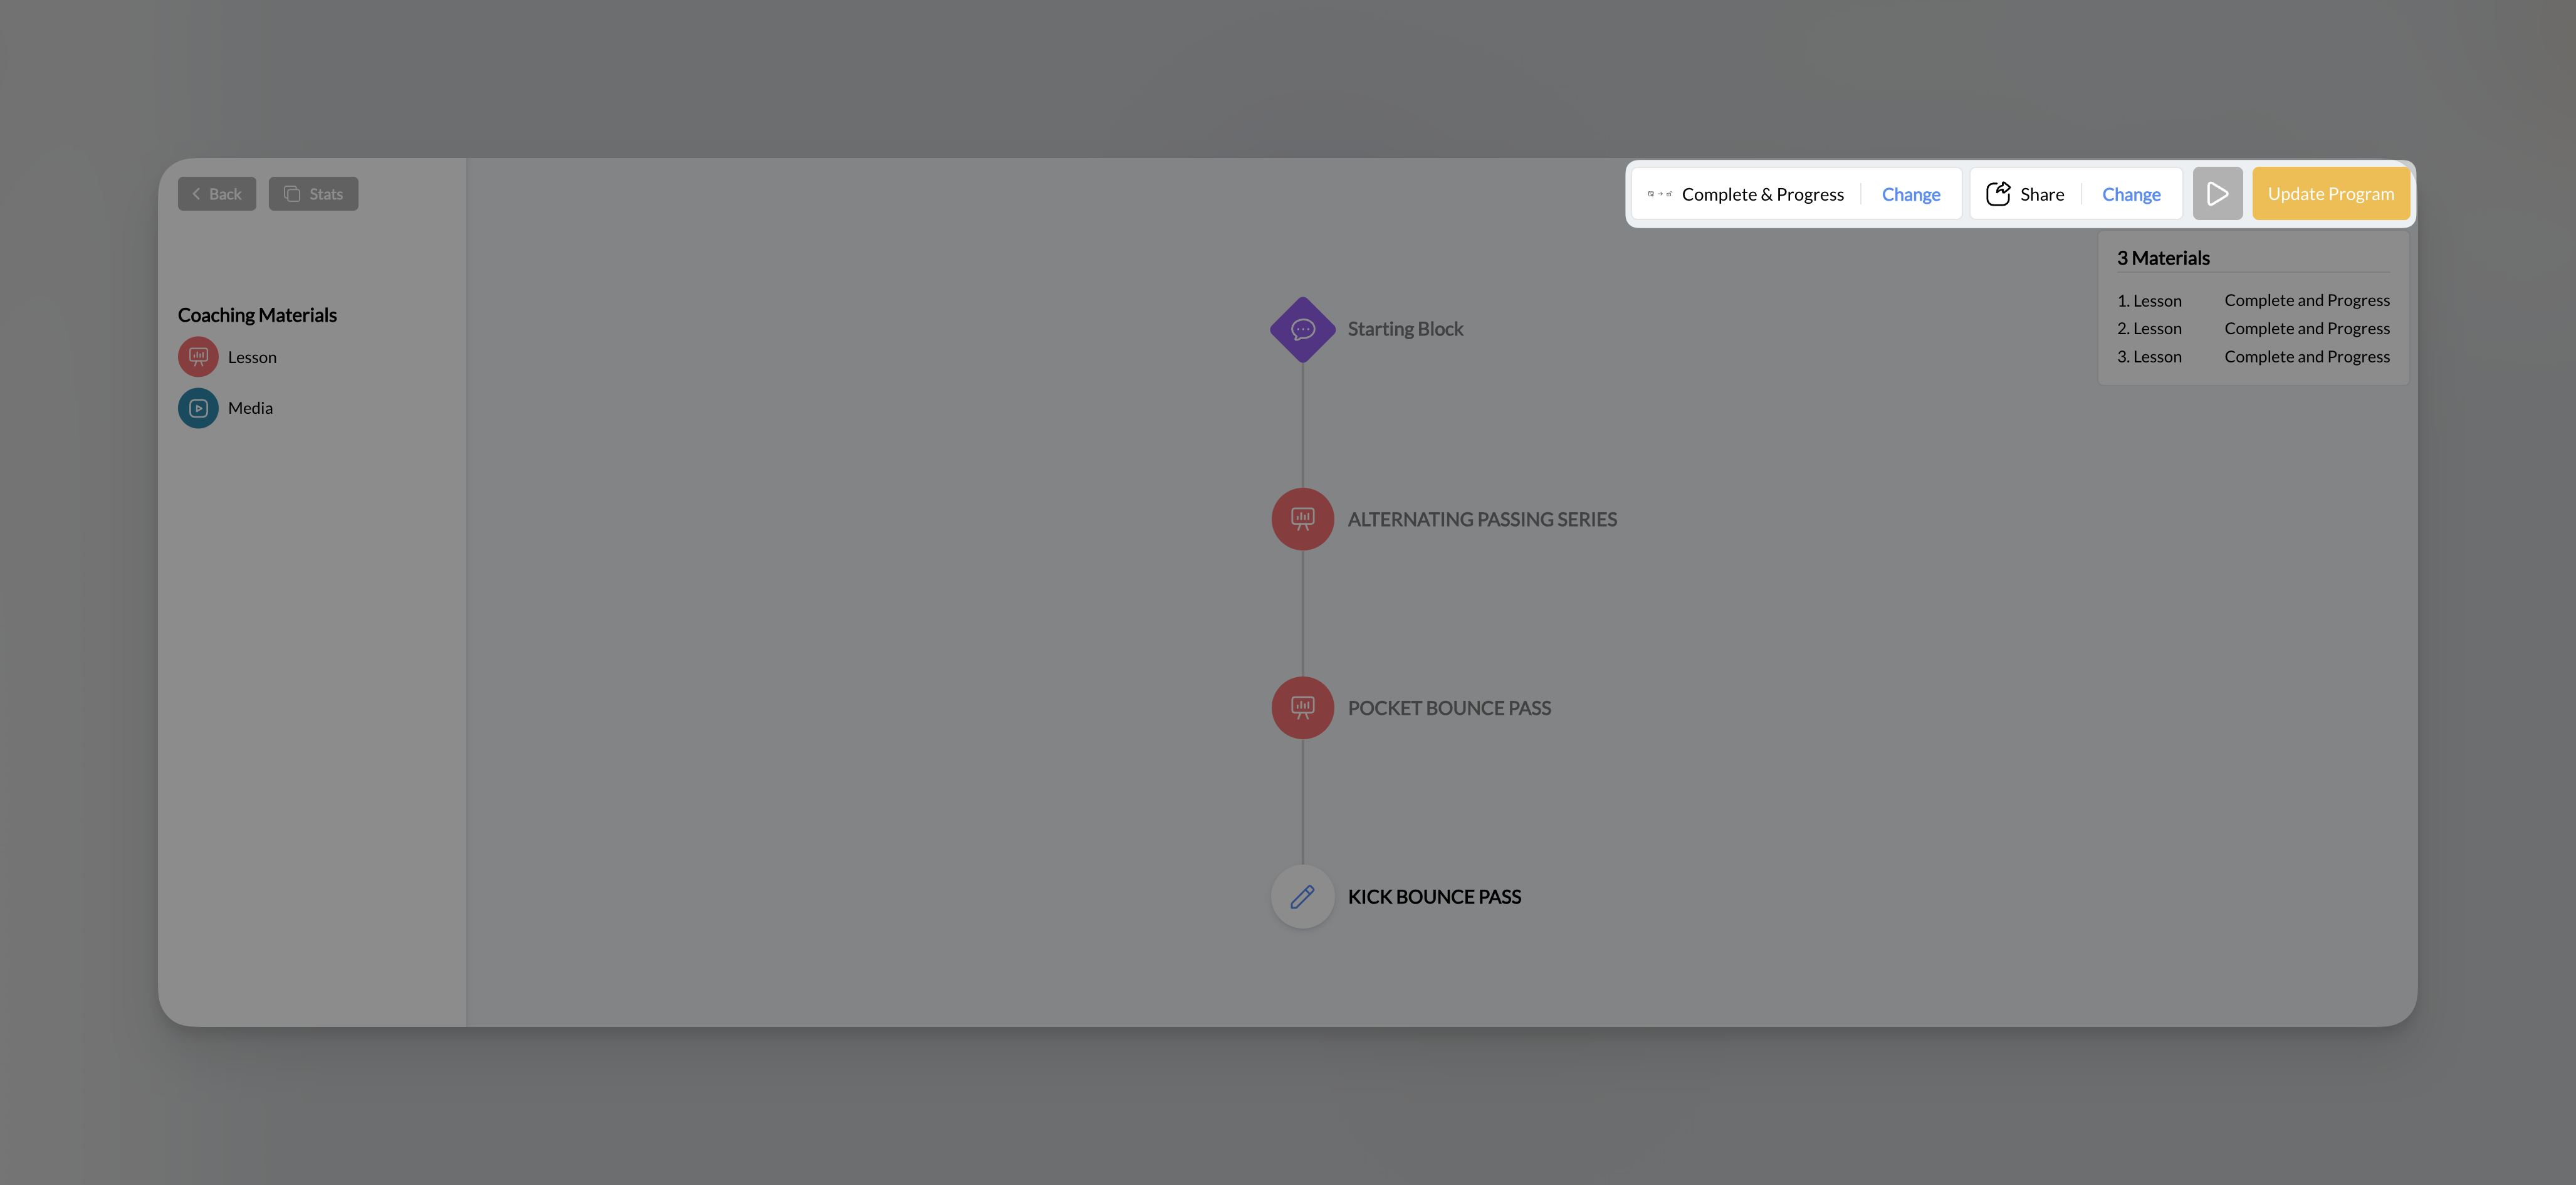
Understanding the Program Builder interface
Top bar
| Element | Function |
|---|---|
| ← Back | Return to Programs list |
| Stats | View program analytics and athlete responses |
| Complete & Progress | Current progression mode (click to change) |
| Share | Configure pricing and access settings |
| Preview (play icon) | See the program as athletes experience it |
| Update Program | Save all changes (yellow button) |
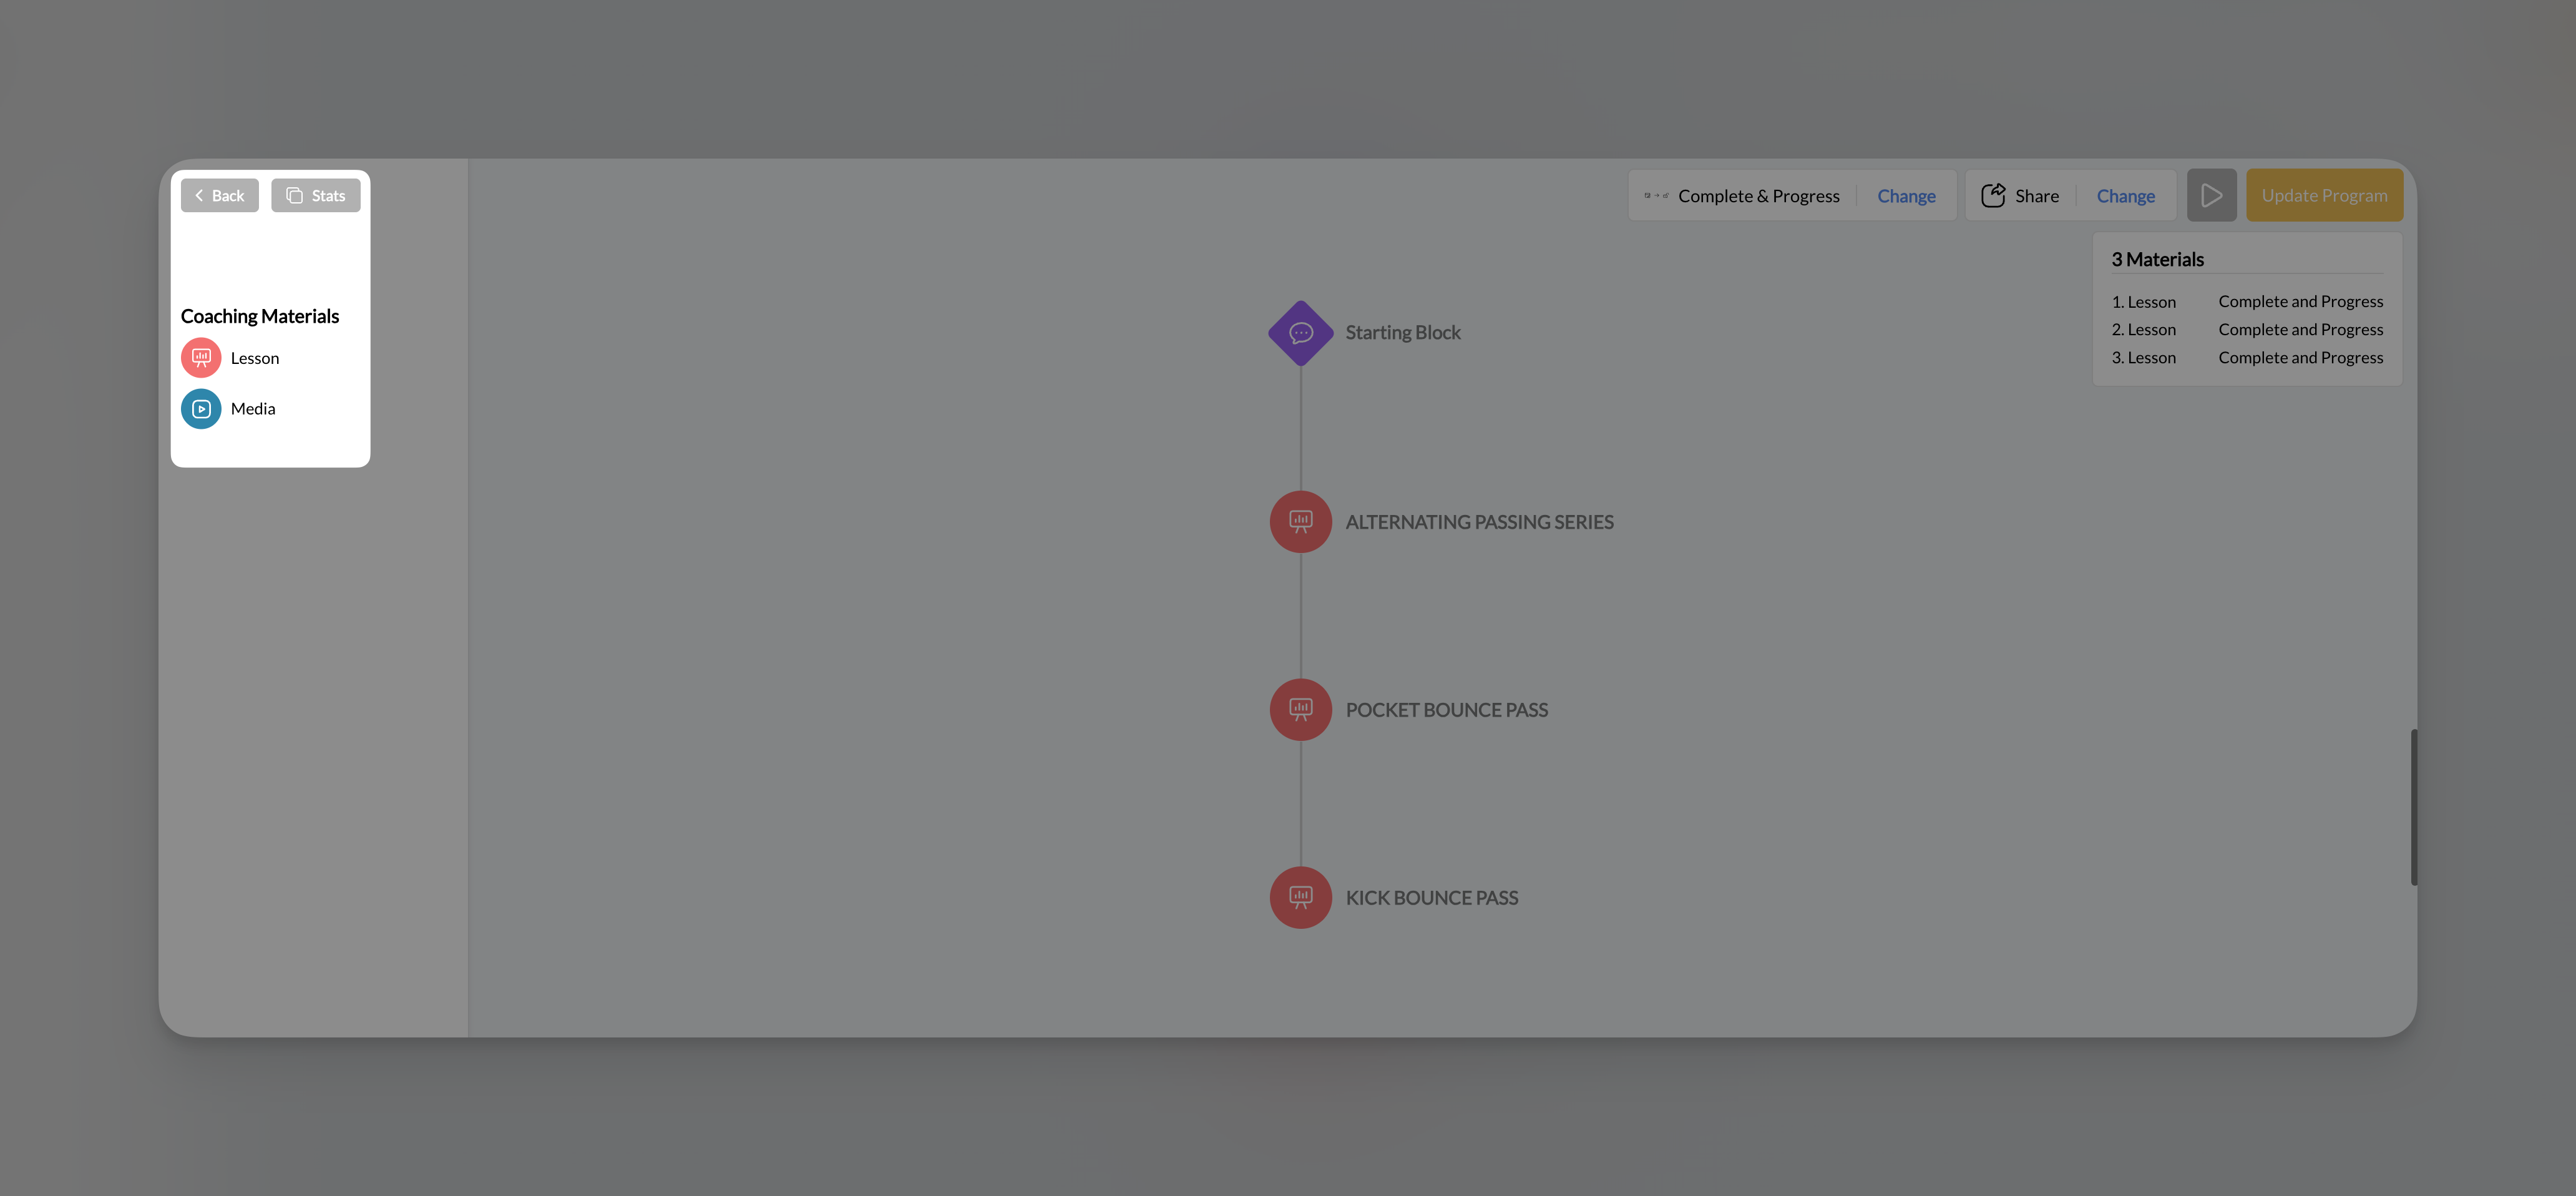
Left sidebar
Program title displays at the top, followed by:- Coaching Materials: Expandable sections for Lessons and Media
- Drag items from here into the visual flow to add them
Center area - Visual flow builder
This is where you build your program structure:- Starting Block (purple): Visual entry point, always present
- Lesson nodes (orange/red): Interactive lessons you’ve added
- Media nodes (blue): Standalone videos or images

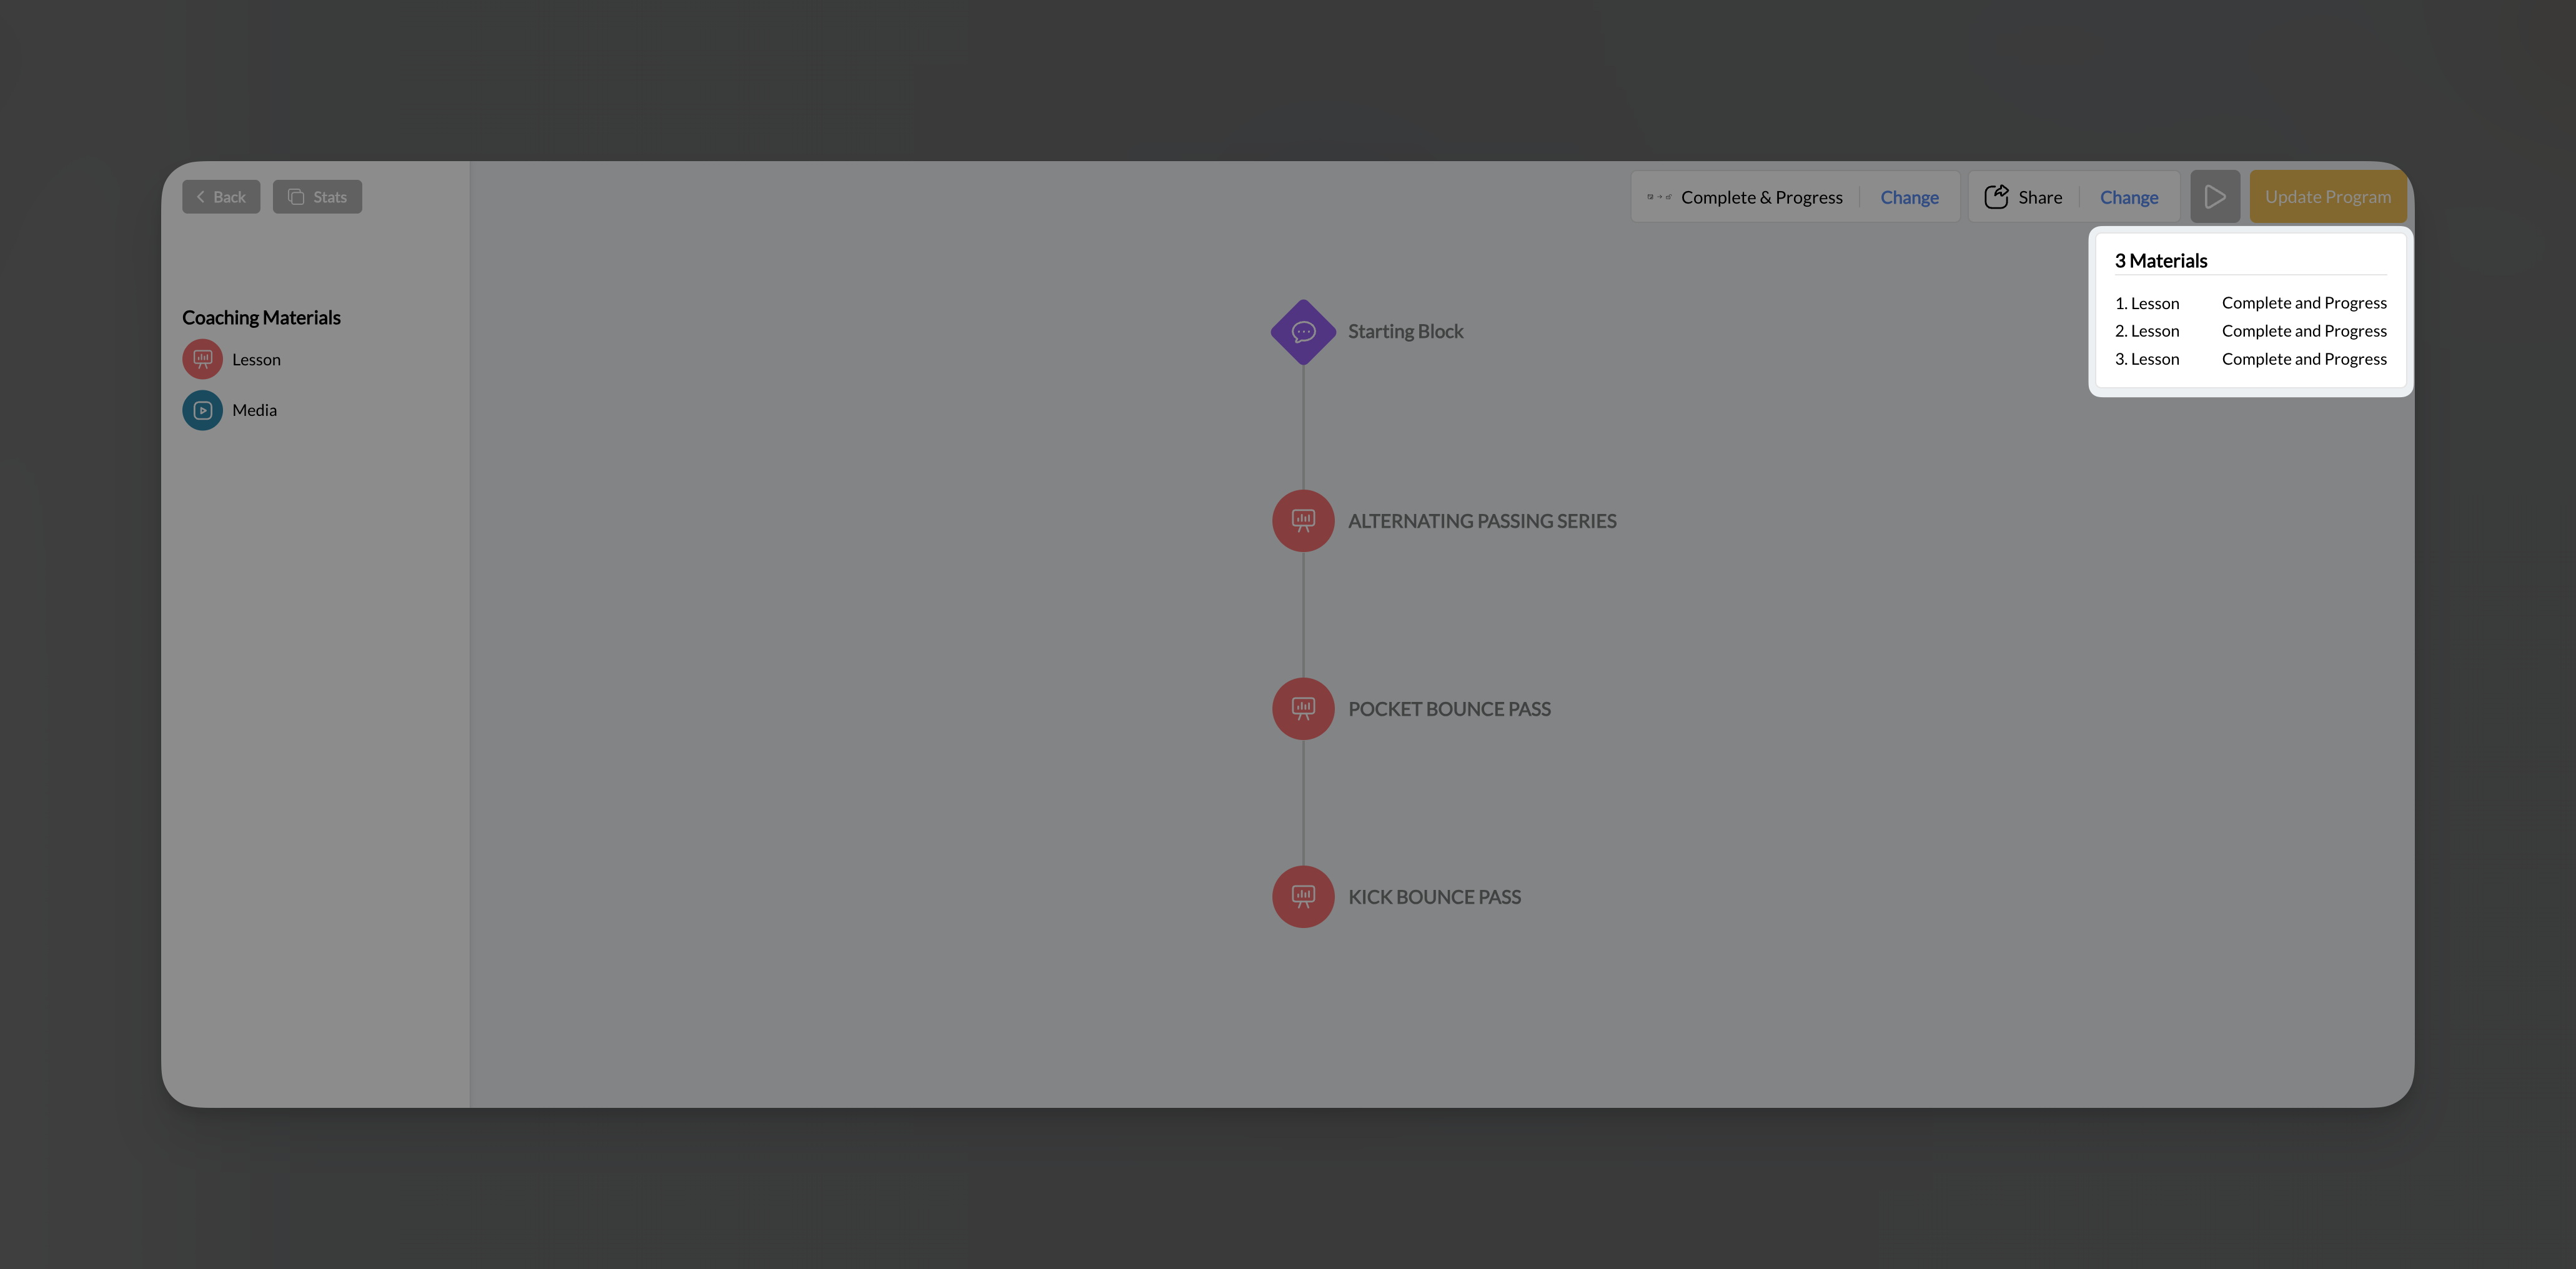
Right panel - Materials summary
Shows a list of all content in your program with:- Order number (1, 2, 3…)
- Content type (Lesson or Media)
- Access timing (Immediate, or unlock requirements)
Adding content to your program
Adding standalone media
- Drag the media button into the visual flow area
- Drop it in position
- Find the video or image you want
Adding lessons
- Drag the lesson button into the visual flow area
- Drop it where you want it in the sequence
- Find the lesson you want to add
Mixed content: Programs can contain any combination of lessons and standalone media. Use lessons for interactive content and standalone media for simple video chapters that don’t need quizzes or text overlays.
Reordering content
Drag nodes up or down in the visual flow to change their order. Athletes will progress through content in the order shown (top to bottom).Removing content
- Click on any node in the visual flow
- Click Remove in the popup menu
- The content is removed from the program (but not deleted from Media Hub)
Working with program nodes
When you click on a node in the visual flow, you’ll see:| Option | What it does |
|---|---|
| Preview thumbnail | Shows the content preview |
| Edit Lesson | Opens Lesson Builder directly (lessons only) |
| Thumbnail | Change the chapter thumbnail |
| Remove | Remove from program |
| Access dropdown | Set when this chapter unlocks |
Progression modes: How athletes move through content
Click Complete & Progress (or Change next to it) in the top bar to choose how athletes progress through your program.Immediate Access
How it works: All content is available immediately. Athletes can access any chapter in any order. Best for:- Reference libraries
- On-demand content collections
- Programs where order doesn’t matter
- Returning athletes who need to jump to specific sections
Complete & Progress
How it works: Athletes must complete each chapter before the next one unlocks. They work through content sequentially. Best for:- Structured courses with building concepts
- Certification programs
- Training progressions where order matters
- Ensuring athletes don’t skip foundational content
“Complete” means the athlete has fully viewed/finished the lesson or media—not just opened it. They need to swipe through all slides or watch the video.
Drip
How it works: Content releases on a time-based schedule. You configure how frequently new chapters unlock (daily, weekly, or custom intervals). Best for:- Email-course style content delivery
- Subscription programs with ongoing content
- Pacing athletes to prevent rushing through material
- Building anticipation and engagement over time
Previewing your program
Click the Preview button (play icon) in the top bar to see exactly what athletes will experience:- Program thumbnail and title
- Chapter list with progress indicators
- Lesson preview with slide count
- “Begin Program” button
Viewing program stats
Click the Stats button in the top bar to see:- All Checkpoints: Overview of all chapters
- View counts: How many athletes viewed each chapter
- Quiz responses: What athletes selected on multiple choice questions
- Form responses: What athletes typed in free-text fields
- Upload submissions: Files athletes submitted through Upload elements
Stats are collected at the program level, even if the same lesson appears in multiple programs. Each program tracks its own responses separately.
Tips for building effective programs
Start with an outline
Plan your chapter structure before building. Know what content goes where and in what order.
Mix content types
Combine interactive lessons with standalone videos for variety. Not everything needs to be a full lesson.
Use clear thumbnails
Each chapter thumbnail helps athletes navigate. Use distinct images that represent the content.
Save frequently
No auto-save means lost work if you forget. Click Update Program after every significant change.
Program content patterns
Online course (Complete & Progress)
Online course (Complete & Progress)
Structure:
- Lesson 1: Welcome & Overview
- Lesson 2: Foundation Concepts
- Lesson 3: Core Technique
- Lesson 4: Practice Drills (with Upload for submission)
- Lesson 5: Advanced Application
- Lesson 6: Final Quiz & Next Steps
Drill library (Immediate Access)
Drill library (Immediate Access)
Structure:
- Media: Warm-up Routine
- Media: Drill 1 - Ball Handling
- Media: Drill 2 - Shooting Form
- Media: Drill 3 - Footwork
- Media: Drill 4 - Defense
- (Continue with more drills…)
Weekly training program (Drip)
Weekly training program (Drip)
Structure:
- Lesson: Week 1 - Assessment & Baseline
- Lesson: Week 2 - Foundation Building
- Lesson: Week 3 - Skill Development
- Lesson: Week 4 - Progressive Challenge
- Lesson: Week 5 - Advanced Techniques
- Lesson: Week 6 - Final Assessment
Client supplemental content (Private)
Client supplemental content (Private)
Structure:
- Media: Your Personalized Warm-up
- Lesson: Form Corrections (specific to this athlete)
- Media: Homework Drills
- Lesson: Upload Your Practice Videos
Frequently asked questions about programs
Can I add the same lesson to multiple programs?
Can I add the same lesson to multiple programs?
Yes! Lessons can be reused across unlimited programs. This is great for foundational content that applies to multiple courses.
What's the difference between a lesson and standalone media in a program?
What's the difference between a lesson and standalone media in a program?
Lessons are interactive, multi-slide experiences with text, quizzes, forms, etc. Standalone media is just a single video or image—athletes watch/view it and move on. Use lessons when you want interaction, standalone media when you just need to share a video.
Can I change the progression mode after athletes have started?
Can I change the progression mode after athletes have started?
Yes, but be careful. Changing from Complete & Progress to Immediate Access will unlock all content for everyone. Changing the other direction may lock content athletes previously had access to.
How do I see which athletes completed my program?
How do I see which athletes completed my program?
Click the Stats button in the Program Builder. You’ll see view counts and can track which chapters athletes have completed.
Is there a limit to how many chapters a program can have?
Is there a limit to how many chapters a program can have?
No limit. Add as many lessons and media files as you need. However, very long programs may benefit from being split into multiple programs or “levels.”
Why can't I see my lesson in the sidebar?
Why can't I see my lesson in the sidebar?
What happens if I delete a lesson that's in a program?
What happens if I delete a lesson that's in a program?
The lesson will be removed from any programs that included it. Always check where a lesson is used before deleting it from Media Hub.
Next steps
Share & Sell Your Programs
Learn how to configure pricing, share programs privately, and connect to payment products.
Create Interactive Lessons
Build engaging lessons to include in your programs.
Related articles
Understanding Products
Create the payment products you link to paywalled programs.
Attach Products to Content
Connect payment products to your programs for monetization.
Content in the Athlete Portal
Manage which programs appear in your athlete app.
Your Athlete Portal
Configure the branded app where athletes access your programs.