

Link an existing scheduler
- Open the appropriate tab for the team.
- Choose Link existing scheduler.
- Search for the scheduler you intend to use and link it.
- Review the resulting scheduler card and wait for its roster-booking status.
- Check the team calendar and any booking details before telling families the schedule is ready.
Create a scheduler from the team
Choose Create scheduler in the appropriate tab. In Games & tournaments, choose the purpose offered by the flow. The builder keeps the team, season, and purpose visible and provides a way back to the team. Finish the existing scheduler setup: define sessions, availability, coaches, locations, resources, and payment or booking settings. See Create your first scheduler for the full builder walkthrough. A team’s season fee and a session’s price are separate. A scheduler card showing Free describes the session setting; it does not prove that team registration is free or that an athlete has paid.Confirm the roster is booked
The scheduler card reports the roster-booking result. Roster booked means the reported booking work completed. A partial result, such as 3 of 5 athletes booked, needs attention. Open Booking details to see the sessions and athletes that still need bookings. Resolve the stated issue and use the available retry action. If capacity is the issue, only increase it when the real session can accommodate the larger group.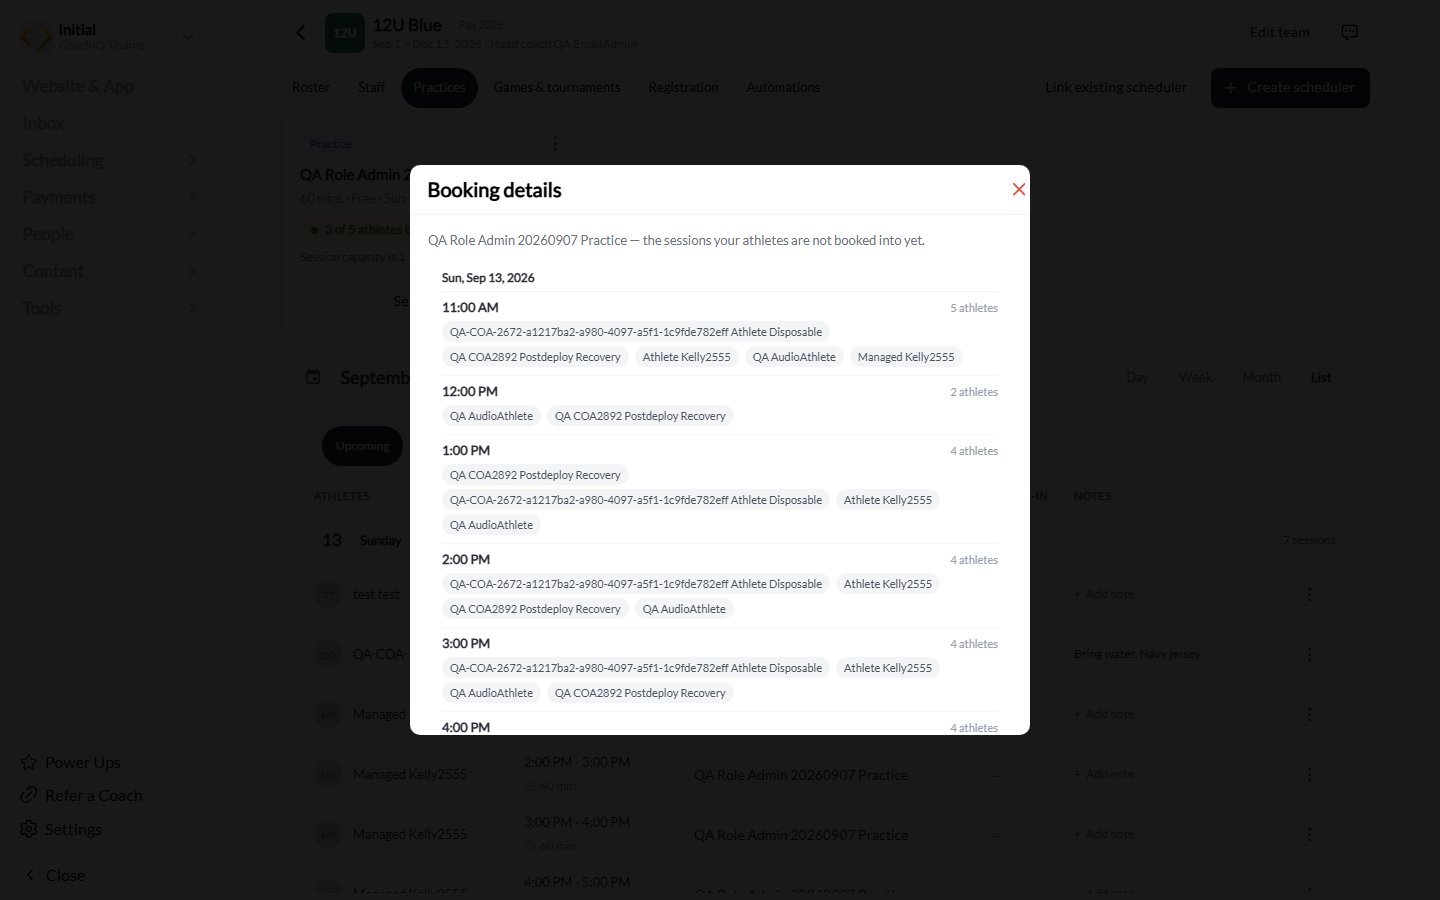
Booking details identifies the sessions and athletes still missing bookings. Names shown here are testing records.
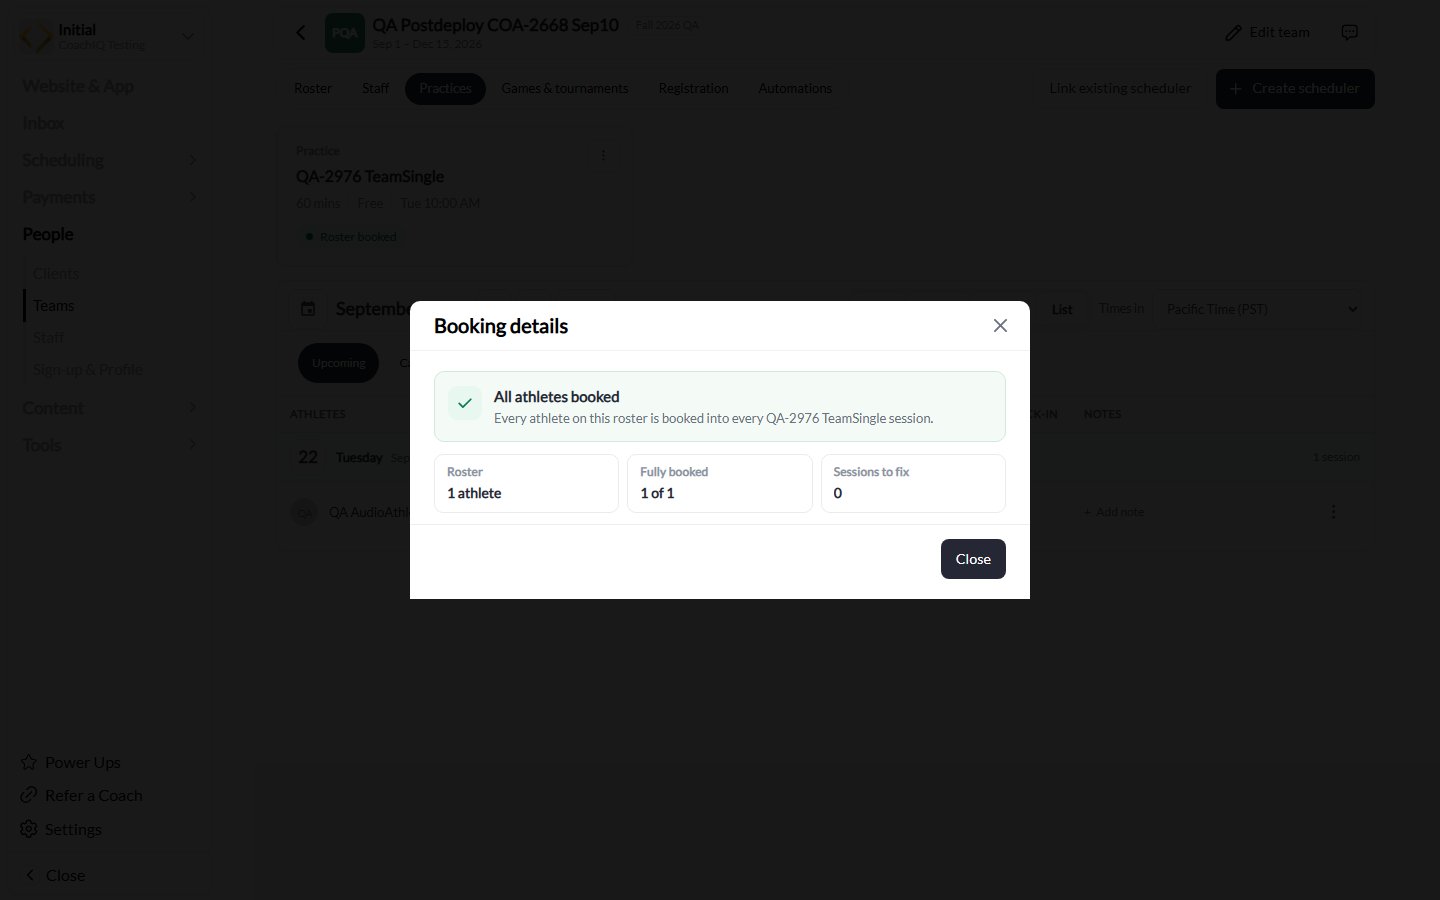
A completed booking result in CoachIQ Testing: one roster athlete, fully booked, with no sessions to fix.
Use the team calendar
The calendar below the linked schedulers shows the team’s sessions in the selected category. Use List, Day, Week, or Month, navigate dates, and switch between Upcoming, Canceled, and Past.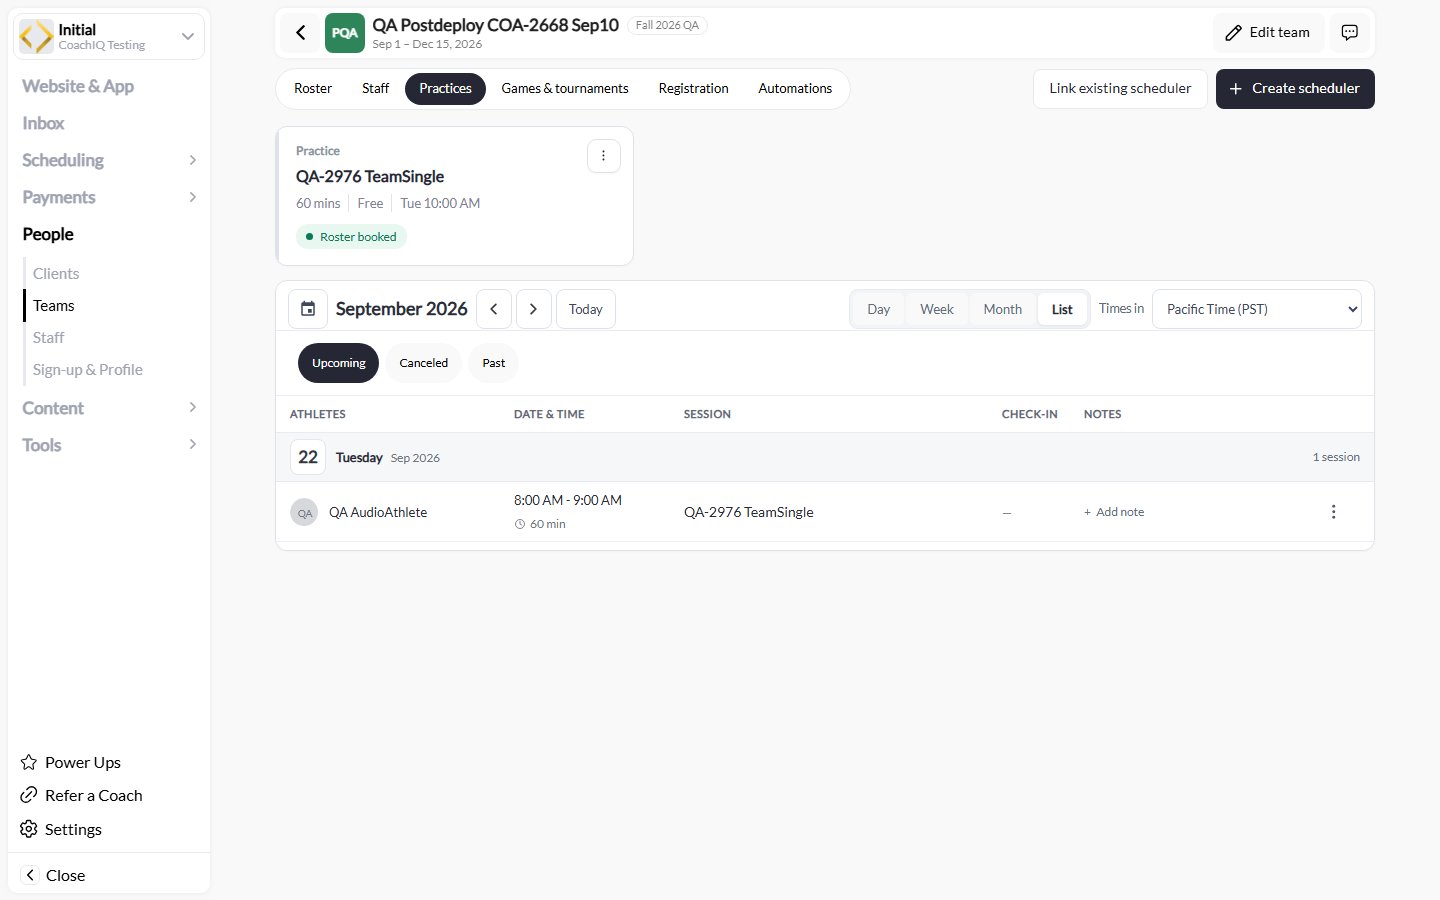
The Practices tab combines linked scheduler status with the team calendar. This testing example uses List view and shows the timezone control.
If sessions or athletes are missing
- Check the selected team, Practices versus Games & tournaments, date range, and calendar state.
- Confirm the linked scheduler has availability and sessions on the expected dates.
- Wait for an in-progress roster update, then inspect the result.
- Open Booking details for incomplete enrollments and address the stated limit.
- After a roster removal or transfer, check both the roster and affected future sessions.