What you’ll accomplish
By the end of this guide, you’ll have functional availability templates that define when you can coach. These templates become the foundation for all your bookable sessions.Before you begin
Decide on your approach before you start configuring: Most coaches start here (Recommended):- One to two availability schedules (ex: separate availabilities for group sessions and private sessions)
- Weekly recurring pattern (same days/times each week)
- Regular coaching hours
- Multiple availability schedules (different locations or contexts)
- Specific date availability (irregular schedules)
- Complex patterns across templates
Method 1: Weekly recurring availability (Recommended)
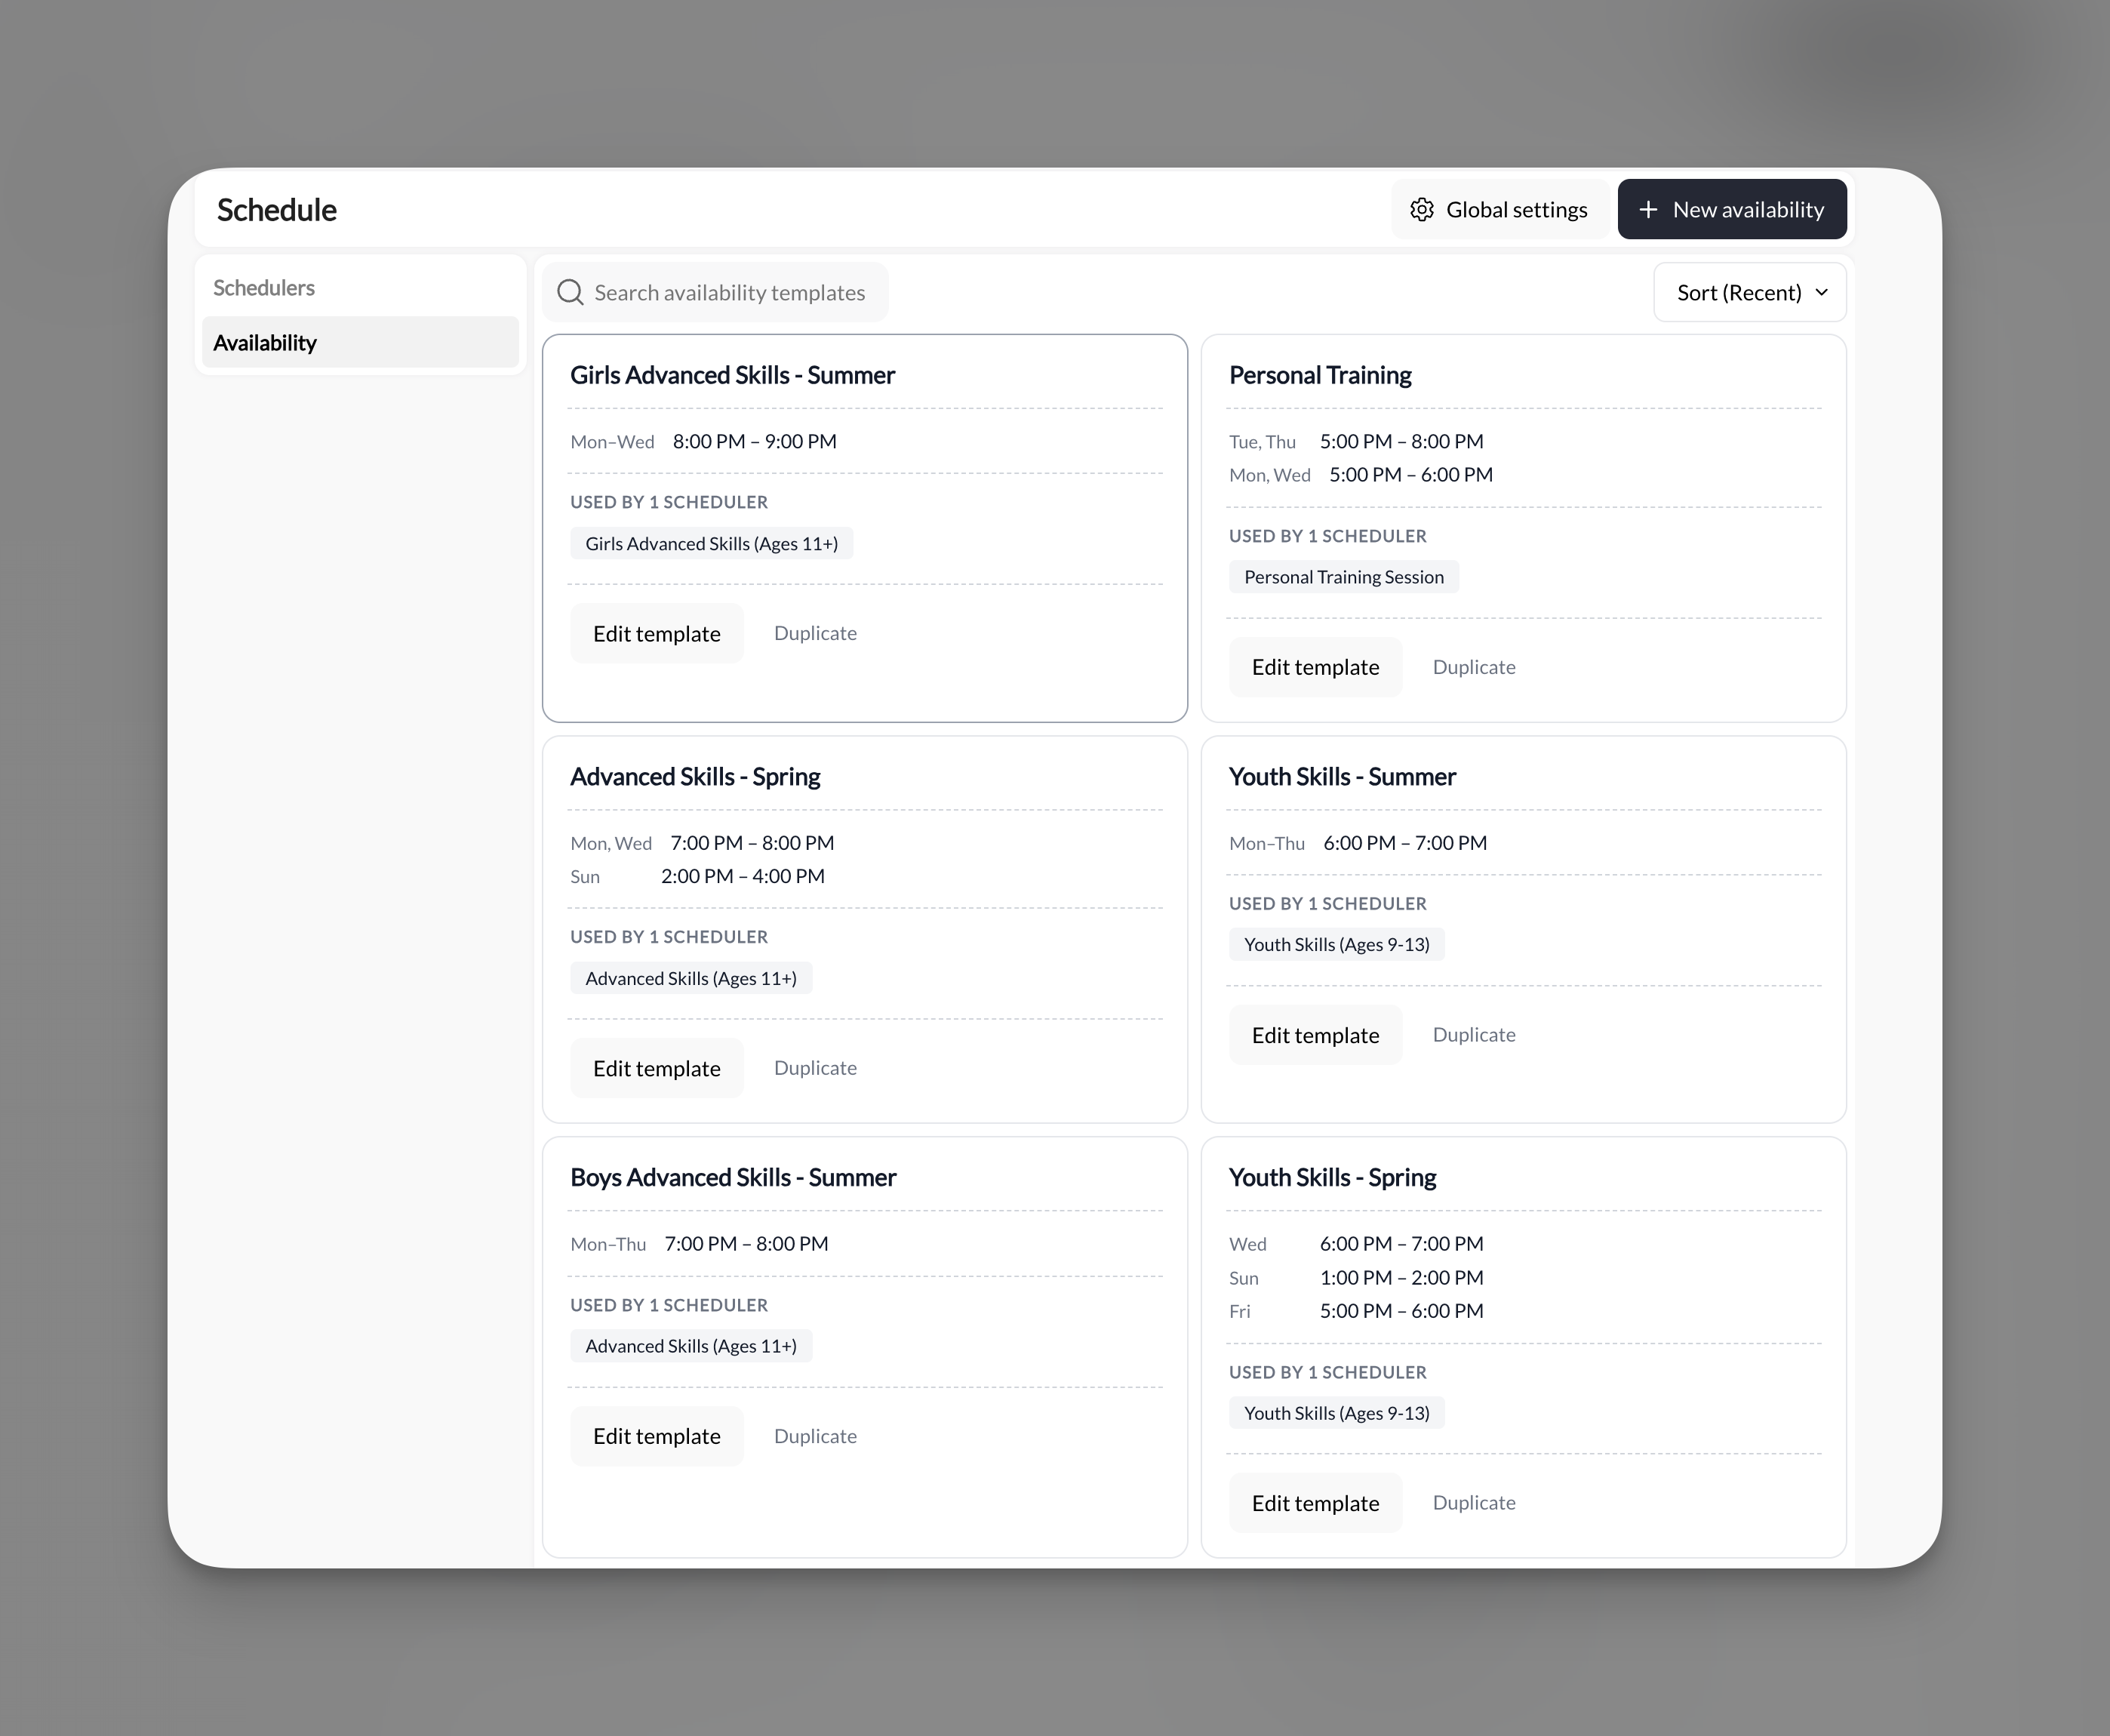
This is the most common and easiest approach. Set your regular weekly schedule once, and it continues forward automatically.Navigate to Availability
- Click Scheduling in the main navigation
- Click Schedule from the submenu
- Select the Availability tab in the left sidebar
Create new Availability
Select your available days
- ✅ Monday
- ✅ Tuesday
- ✅ Wednesday
- ✅ Thursday
- ✅ Friday
- ✅ Saturday
- ✅ Sunday
- ✅ Monday
- ✅ Wednesday
- ✅ Friday
- ✅ Saturday
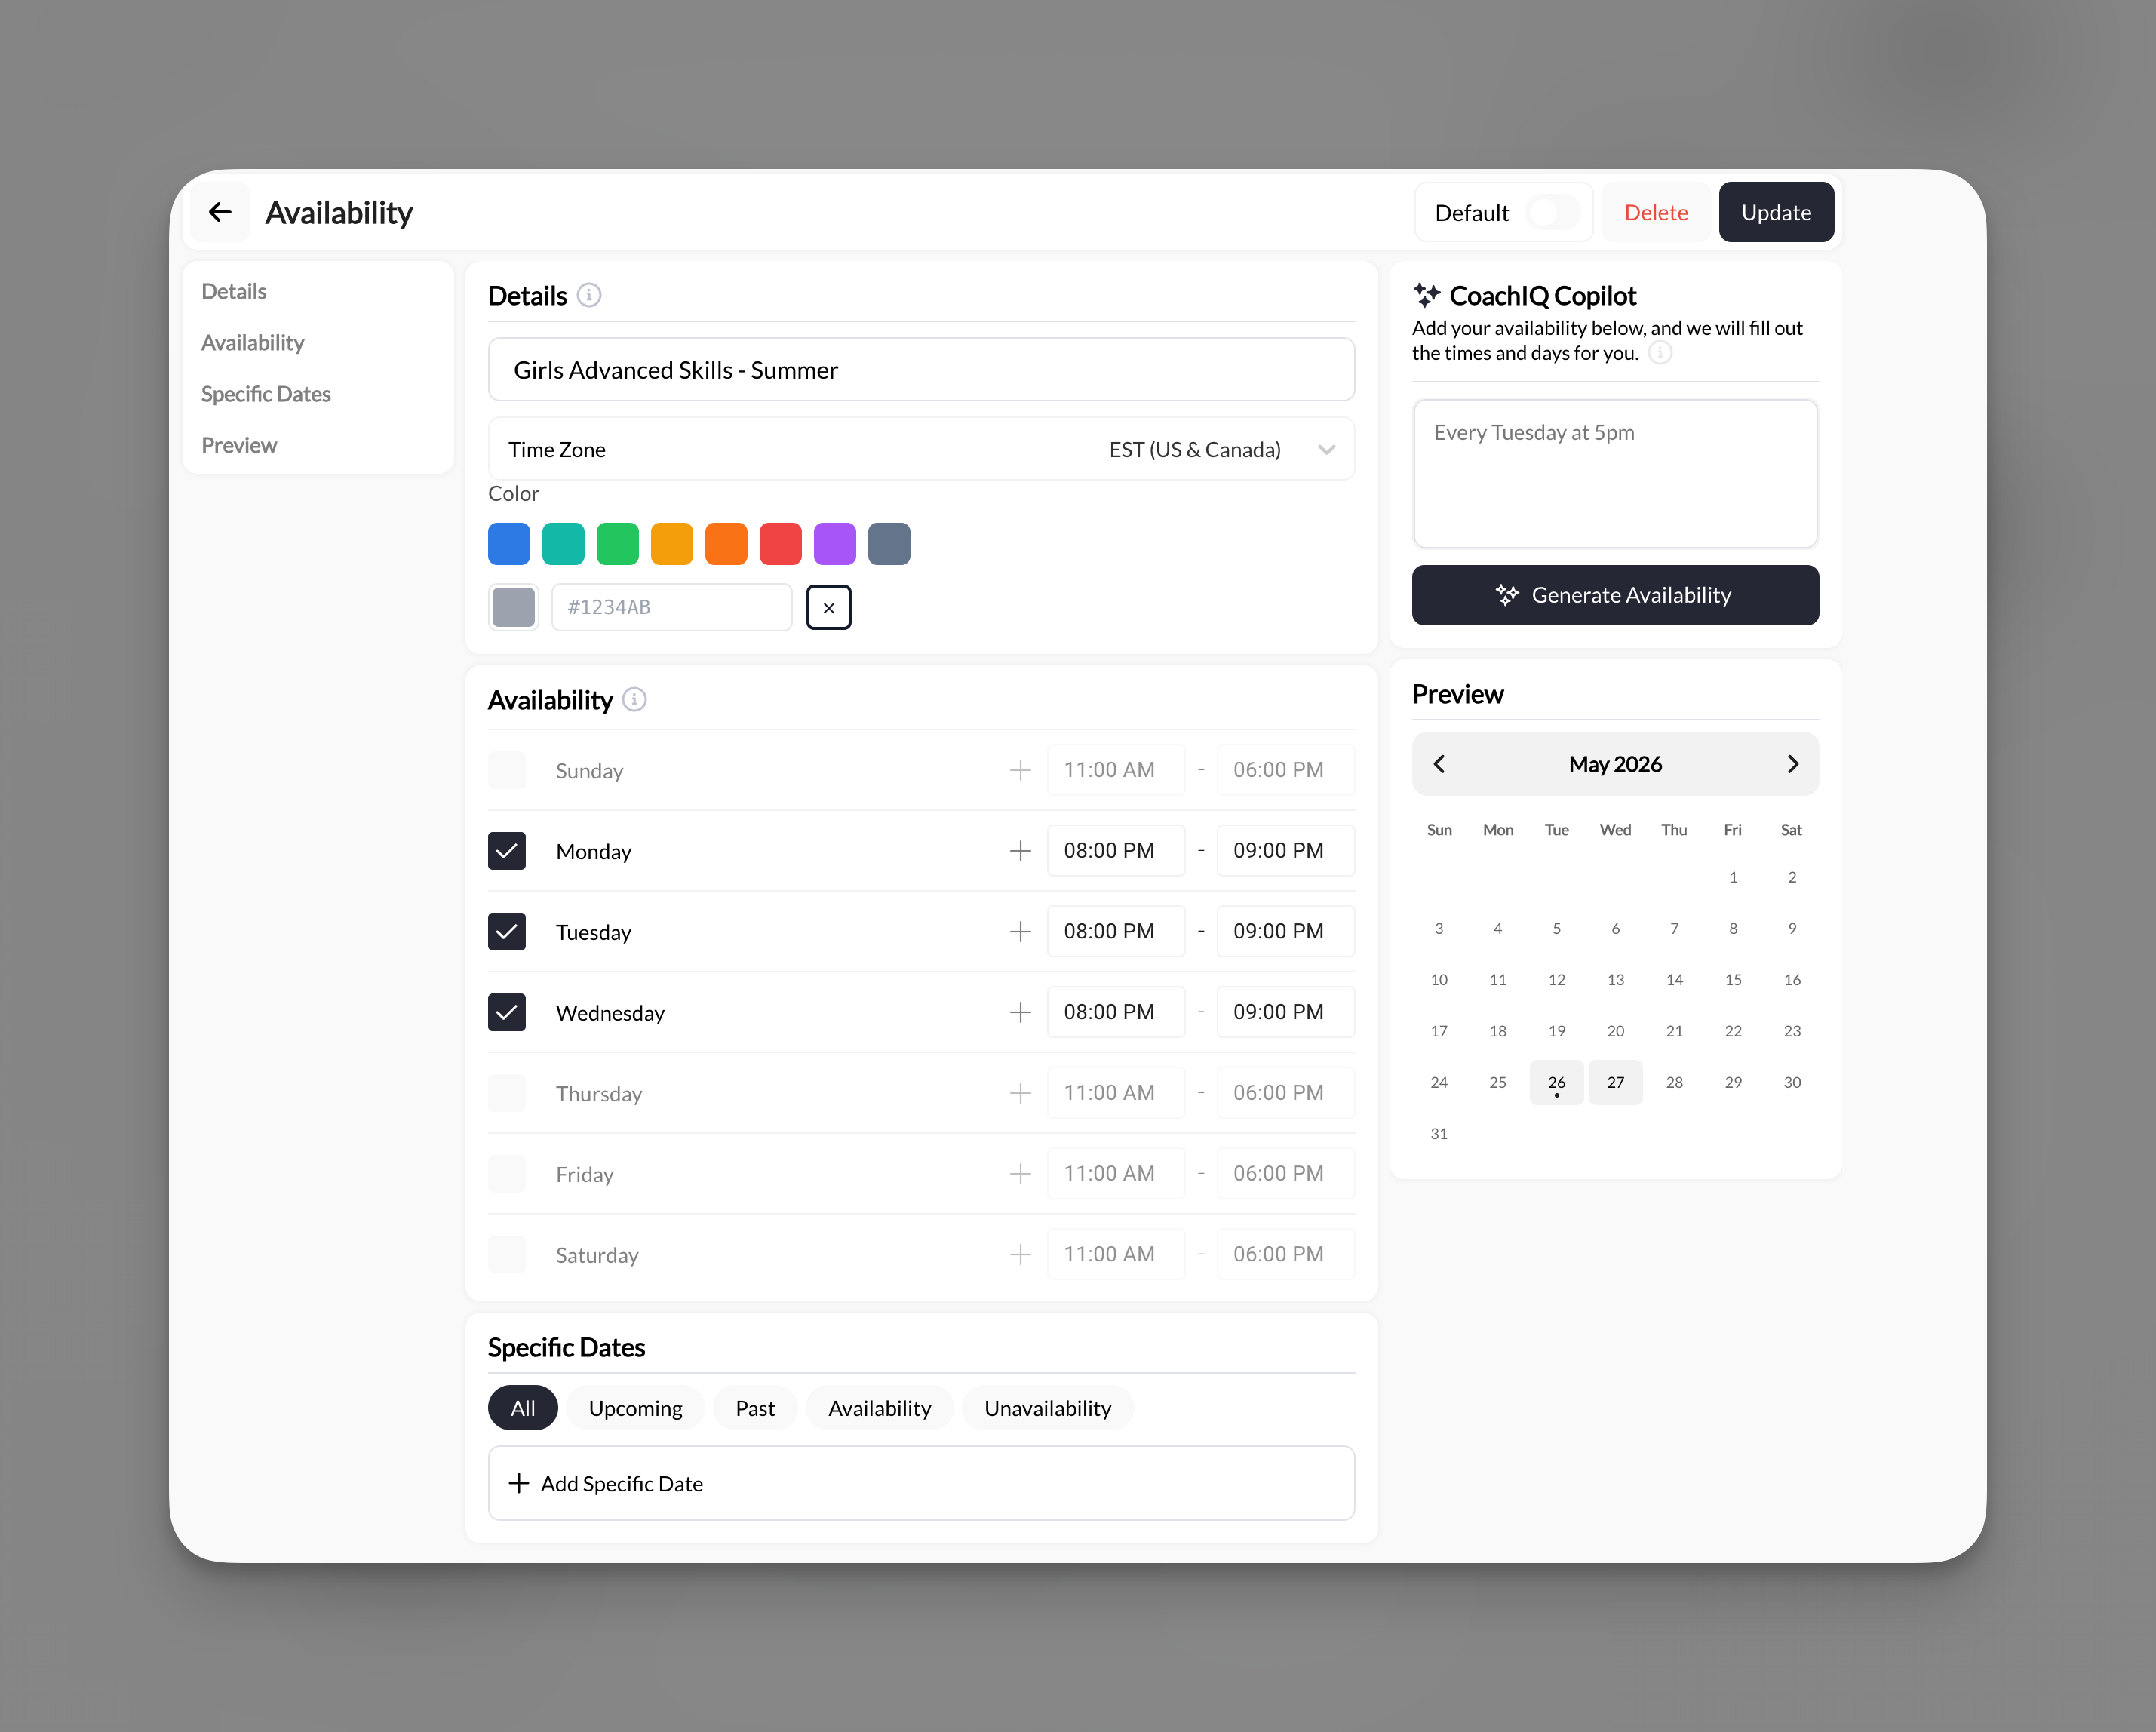
Set time ranges for each day
- Monday: 4:00 PM - 8:00 PM
- Wednesday: 3:00 PM - 9:00 PM
- Friday: 4:00 PM - 8:00 PM
- Saturday: 9:00 AM - 2:00 PM
- All selected days: 3:00 PM - 8:00 PM
Account for Time Slots Within Your Availability
- Avalability set from 5 - 9 pm
- ✅ Sessions are 60 minutes
- 5 - 6 pm
- 6 - 7 pm
- 7 - 8 pm
- 8 - 9 pm
- ❌ Sessions are 1 hour and 30 minutes
- 5 - 6:30 pm
- 6:30 - 8 pm
- Not enough time with the availabilty set to end at 9 pm
Name your availability template
- “Private Training Sessions at Location 1”
- “Group Training Sessions at Location 2”
- “Availability 1”
- “Schedule A”
- “Template 1”
Review and save
- ✅ Days selected are correct
- ✅ Time ranges match your intended schedule
- ✅ End times account for buffer time
- ✅ All days have time ranges set
Method 2: Specific dates availability
Use this when you have irregular schedules, seasonal coaching, or want to test time slots for a limited period.Access the Availability section
Choose 'Specific Dates' option
Select your available dates
- July 10, 11, 12, 13, 14 (week 1)
- July 17, 18, 19, 20, 21 (week 2)
- July 24, 25, 26, 27, 28 (week 3)
- Every Saturday in October
- October 7, 14, 21, 28
- Pick specific dates that fit your variable schedule
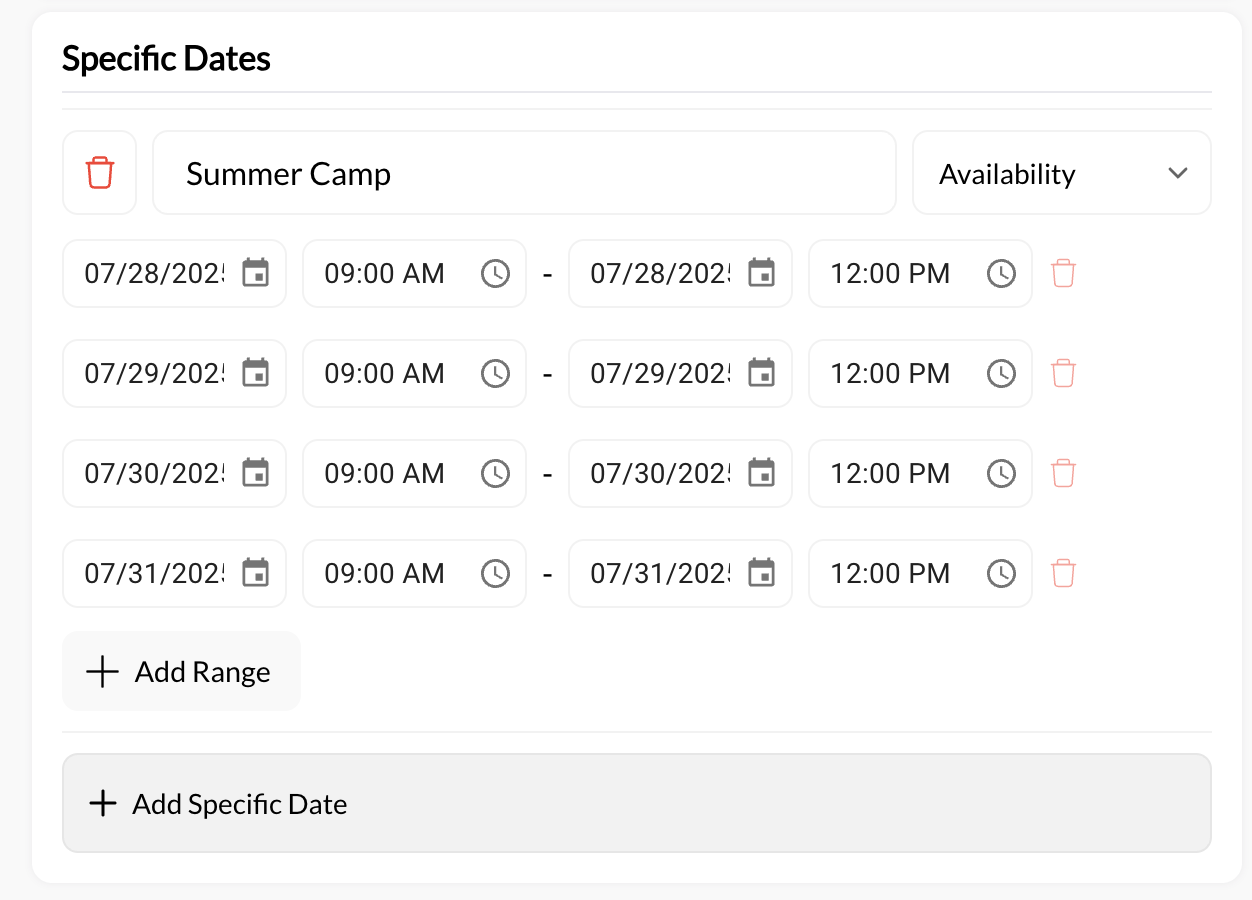
Set time ranges for selected dates
- All selected dates: 9:00 AM - 5:00 PM
- July 10: 9:00 AM - 5:00 PM
- July 11: 10:00 AM - 3:00 PM
- July 12: 9:00 AM - 5:00 PM
Review and save
- ✅ All intended dates are selected
- ✅ No accidental dates included
- ✅ Time ranges are correct
- ✅ Dates extend far enough into future
Method 3: Using Copilot to generate availability
CoachIQ’s Copilot AI can generate availability patterns based on plain language descriptions.Access Copilot in scheduler builder
Describe your availability in plain language
“I’m available Monday, Wednesday, and Friday from 3 PM to 8 PM”Multiple time blocks:
“I coach weekday afternoons 3-8 PM and Saturday mornings 9 AM to 1 PM”Specific exclusions:
“Available every weekday 2-7 PM except Thursdays”
Review Copilot's generated availability
- ✅ Days are correct
- ✅ Times match your intent
- ✅ AM/PM is correct (not 3 AM when you meant 3 PM)
- ✅ Pattern type (recurring vs specific dates) is right
Adjust if needed
- Edit directly: Manually adjust days or times
- Regenerate: Try rephrasing your prompt and ask Copilot again
- Accept and tweak: Accept the generated availability and fine-tune manually
Accept and save
Adding blackout days (blocking time off)
Blackout days prevent bookings on specific dates without deleting your entire availability pattern.Access blackout day settings
- Blackout Days
- Unavailable Dates
- Block Time Off
- Exceptions
Select dates to block
- Vacation: July 15-30
- Holidays: Thanksgiving Day, Christmas week
- Personal days: Doctor appointments, family events
- Facility closures: Gym maintenance days
Save blackout days
Verify blackout days appear correctly
- ✅ Blackout days show no available slots
- ✅ Days before and after blackout still have availability
- ✅ All intended dates are blocked
Creating multiple availability templates
As your business grows, you may need multiple availability templates for different contexts.Scenario 1: Multiple Locations
Scenario 1: Multiple Locations
- Create first scheduler with “Location A Availability”
- Downtown Gym: Monday/Wednesday 5-9 PM
- Create second scheduler with “Location B Availability”
- Community Center: Tuesday/Thursday 4-8 PM, Saturday 9 AM-1 PM
Scenario 2: Different Session Types Need Different Times
Scenario 2: Different Session Types Need Different Times
- Create “Private Training” scheduler with weekday availability
- Monday-Friday: 3-8 PM
- Create “Group Bootcamp” scheduler with weekend availability
- Saturday/Sunday: 9 AM-12 PM
Scenario 3: Testing New Time Slots
Scenario 3: Testing New Time Slots
- Keep existing scheduler with regular hours
- “Regular Sessions”: Monday/Wednesday/Friday 3-8 PM
- Create new scheduler with trial hours
- “Early Morning Sessions”: Tuesday/Thursday 6-8 AM (specific dates only for next month)
Editing existing availability
Your schedule will change. Here’s how to update availability for existing schedulers.Navigate to your scheduler
- Go to Scheduling → Schedule → Schedulers tab
- Find the scheduler you want to edit
- Click to open or click Edit
Find the Availability section
Make your changes
- Check an additional day box
- Set time range for that new day
- Save
- Adjust start/end times for existing days
- Save
- Uncheck the day box
- Save
- Select new blackout days
- Save
Save changes
Check your calendar
- ✅ New availability shows correct slots
- ✅ Changed hours reflect properly
- ✅ Removed days no longer show availability
- ✅ Existing bookings are still there
Connecting availability to multiple schedulers
The real power of availability templates: one template powering multiple session types.The reusability workflow
Create your first scheduler with availability
Create your second scheduler
- Navigate to Availability section
- Look for option to Use Existing Availability or Select Availability Template
Verify shared availability
- Check calendar in Week view
- Both schedulers should show available slots during the same time windows
- Both should reflect any changes you make to the shared availability
When schedulers should have SEPARATE availability
Create different availability for each scheduler when:- ✅ They’re at different physical locations
- ✅ One is weekday-only, another is weekend-only
- ✅ Different session types are genuinely available at different times
- ✅ You’re testing new time slots for one session type
- ❌ Different session types are offered during the same hours (same availability, different schedulers)
- ❌ Only the price or duration differs (same availability works fine)
- ❌ You want to limit bookings (use booking limits instead, not separate availability)
Common availability patterns by coaching type
- Solo Personal Trainer
- Facility Owner (Multiple Coaches)
- Team Coach
- Seasonal/Camp Coach
- One availability template: “Regular Coaching Hours”
- Days: Monday/Wednesday/Friday
- Times: 4:00 PM - 8:00 PM
- Buffer: 15 minutes
- 30-Min Quick Session - $50
- 60-Min Full Training - $90
- Free 30-Min Assessment
Availability best practices summary
Start Simple
Add Buffer Generously
Block Holidays Upfront
Think Reusability
Extend End Times
Use Descriptive Names
Review Calendar After Changes
Test First
Troubleshooting availability issues
No available slots are showing when I test
No available slots are showing when I test
- Availability days/times not set
- Availability end date is in the past
- All time slots are blocked by blackout days
- Buffer time + session duration exceeds availability window
- Edit scheduler and verify availability is set
- Check end date extends into future
- Review blackout days for conflicts
- Calculate: (session duration + buffer) × number of desired slots = minimum availability window needed
I see fewer available slots than expected
I see fewer available slots than expected
- Availability: 3:00 PM - 5:00 PM (2 hours)
- Session duration: 60 min
- Buffer: 30 min
- Expected slots: 2
- Actual slots: 1 (only 3:00 PM works; 4:00 PM session would end at 5:00 PM but buffer would end at 5:30 PM)
Changes to availability aren't showing on calendar
Changes to availability aren't showing on calendar
- Changes not saved
- Browser cache showing old data
- Looking at wrong date range
- Changes only affect future, not past
- Re-save the scheduler
- Refresh browser (hard refresh: Cmd+Shift+R or Ctrl+Shift+R)
- Navigate to future dates to see new availability
- Remember: existing bookings don’t change, only future slots
Athletes can book times I didn't set as available
Athletes can book times I didn't set as available
- Multiple schedulers with different availability
- Another coach’s availability overlapping
- Buffer time miscalculated
- Availability wider than intended
- Review all schedulers’ availability settings
- Check if multiple coaches have overlapping availability
- Verify start/end times are correct (not AM/PM errors)
- Double-check all checked day boxes match intent
I can't reuse my availability across schedulers
I can't reuse my availability across schedulers
- Manually configure same availability in each scheduler
- Be extra careful to keep them in sync when making changes
- Consider using Copilot with same prompt for each scheduler to ensure consistency
Quick reference: Time calculation formulas
When planning your availability, use these formulas:How many slots will I have?
Formula:- Availability: 3:00 PM - 8:00 PM = 5 hours = 300 minutes
- Session: 60 minutes
- Buffer: 15 minutes
- Calculation: 300 ÷ 75 = 4 slots
When should I end my availability?
Formula:- Last session start: 7:00 PM
- Session: 60 minutes
- Buffer: 15 minutes
- Calculation: 7:00 PM + 60 min + 15 min = 8:15 PM
How much availability do I need?
Formula:- Want 5 slots per day
- Session: 60 minutes
- Buffer: 15 minutes
- Calculation: 5 × 75 = 375 minutes = 6.25 hours