What you’ll accomplish
Learn how to book athletes directly into sessions using CoachIQ’s Booking Builder—perfect for VIP clients, makeup sessions, and special scheduling situations that require your direct involvement.Where to find this: Schedule → Calendar → “Book Session” button, or direct URL:
/schedule/booking/builder/newWhen to use manual booking
Manual booking is your tool for handling scheduling situations that don’t fit the standard athlete self-booking flow:VIP & High-Touch Clients
Private clients who prefer you handle their scheduling rather than booking themselves
Makeup Sessions
Rescheduling after cancellations, no-shows, or special circumstances requiring accommodation
Special Requests
Booking outside your normal availability for one-off exceptions or emergency sessions
Walk-Ins & Phone Calls
Athletes who contact you directly instead of using the booking page
Complimentary Sessions
Free or comp sessions for referrals, trials, or special promotions
Administrative Corrections
Fixing booking errors or handling technical issues on athlete’s behalf
Opening the Booking Builder
There are three ways to access the manual booking interface:- From Calendar
- From Schedulers Page
- From Client Profile
Best for: Booking at a specific time you can see on calendar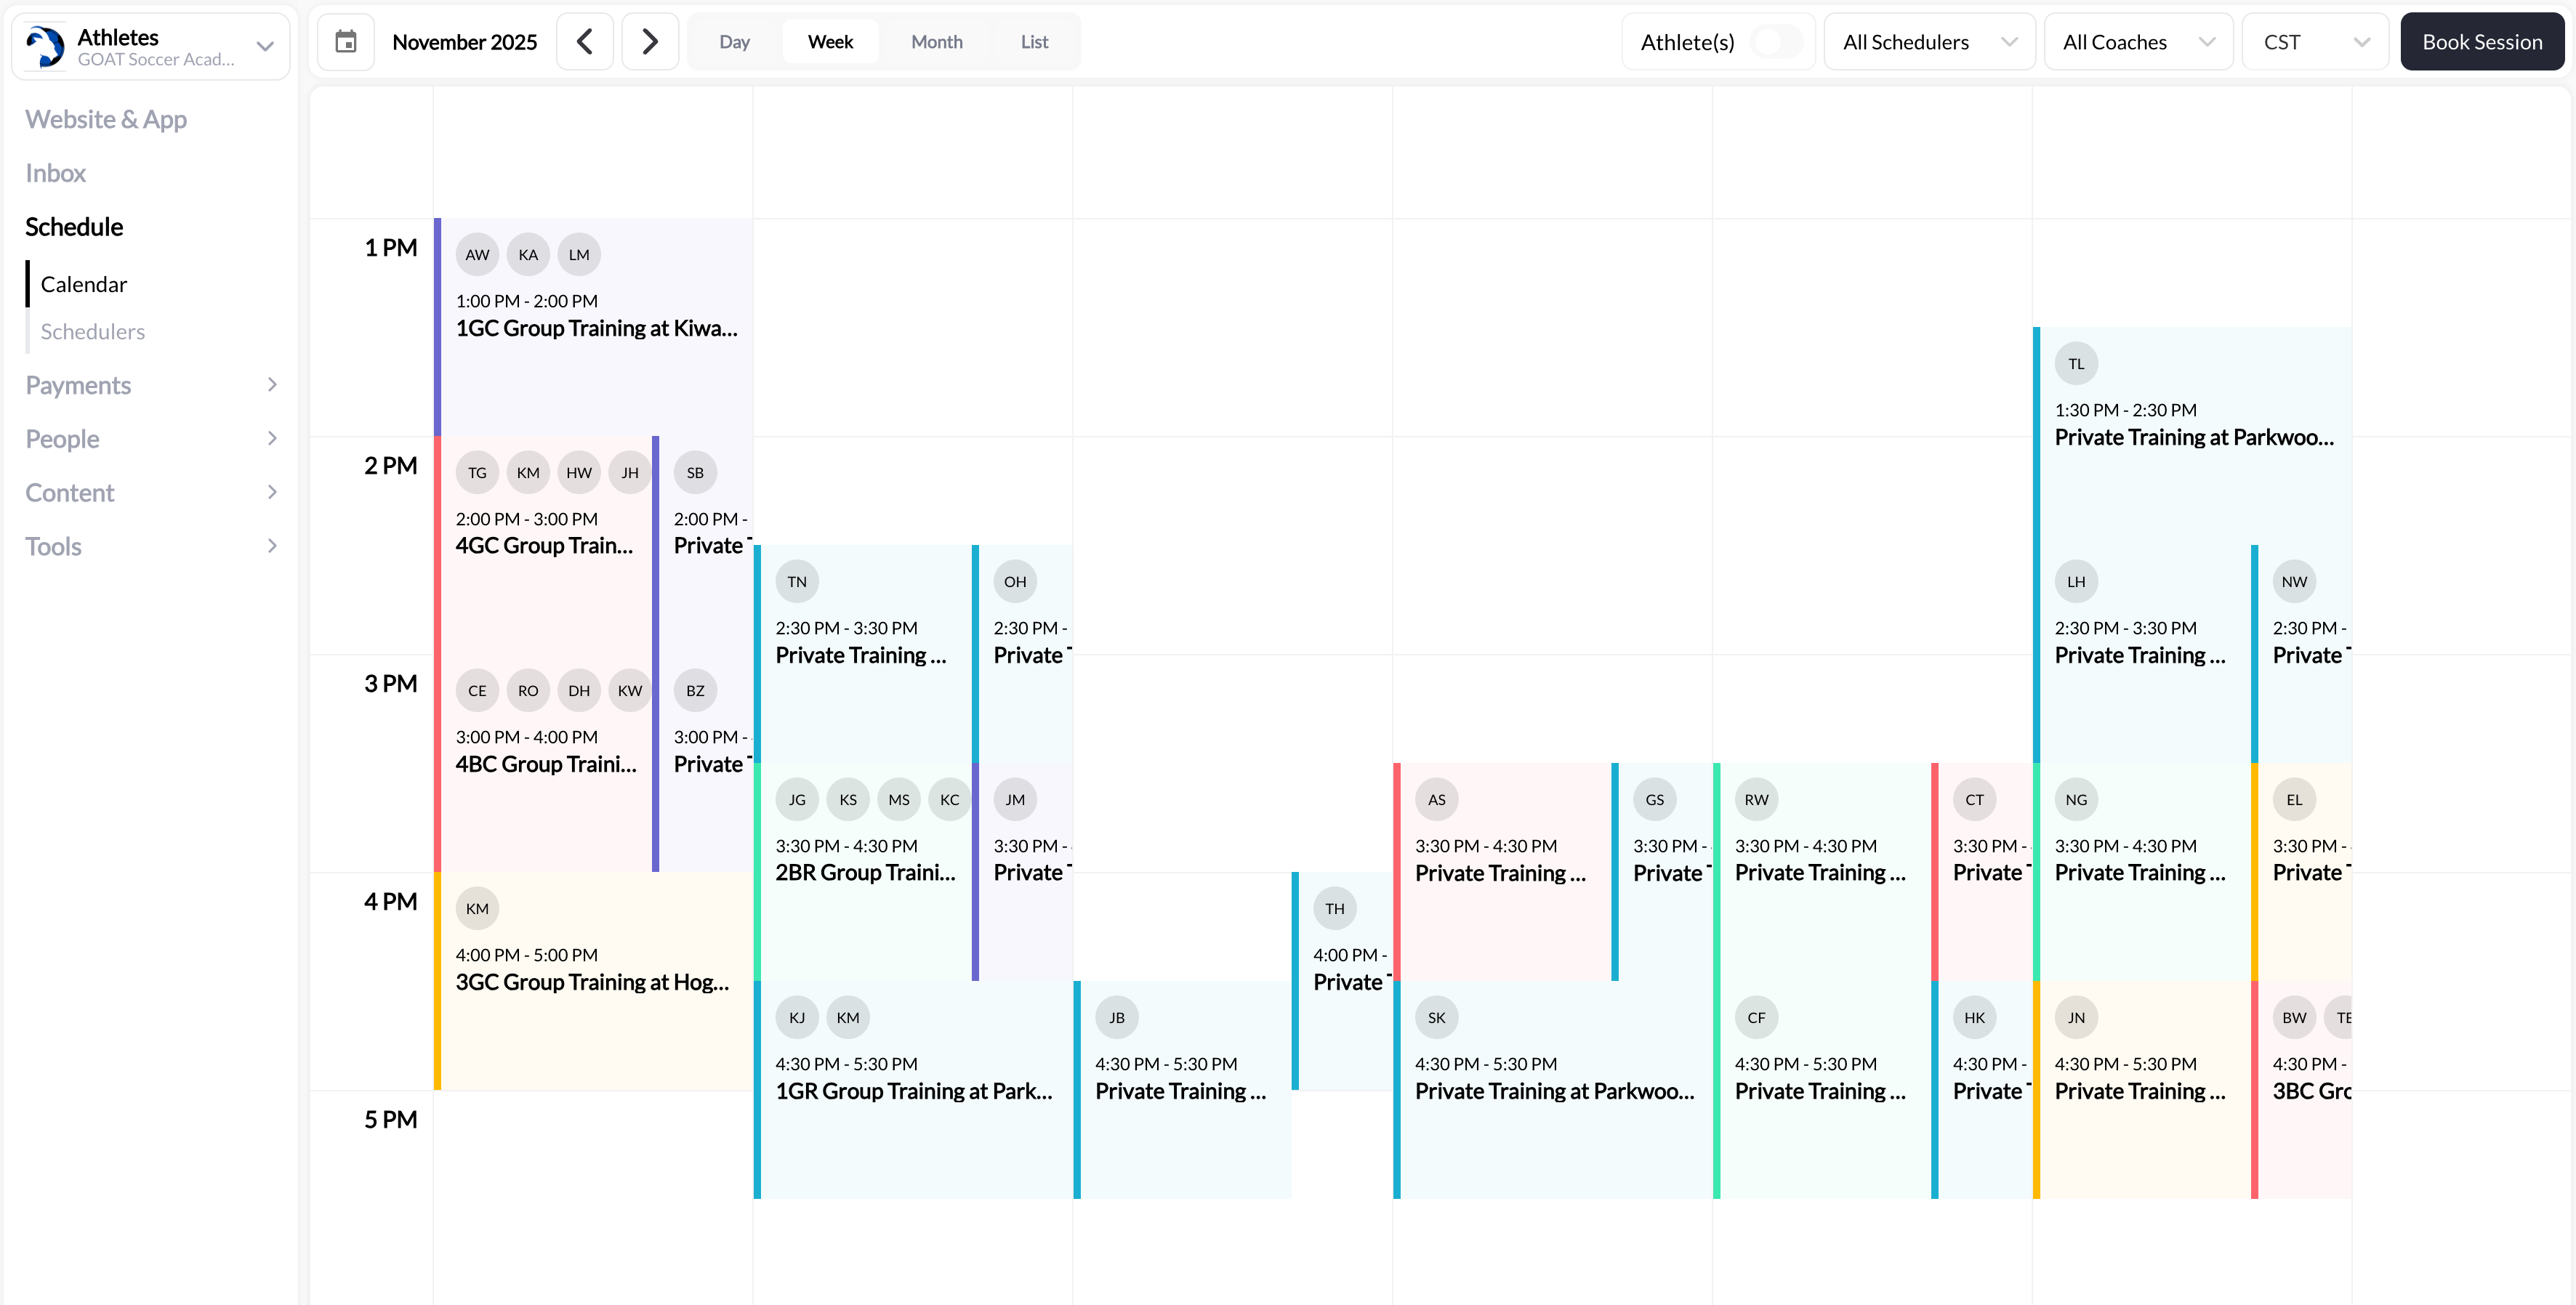
- Go to Schedule → Calendar
- Click the “Book Session” button (top right)
- Booking Builder opens
Step-by-step: Creating a manual booking
The Booking Builder has four main sections you’ll complete in order: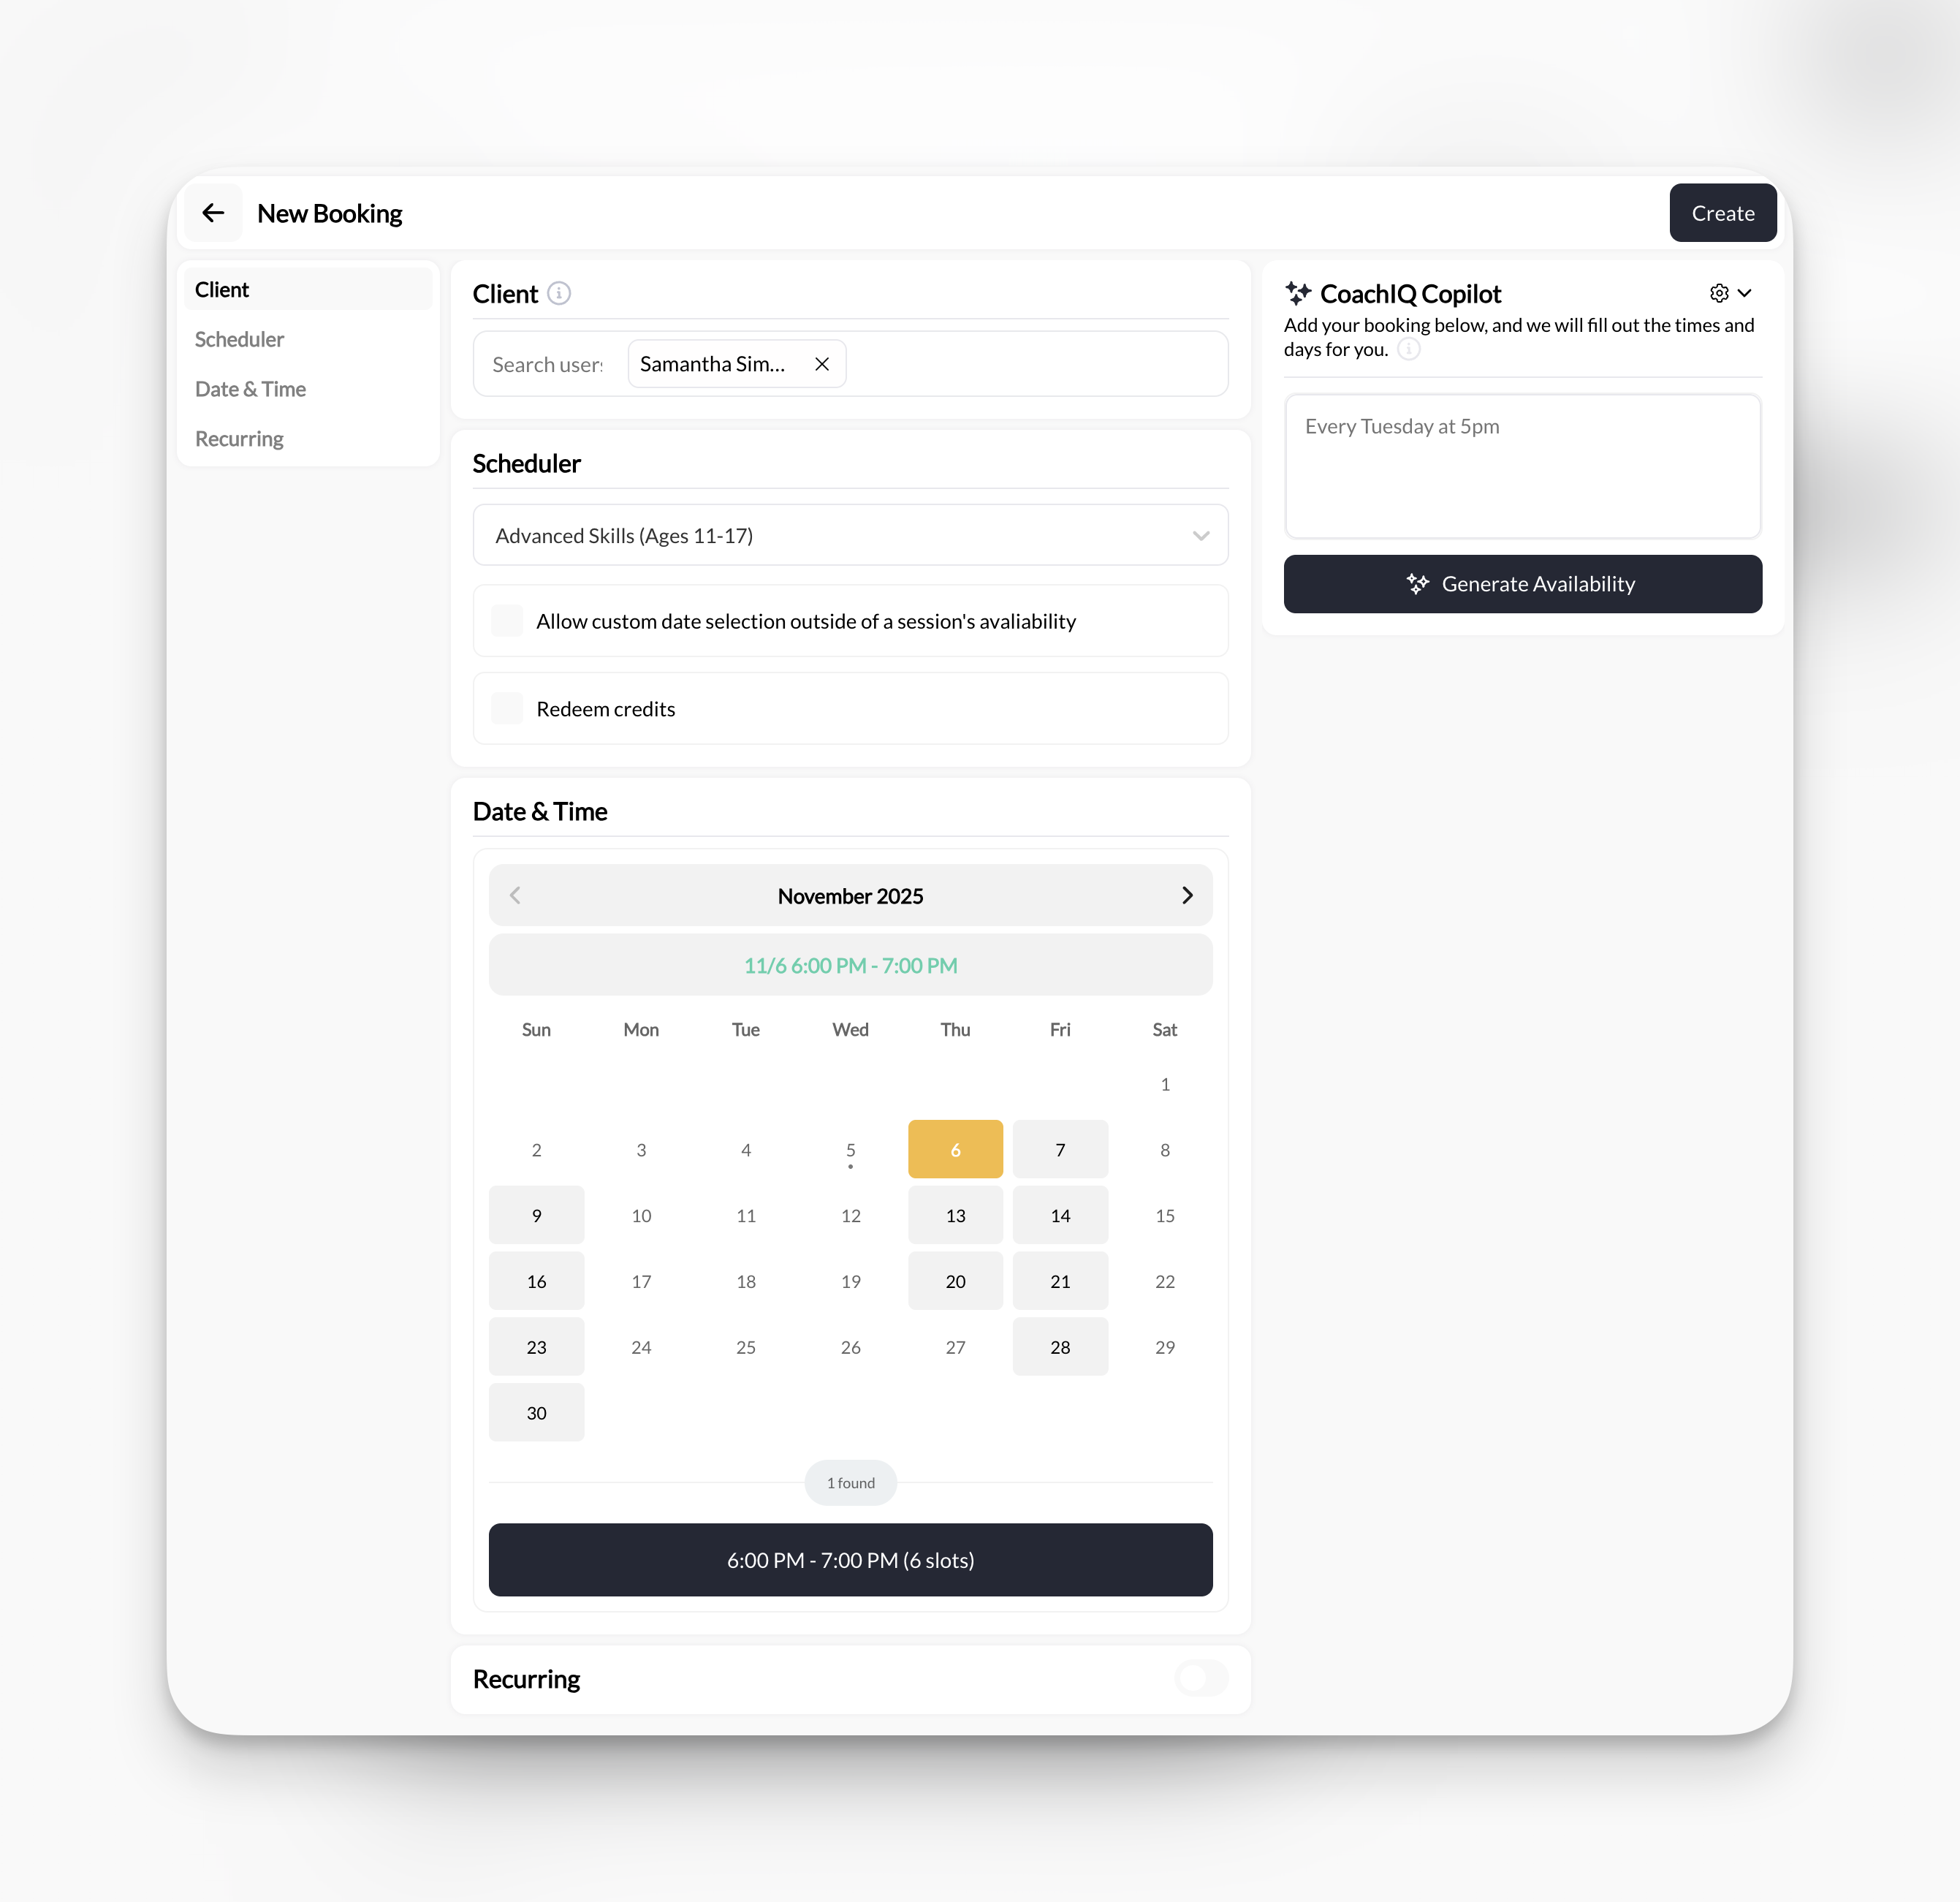
1
Select the client
Search for and select the athlete you’re booking for.How to find clients:
- Search by name: Start typing athlete/parent name
- Search by email: Type their email address
- Client name
- Email address
- Associated tags
- Profile picture (if set)
Can’t find the client? They may not be in your system yet. Go to People → Clients → Add Client to create their profile first.
2
Choose the scheduler
Select which type of session you’re booking.The dropdown shows all your active schedulers with:
- Scheduler name
- Duration (e.g., “60 min”)
- Pricing (e.g., “$75.00” or “1 Credit”)
Allow custom date selection
What this does
What this does
When checked: You can book the athlete at ANY date/time, even outside your normal availability.When unchecked: You can only book within your published availability windows.Use case:
- Checked → Special accommodation outside normal hours
- Unchecked → Standard booking within your schedule
Redeem credits
What this does
What this does
When checked: Booking will consume athlete’s credits (if scheduler is credit-based).When unchecked: Booking won’t consume credits—useful for comp sessions or when you want to manually handle credit deduction later.Important: Only appears if the selected scheduler accepts credits.Default: Usually checked (credits will be consumed as normal).
3
Select date and time
Choose when this session will occur.What you’ll see depends on the checkboxes:Duration presets:
- Booking Within Availability
- Booking Outside Availability
When “Allow custom date selection” is unchecked:
- Calendar shows only available dates (dates with open slots appear clickable)
- Select a date
- Choose from available time slots
- Duration options: 15 min, 30 min, 60 min, or custom

- Click 15, 30, or 60 for quick duration selection
- Or set custom duration for non-standard session lengths
4
Review and create booking
Before finalizing, review all details:Booking summary shows:
- Athlete name
- Scheduler name
- Date and time
- Duration
- Credit consumption status (if applicable)
- Any warnings or conflicts
Success! The booking is created instantly. Both you and the athlete receive confirmation notifications.
What happens after booking
Immediate actions
- Calendar updated: Booking appears on your calendar immediately
- Athlete notification: Athlete receives confirmation via:
- In-app notification
- Email (if enabled)
- SMS (if reminder settings configured)
- Credit deduction: If “Redeem credits” was checked, credits are deducted from athlete’s balance
- Availability blocked: That time slot is now unavailable for other bookings (unless double-booking is enabled)
Athlete receives
The athlete gets a booking confirmation that includes:- Session date and time
- Session type (scheduler name)
- Duration
- Location (if set on scheduler)
- Your contact information
- Cancellation policy (if applicable)
- “Add to Calendar” option
The notification looks identical to a self-booked session—athletes can’t tell if you booked them manually vs. they booked themselves.
Using Copilot for faster booking
CoachIQ Copilot can speed up the booking process by interpreting natural language:1
Access Copilot
In the Booking Builder, look for the “CoachIQ Copilot” panel on the right side.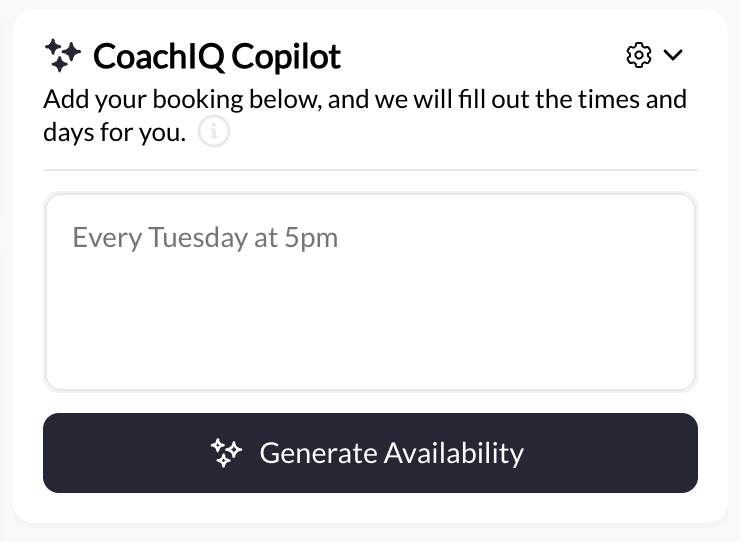
2
Describe the booking
Type a natural language description:Examples:
- “Every Tuesday at 5pm”
- “Next Monday at 3pm”
- “Fridays at 10am for 4 weeks”
Copilot works best for recurring patterns, but can also handle single bookings.
3
Generate and review
Click “Generate Availability” and Copilot will:
- Interpret your description
- Auto-fill date/time fields
- Suggest booking pattern
Common manual booking scenarios
Makeup session after athlete cancels
Makeup session after athlete cancels
Situation: Athlete canceled last-minute due to illness. You want to give them a free makeup session.Process:
- Open Booking Builder
- Select athlete
- Choose same scheduler as original session
- Uncheck “Redeem credits” (so they’re not charged twice)
- Select new date/time
- Create booking
VIP client who wants you to schedule
VIP client who wants you to schedule
Situation: High-value client prefers you schedule their weekly sessions rather than them self-booking.Process:
- Open Booking Builder
- Select VIP athlete
- Choose their preferred scheduler
- Leave “Redeem credits” checked (normal credit consumption)
- Select their preferred day/time
- Create booking
Walk-in or phone booking
Walk-in or phone booking
Situation: Athlete calls asking if you have availability today at 4pm.Process:
- Check calendar for conflicts at 4pm
- If available, open Booking Builder
- Search for athlete by phone number or email
- Select appropriate scheduler
- Choose today’s date, 4pm time
- Create booking
Special request outside normal hours
Special request outside normal hours
Situation: Regular athlete needs session Tuesday 7am, but you’re normally only available 9am-5pm.Process:
- Open Booking Builder
- Select athlete
- Choose scheduler
- Check “Allow custom date selection”
- Select Tuesday, manually enter 7:00 AM
- Verify no conflicts on calendar
- Create booking
Complimentary or free session
Complimentary or free session
Situation: You want to give new athlete a free trial session, but your scheduler normally charges 1 credit.Process:
- Open Booking Builder
- Select athlete
- Choose the credit-based scheduler
- Uncheck “Redeem credits”
- Select date/time
- Create booking
Fixing athlete's booking error
Fixing athlete's booking error
Situation: Athlete accidentally booked wrong scheduler. You need to correct it.Process:
- Cancel the incorrect booking (Article #21)
- Open Booking Builder
- Select athlete
- Choose correct scheduler
- Check “Redeem credits” if the original booking refunded credits
- Book at the same or corrected time
- Communicate the fix to athlete
Troubleshooting manual booking issues
Athlete says they didn't receive confirmation
Athlete says they didn't receive confirmation
Possible causes:
- Athlete’s notification settings disabled
- Email in spam folder
- Incorrect contact information in athlete profile
- System notification delay
- Verify booking appears on YOUR calendar
- Check athlete’s profile has correct email/phone
- Ask athlete to check spam/junk folder
- Manually send them confirmation (screenshot or message)
- Have athlete check notification settings in their account
Credits weren't deducted when they should have been
Credits weren't deducted when they should have been
Possible causes:
- “Redeem credits” checkbox was unchecked
- Athlete credit balance wasn’t refreshed after booking
- Check booking details to verify credit redemption setting
- View athlete’s credit transaction history
- If credits weren’t deducted but should have been:
- Go to athlete’s profile
- Manually deduct appropriate credits
- Add note explaining the manual adjustment
Can't find athlete in search
Can't find athlete in search
Possible causes:
- Athlete hasn’t been added to system yet
- Typing name/email incorrectly
- Athlete account is deactivated
- Try searching by email instead of name
- Go to People → Clients and search there
- If athlete doesn’t exist: Add Client to create their profile first
- If athlete exists but still not showing: Clear search and try again
- Check if athlete has “Customer” role assigned
Booked outside availability but shouldn't have
Booked outside availability but shouldn't have
Situation: Accidentally checked “Allow custom date selection” and created booking at impossible time.How to fix:
- Delete the incorrect booking
- Create new booking WITHOUT “Allow custom date selection” checked
- Notify athlete of time change
- Double-check calendar for actual availability
Manual booking best practices
Verify Before Booking
Always check your calendar for conflicts before manually booking, especially when using custom date selection. Double-booking yourself causes major problems.
Communicate Clearly
If manually booking for someone else, confirm the date/time with them before creating the booking. Prevents confusion and reschedules.
Document Special Cases
For comp sessions or exceptions, add a note in the booking details or athlete profile explaining why normal rules were bypassed.
Consistent Credit Handling
Decide on your policy: Do makeup sessions consume credits? Are trials always free? Be consistent so athletes know what to expect.
Related articles
- Setting Up Your First Scheduler - Learn about scheduler configuration and settings
- Managing Athlete Credits - Understanding credit balances, transactions, and manual adjustments
- Calendar Management - Tips for avoiding conflicts and managing your schedule
- Cancellation & Rescheduling Policies - Setting up and enforcing cancellation rules
- Creating Recurring Bookings - Automate standing appointments for regular athletes
Need to change a booking after it’s created? See Editing & Rescheduling Bookings.