

Open the editor
- From Content → Media Hub, open a video and choose Create Video to load it for analysis.
- Or go to Content → Video Analysis and click Create video, then choose Add Media on the slide.
- To answer a video an athlete sent you, click Review submissions (see below).
Prepare the slides
Choose your orientation, layout, background, and optional logo before building the analysis. Add media to the slide, then use Add slide when you need another section. The slide strip on the right shows the current slide. Use the drawing, text, and move tools to prepare the points you want to explain. The Camera menu controls the camera presentation; recording setup lets you select the camera and microphone devices.Record your feedback
- Choose New Recording.
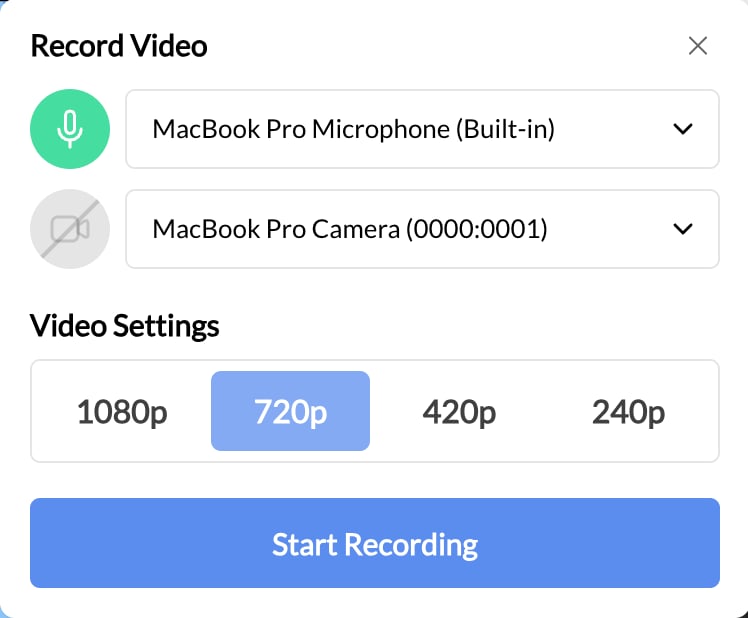
- Select the microphone and camera you want to use. Enable only the inputs you need.
- Choose a resolution under Video Settings. The current options are 1080p, 720p, 420p, and 240p.
- Choose Start Recording and confirm the timer starts.
- Play or pause the source, move between slides, and draw or add text while explaining the clip. Use Q to pause or resume the recording.
- Choose Save when your feedback is complete.
Save and check playback
Keep the editor open while the recording saves. Wait for processing, then play the completed video and check the sound, annotations, and ending before sharing it. The saved analysis appears in Media Hub. If the tile says Processing, wait until the new recording is ready to play. A long recording may say Taking longer than expected; leave the tab open and it turns into a playable video once it’s ready. You do not need a separate export step to add the saved recording to Media Hub. After recording, the finished screen shows the video’s title as text you can edit in place. Type a new title to rename it; the new title shows in Media Hub, including for an analysis made for an athlete. If the title doesn’t save, you’re told, and what you typed stays so you can try again. If a save fails after a connection problem, reconnect and choose Retry Save in the same editor. Keep the page open so the recording remains available for the retry.Share the saved analysis
After saving, use Send to users to choose the intended recipients, or Copy Link to copy the analysis link. Review the recipient selection and video before sending. You can also find the recording in Media Hub, copy its link, or download it. To include the analysis in a structured training experience, add the saved media to a lesson or program.Re-record a saved analysis
This section is about analyses you made yourself in Media Hub or Video Analysis. For athlete submissions, see Re-record a review. Choose Re-record in the analysis editor, record the replacement, and save it. Wait for processing and check that the new take plays. Send to users and Copy Link remain available after a re-record. A temporary Processing label does not mean the item was removed. If saving fails, reconnect and use Retry Save.Review athlete submissions
When a lesson asks athletes to upload a video, their submissions wait for you in Video Analysis. Only Admins can review submissions; Coaches see a note saying so.- Go to Content → Video Analysis and click Review submissions.
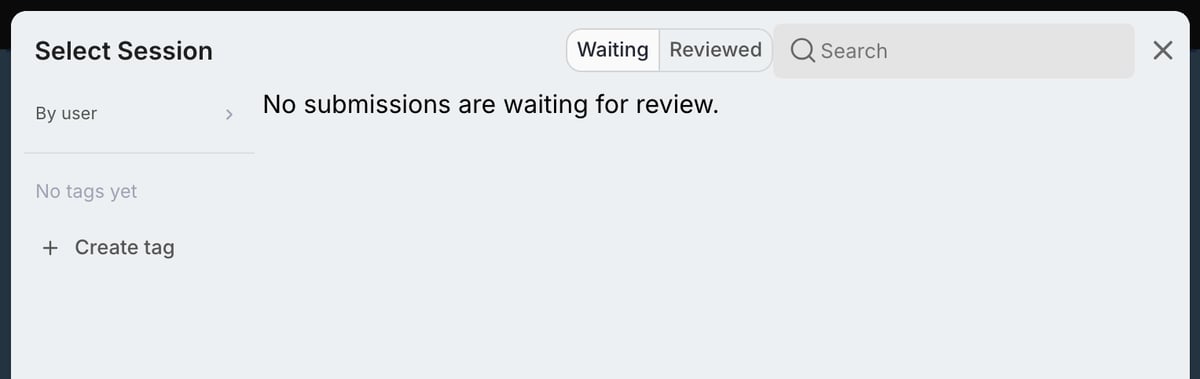
- The Select Session window opens on Waiting: submissions that still need a review. Reviewed lists the reviews you’ve already sent. Each submission shows the athlete’s name and the date it arrived.
- Narrow the list with By user, a tag, or Search. Your filters stay when you switch between Waiting and Reviewed. When nothing matches, the window says why, for example “No submissions are waiting for review.”
- Open a waiting submission. The athlete’s video loads into the editor. Record your review the same way as any analysis and submit it.
Re-record a review the athlete already has
Choose Re-record on the review. CoachIQ asks Re-record this review? first. If you go ahead:- The submission goes back to Waiting and the old recording is removed.
- Recording starts again from the athlete’s original video, not from your old review.
- The athlete sees no review until you record and submit a new one.
Use keyboard shortcuts
Open Shortcuts in the editor to see the current list.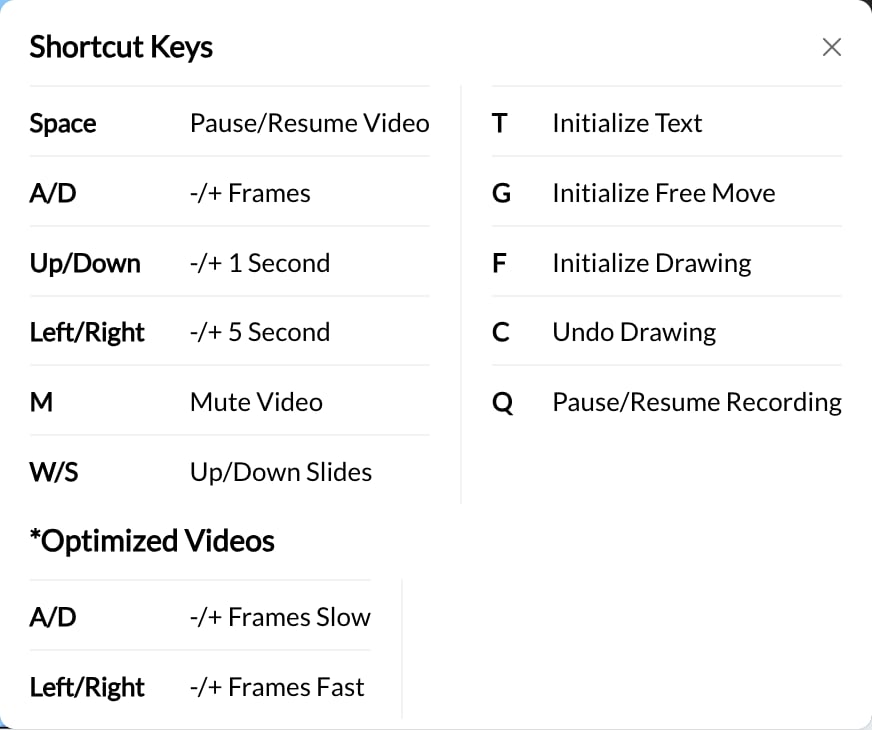
For optimized videos, the shortcut panel lists frame-based movement for A/D and Left/Right. Muting the source video is separate from turning off your recording microphone.
Troubleshoot without losing work
- No microphone or camera: check the selected input and the browser’s permission for CoachIQ before recording.
- Source still loading: wait for the source download to finish before starting the take.
- Source won’t load: read the message in the editor and use its retry option if one is offered. If it still fails, note the exact message for support.
- Save failed: keep the editor open, restore the connection, and use Retry Save.
- Replacement still processing: wait, then check playback from both the editor and Media Hub before sharing.
- Need help: note the approximate recording length, the exact error, and whether the problem occurs during source upload, recording, saving, or playback. These details help support investigate the right step.