

Where to find this: Tools → Automations, then click any automation or Create Automation
The builder, top to bottom
The builder is one long page with a section for each part of the automation, and a side menu (Details · Triggers · Data Sources · Conditions · Actions · Logs · Settings) that jumps to each. The header holds Test Run and Update (labelled Create for a new automation). Nothing you change is saved until you click Update.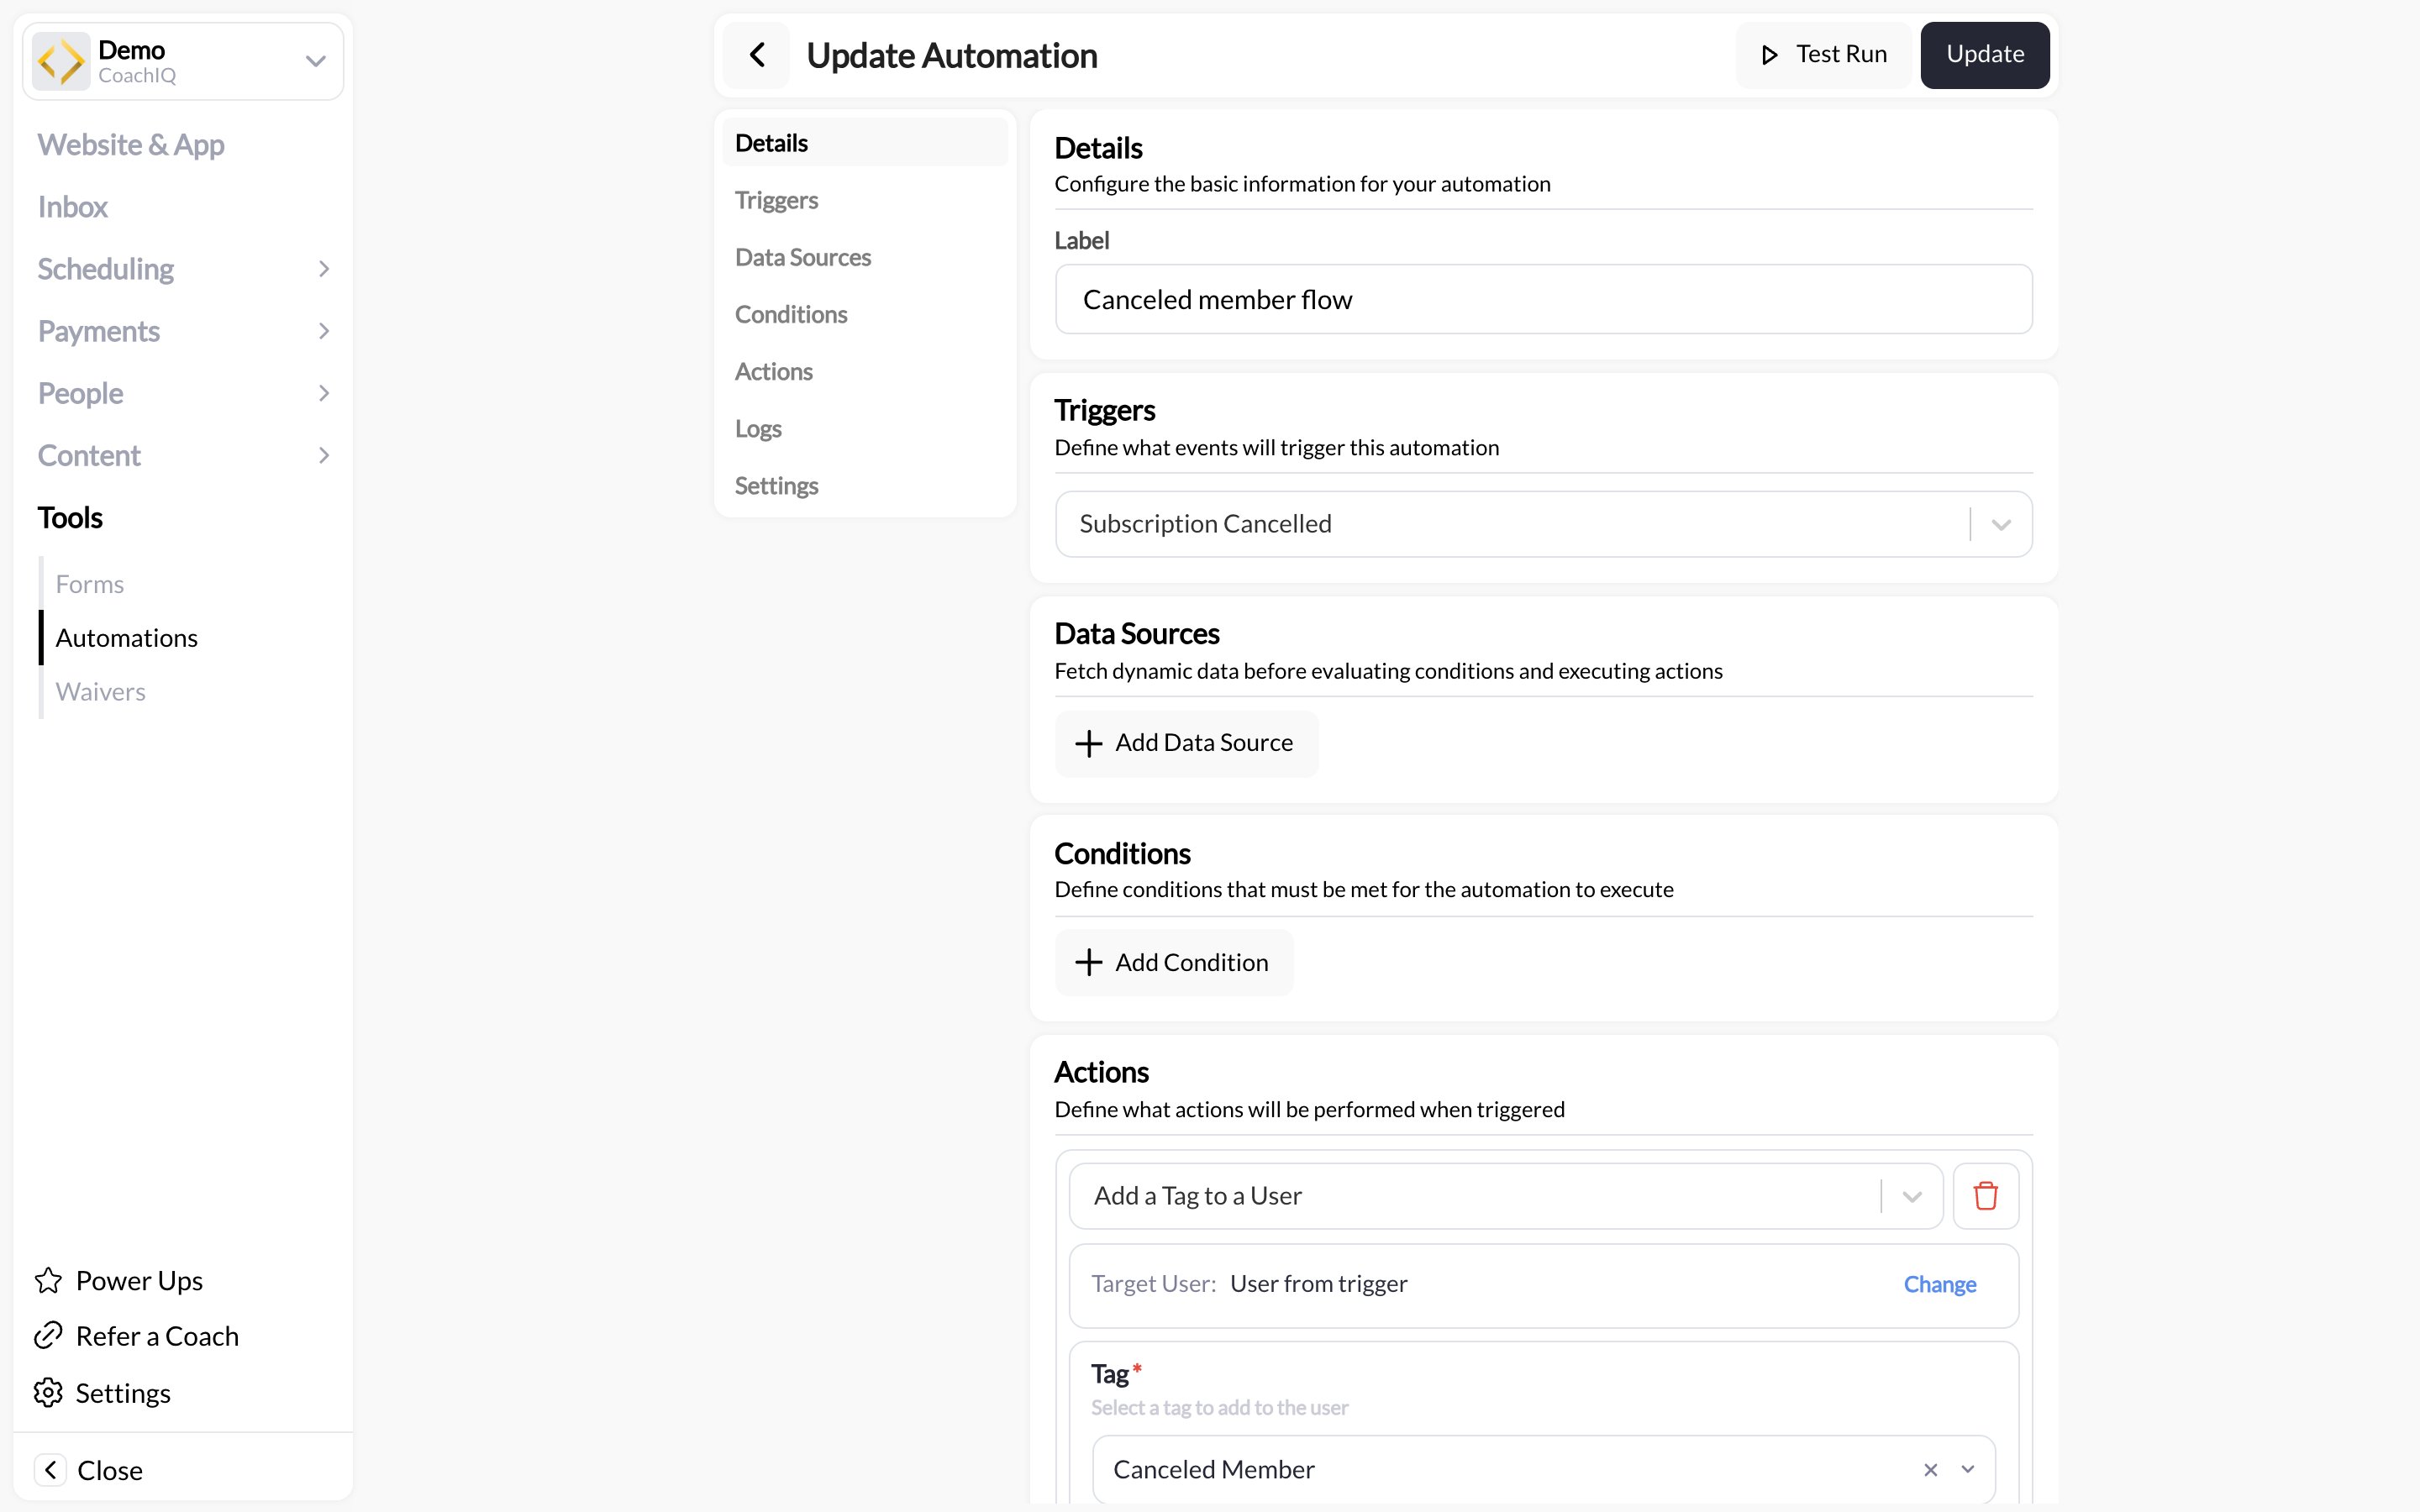
Section names and labels were checked against the live app on 2026-09-02. For the full list of triggers, actions, and dynamic fields see the Triggers and actions reference.
Details
The automation’s label. This is what you see in the Automations list and in Execution Logs, so make it specific: “Trial → membership nudge, day 3” rather than “Follow-up”.Triggers
The event that starts the automation, such as Purchase Made, Booking Created, Form Submitted, or a schedule. One trigger per automation. When the event fires, the person it happened to becomes the user every later section can reference.Data Sources
Extra information fetched before the conditions run. Use a data source when your condition or message needs something the trigger alone does not carry: the athlete’s current credit balance, their active subscription, their upcoming bookings. Add the source here and its fields become available in Conditions and Actions.Conditions
Filters that decide whether the automation continues. Each rule compares a field to a value: Product Label · Equal To · “Summer Camp”, Interval · Equal To · month, and so on. Click Add Condition to create the first group and rule, then Add Rule for another rule. Rules sit inside groups, and you choose how a group combines them:- And — every rule in the group must be true
- Or — any one rule is enough
Actions
What happens when the conditions pass. Click Add Action for each step. The two most used:
Target User has three choices on the messaging and tag actions: User from trigger (the person the event happened to), trigger user and their guardians, or a specific person you pick after clicking Change. Choose the guardians option when the triggering athlete may be a managed child with no email or login of their own: a welcome announcement, team tag, or practice reminder then reaches the parent as well, instead of landing on a profile nobody checks. A parent who triggers the automation is a single target; the option never adds children.
The 180 / 160 counter is a cost hint, not a limit. Texts longer than 160 characters still send; they go out as more than one segment and each segment is billed from your SMS credits (see How SMS credits work).
Inside any message field, type
# to insert a field option from the trigger or a data source, or @ to insert a CoachIQ field such as the athlete’s first name, the session title, or the booking time (the field hint says exactly that: “Use # for field options, and @ for CoachIQ fields”). Fields fill in per person when the automation runs.
Actions run in order. Put the message you most want delivered first.
Execution Logs
Start here when a message or action seems missing. Click Check for events to refresh, then find the run by its full event and action names and the local date and time. Each row summarizes the outcome in words; expand it to check individual actions.- Succeeded means the actions completed, but a successful run alone does not prove someone read a message.
- Partial success means some actions completed and others did not. Check each result before running the automation again, so you do not repeat an action that already succeeded.
- A failed condition means the event did not qualify for the actions that follow.
- Expand Show technical details when you need more detail for troubleshooting or support.
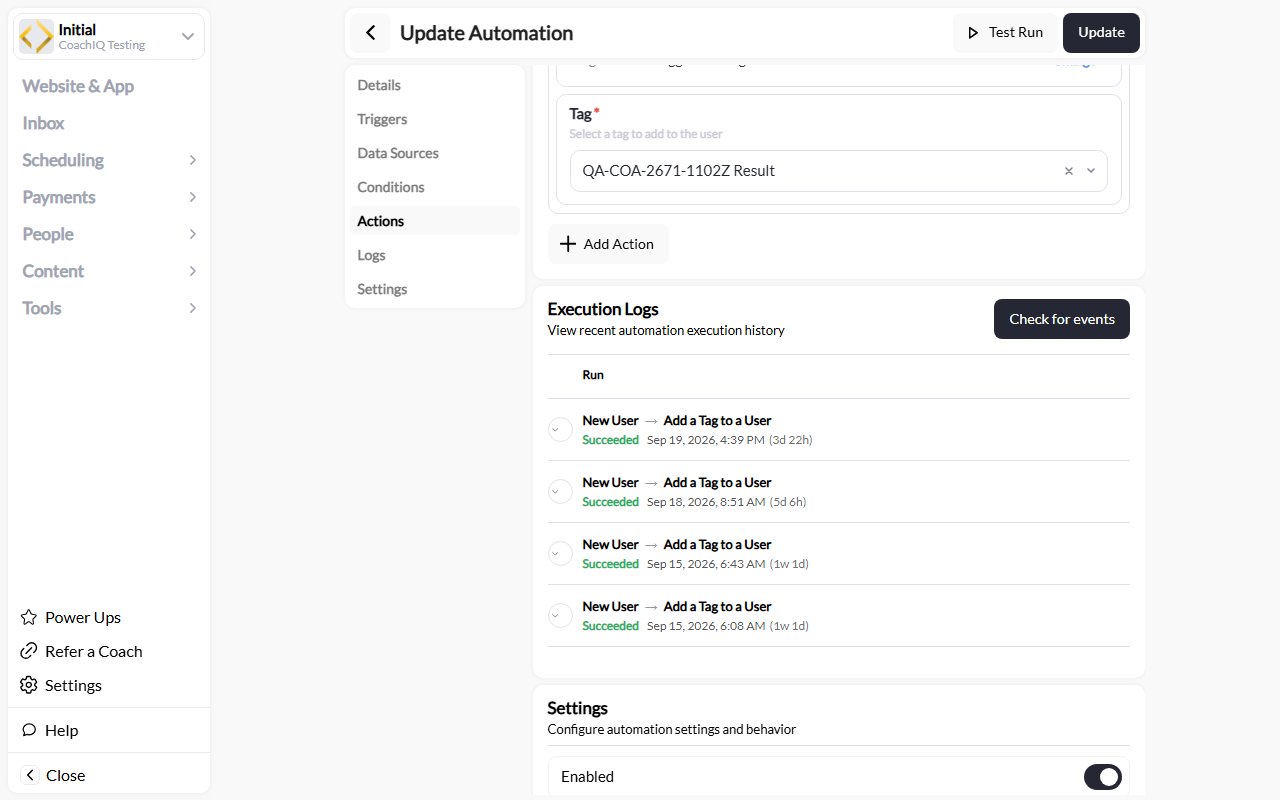
Test-account example of automation execution history.
Settings
The Enabled toggle. Off stops automatic runs; it does not make a manual Test Run a preview. There is no separate delete button; the section says “Disable above to delete this automation”, so switch Enabled off first and the delete option appears. Deleting is permanent, so if you may want it back, leave it disabled or archive it from the Automations list instead (see below).Archiving an automation
Archiving is the middle ground between disabling and deleting. Use it for automations you are done with (last season’s registration flow, a one-off campaign) so the Tools → Automations list shows only what is live.- Where: from the automations list at Tools → Automations, not from inside the builder. Archive the automation from its row.
- What happens: the automation stops running and leaves the active list. Its Execution Logs and configuration are kept.
- Getting it back: switch the list to show archived automations, open the one you want, and restore it. It returns to the active list with its history intact; check the Enabled toggle before relying on it again.
Archive rather than delete when there is any chance you will run the same flow next season. A deleted automation and its logs are gone; an archived one is a click away.
Test Run
Test Run performs the configured actions. Messages really send, and other actions can change records. Before testing, save your changes and check the target, conditions, and every action. Use a test profile and an email address or phone number you control. Keep Enabled off while preparing the automation, but remember that it does not prevent a manual test. After testing, review Execution Logs, confirm the result on the test profile, then enable and save the automation when you are ready for automatic runs.A note on the older screenshots
Some pages in this section show an earlier version of the builder with a blank canvas and a Select Trigger button. The sections above are the current layout; the concepts are the same.Common questions
My automation ran but nobody got the message
My automation ran but nobody got the message
Open Execution Logs. If the run shows conditions failing, the person did not match. If an action shows an error, check the target user has a phone (for SMS) or a portal login (for announcements).
Can one automation have two triggers?
Can one automation have two triggers?
No. Create a second automation with the other trigger. Templates make that quick: see Automation templates.
What is the difference between # and @ fields?
What is the difference between # and @ fields?
# fields come from the event that fired or a data source you added (the product bought, the form answers). @ fields are CoachIQ’s standard fields about the person and your business (first name, session title, your group name).Related articles
Triggers and actions reference
Every trigger, action, and dynamic field
Automation templates
Prebuilt automations to start from
Scheduled automations
Automations that run on a timer instead of an event
Build your first automation
A guided first build