

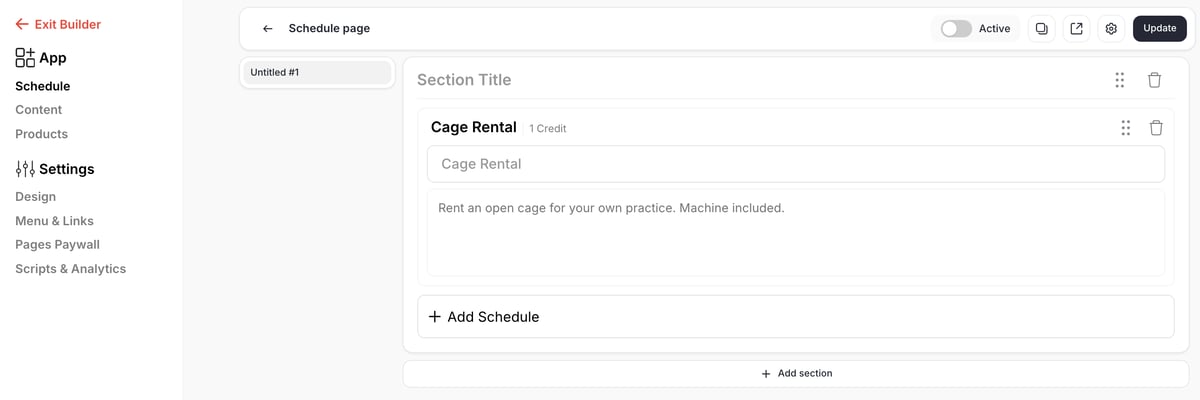
Where to find this: Website & App › App, click Edit app, then Schedule in the builder’s left menu. The page is titled Schedule page in the builder; families see it as Sessions unless you rename it.
Add schedulers to the page
1
Open the Schedule page
In the builder, click Schedule in the left menu.
2
Click Add Schedule
Inside a section, click + Add Schedule. The Schedulers window lists every scheduler with its duration, price and location. Search with Search for sessions or change the order with Sort.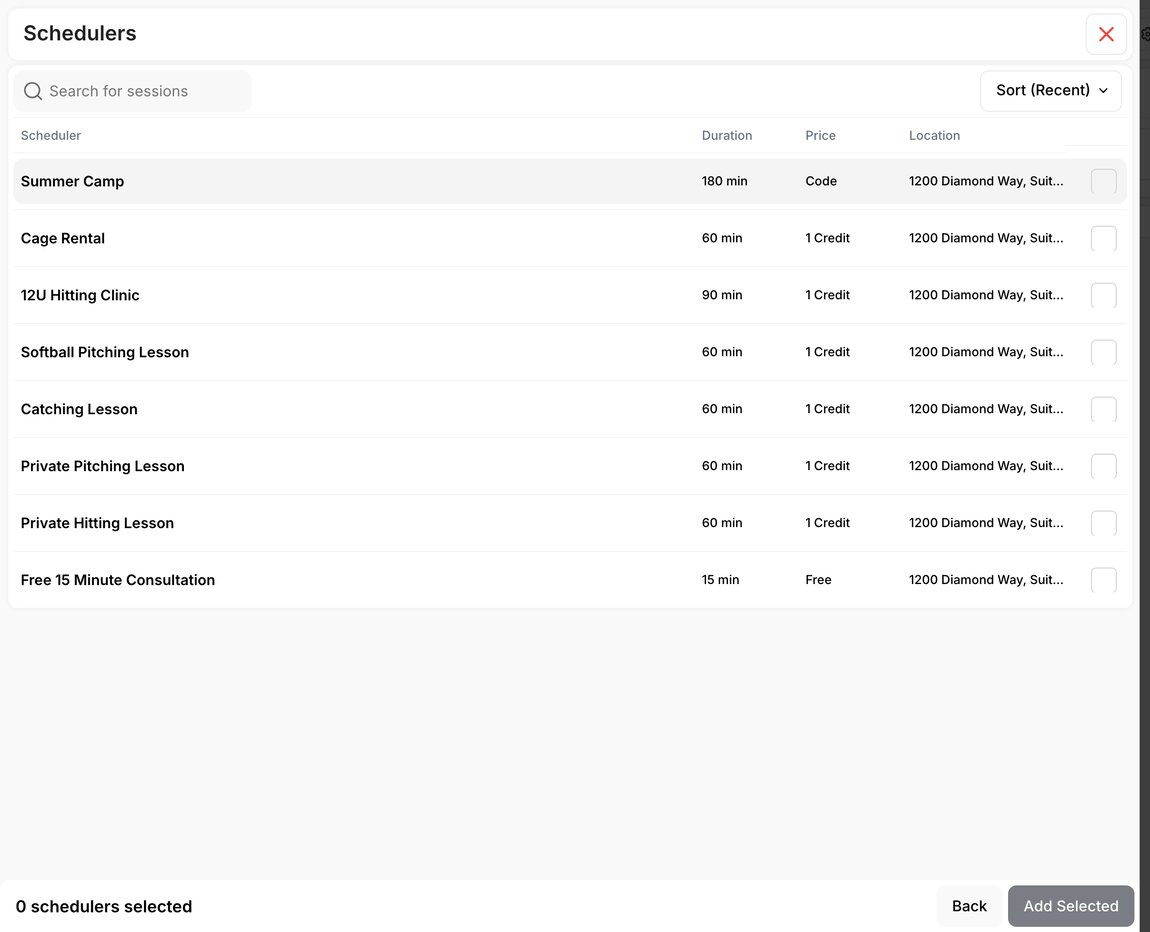
3
Pick schedulers
Tick one or more schedulers, then click Add Selected.
4
Set the card's title and description
Each scheduler shows as a card with its price (for example 1 Credit), a title box and a description box. They start with the scheduler’s own name and description. Change them to whatever families should read on this page.
5
Save
Click Update at the top right. Nothing changes in your app until you do.
Adding an inactive scheduler doesn’t switch it on. It shows a grey Inactive badge in the builder, and families don’t see it until you turn the scheduler on in Scheduling › Schedulers.
Sections
Sections are the headings families see, such as “Private Lessons” or “Cage Rentals”.- Add a section: click + Add section under the last section, then type its name in Section Title.
- Reorder: drag a section or a scheduler card by its handle (the six dots, named “Reorder” plus the name for screen readers). Cards only move from the handle, so the title and description boxes stay easy to click.
- Remove: click the trash icon. This only takes it off the page; the scheduler itself isn’t changed.
Turn the page on or off
The Active switch at the top turns the page on or off for families. In Menu & Links you can also hide the page while still letting families see their bookings (Keep Bookings visible). To limit booking to members, turn on Schedulers in Pages Paywall. Parents can book a child from a paywalled Schedule page when either the parent or that child holds a paywall product.Page settings
Click the gear icon (Page settings) at the top right.- Page name (the first box): what families see as the page title and in the menu, for example “Book a Lesson”. Leave it blank and families see Sessions.
- Slug: the end of the page’s web address, for example
/sessions. The buttons beside it copy the link and open the page. - Page Meta (SEO): the image, title, keywords and description that show when someone shares a link to the page.
What families see
- Cards: each card shows the title and description you set on this page, its price and Book Now or Learn More.
- Learn More opens the card’s own title and description, so the words you wrote for this page show there too. Where you left the card’s title or description blank, the scheduler’s own text fills in that part.
- Session details show the session length. Read More shows only when the description is cut short.
- After booking, families manage their sessions from Bookings. See Bookings, billing and orders.
Add one session to a personal calendar
After booking, families can select Add to Calendar on the confirmation screen and choose Google Calendar, Apple Calendar, Outlook.com or the calendar file. Each option includes the session name, date, time and location. Apple Calendar downloads a file to open in Calendar.Subscribe to bookings in Google, Apple, or Outlook
Families can open Settings › Calendar in your app, turn on their calendar subscription and choose Google, Apple or Outlook. It’s a private, read-only feed of their bookings; they still book and cancel in your app. Reset private link replaces the link (they then subscribe again with the new one), and Turn off stops it. This is separate from your own Google Calendar sync. If a family gets both a Google invitation and the subscription, the same session can show twice.Common questions
Where do I create a scheduler or change its price?
Where do I create a scheduler or change its price?
In Scheduling › Schedulers. The price, duration, availability and booking rules all come from the scheduler. See Creating your first scheduler.
A family can't see a scheduler. What should I check?
A family can't see a scheduler. What should I check?
- The Schedule page’s Active switch is on and you clicked Update.
- The page isn’t hidden in Menu & Links.
- The scheduler is on this page and isn’t marked Inactive.
- The scheduler has open times, and the family can book it (for example, it isn’t limited to a tag they don’t have).
- If the page is paywalled, they or their parent hold a paywall product.
Can I show different schedulers to different families?
Can I show different schedulers to different families?
Everyone sees the same Schedule page. To limit who can book, use the scheduler’s own settings, such as limiting it to a tag. See Scheduling overview.