Where to find this: Dashboard → App Builder → Content
What you’ll accomplish
Set up and organize your training programs, certifications, and resources so athletes can easily access content from their mobile app or web portal. You’ll learn how to create sections, control access levels, and optimize the layout for maximum engagement.Before you begin
Required: At least one program must exist in Content → Programs before you can display it in the Athlete Portal.
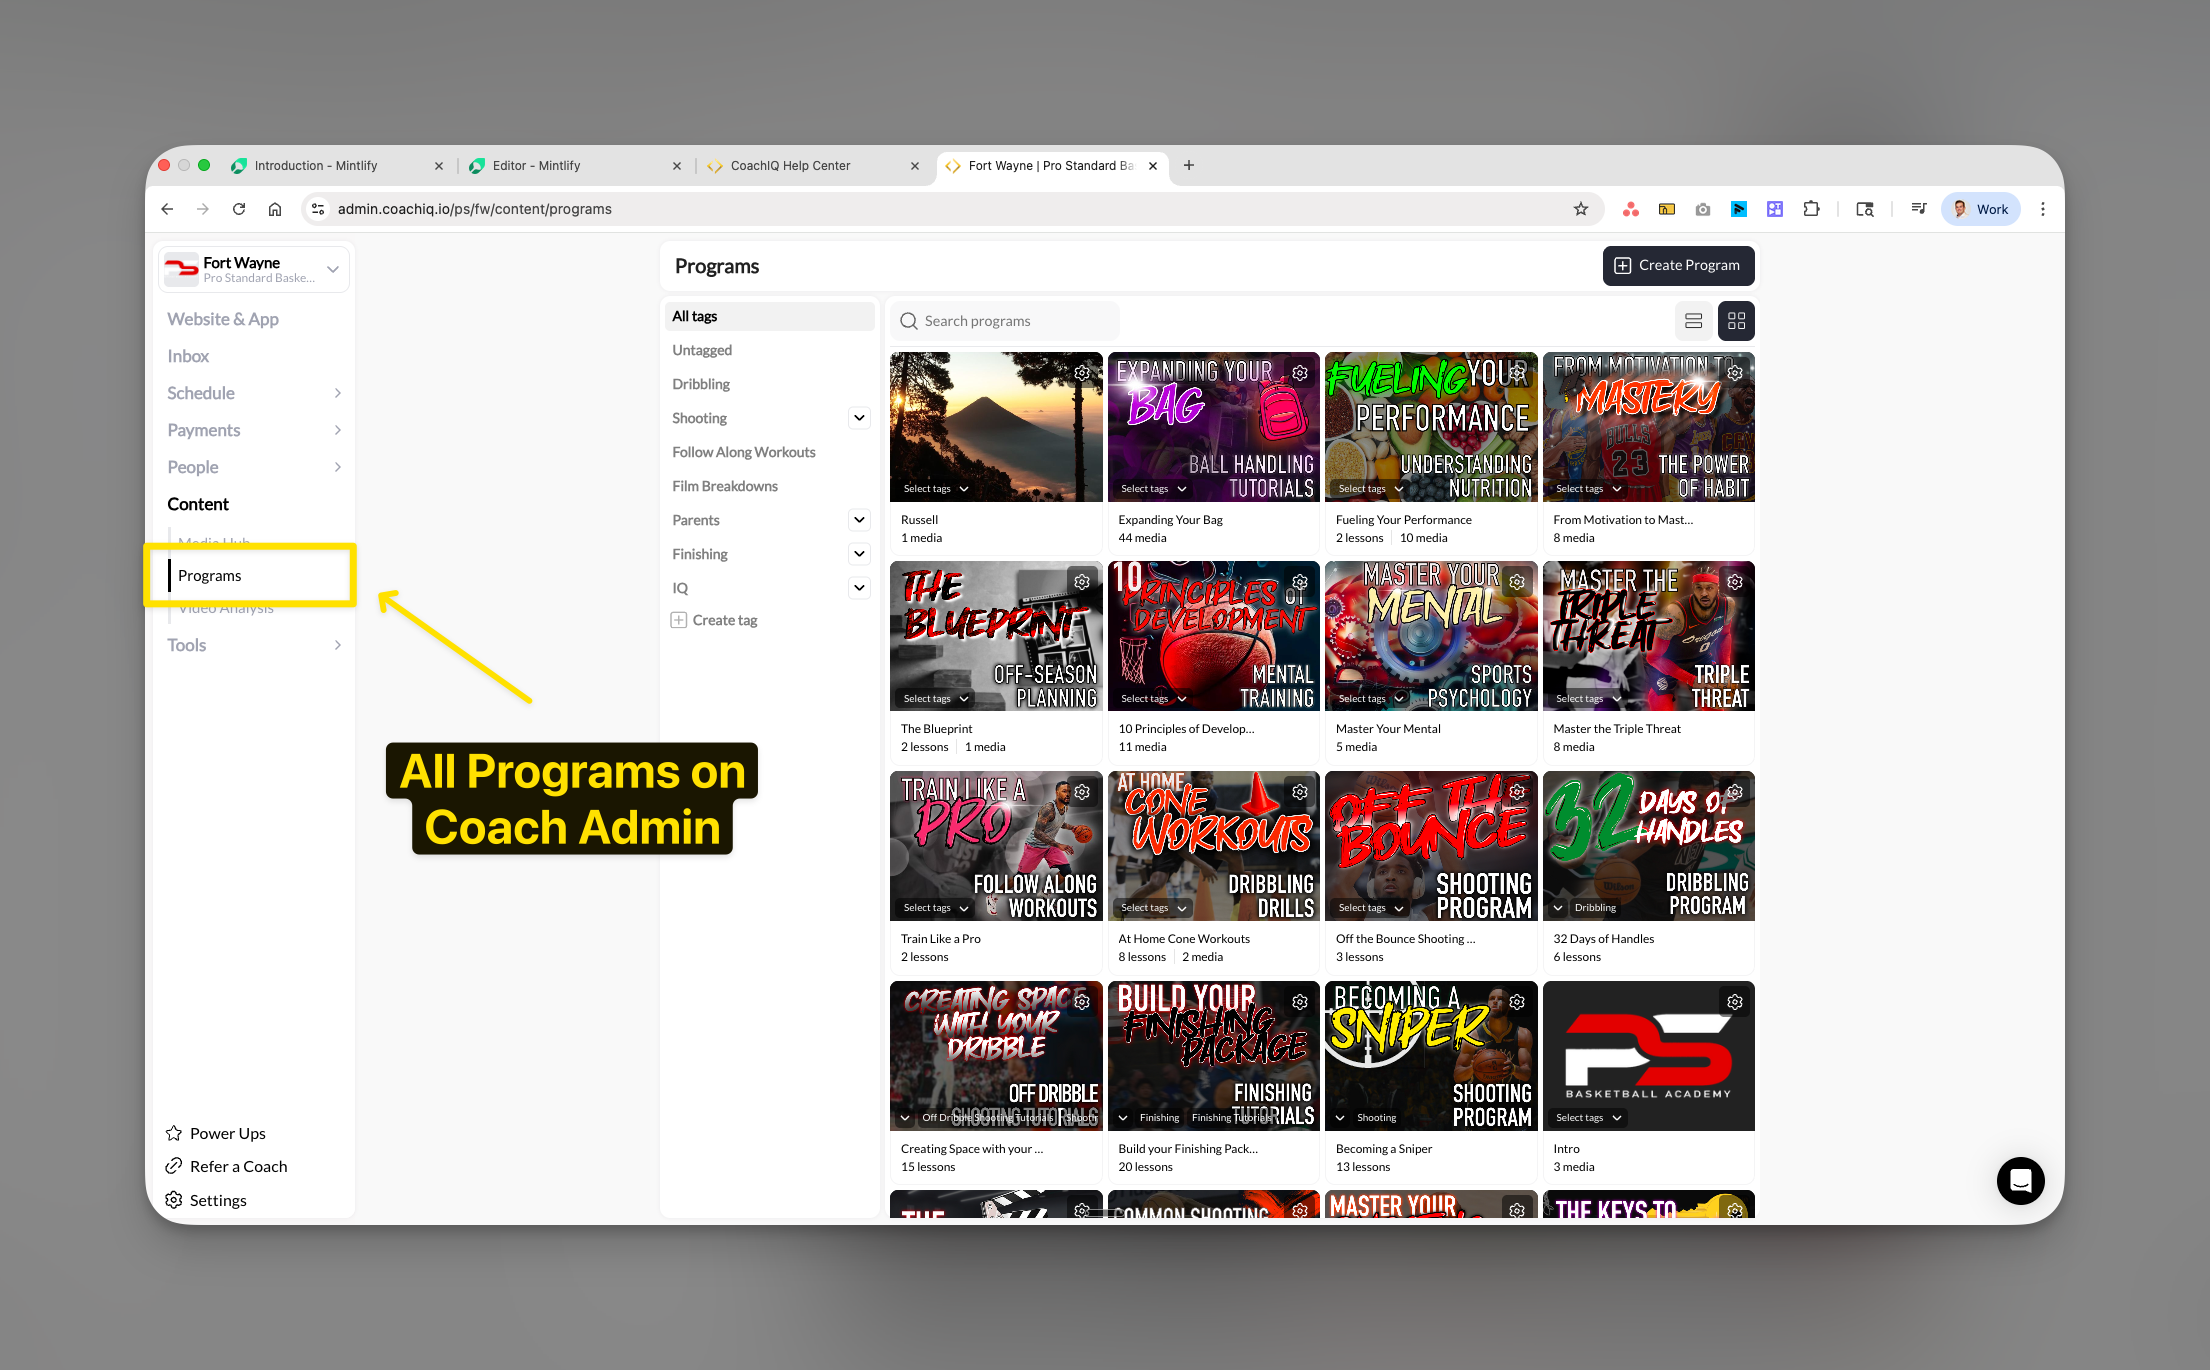
Understanding the Programs page
The Programs page displays training content, certifications, and educational resources that athletes access at their own pace.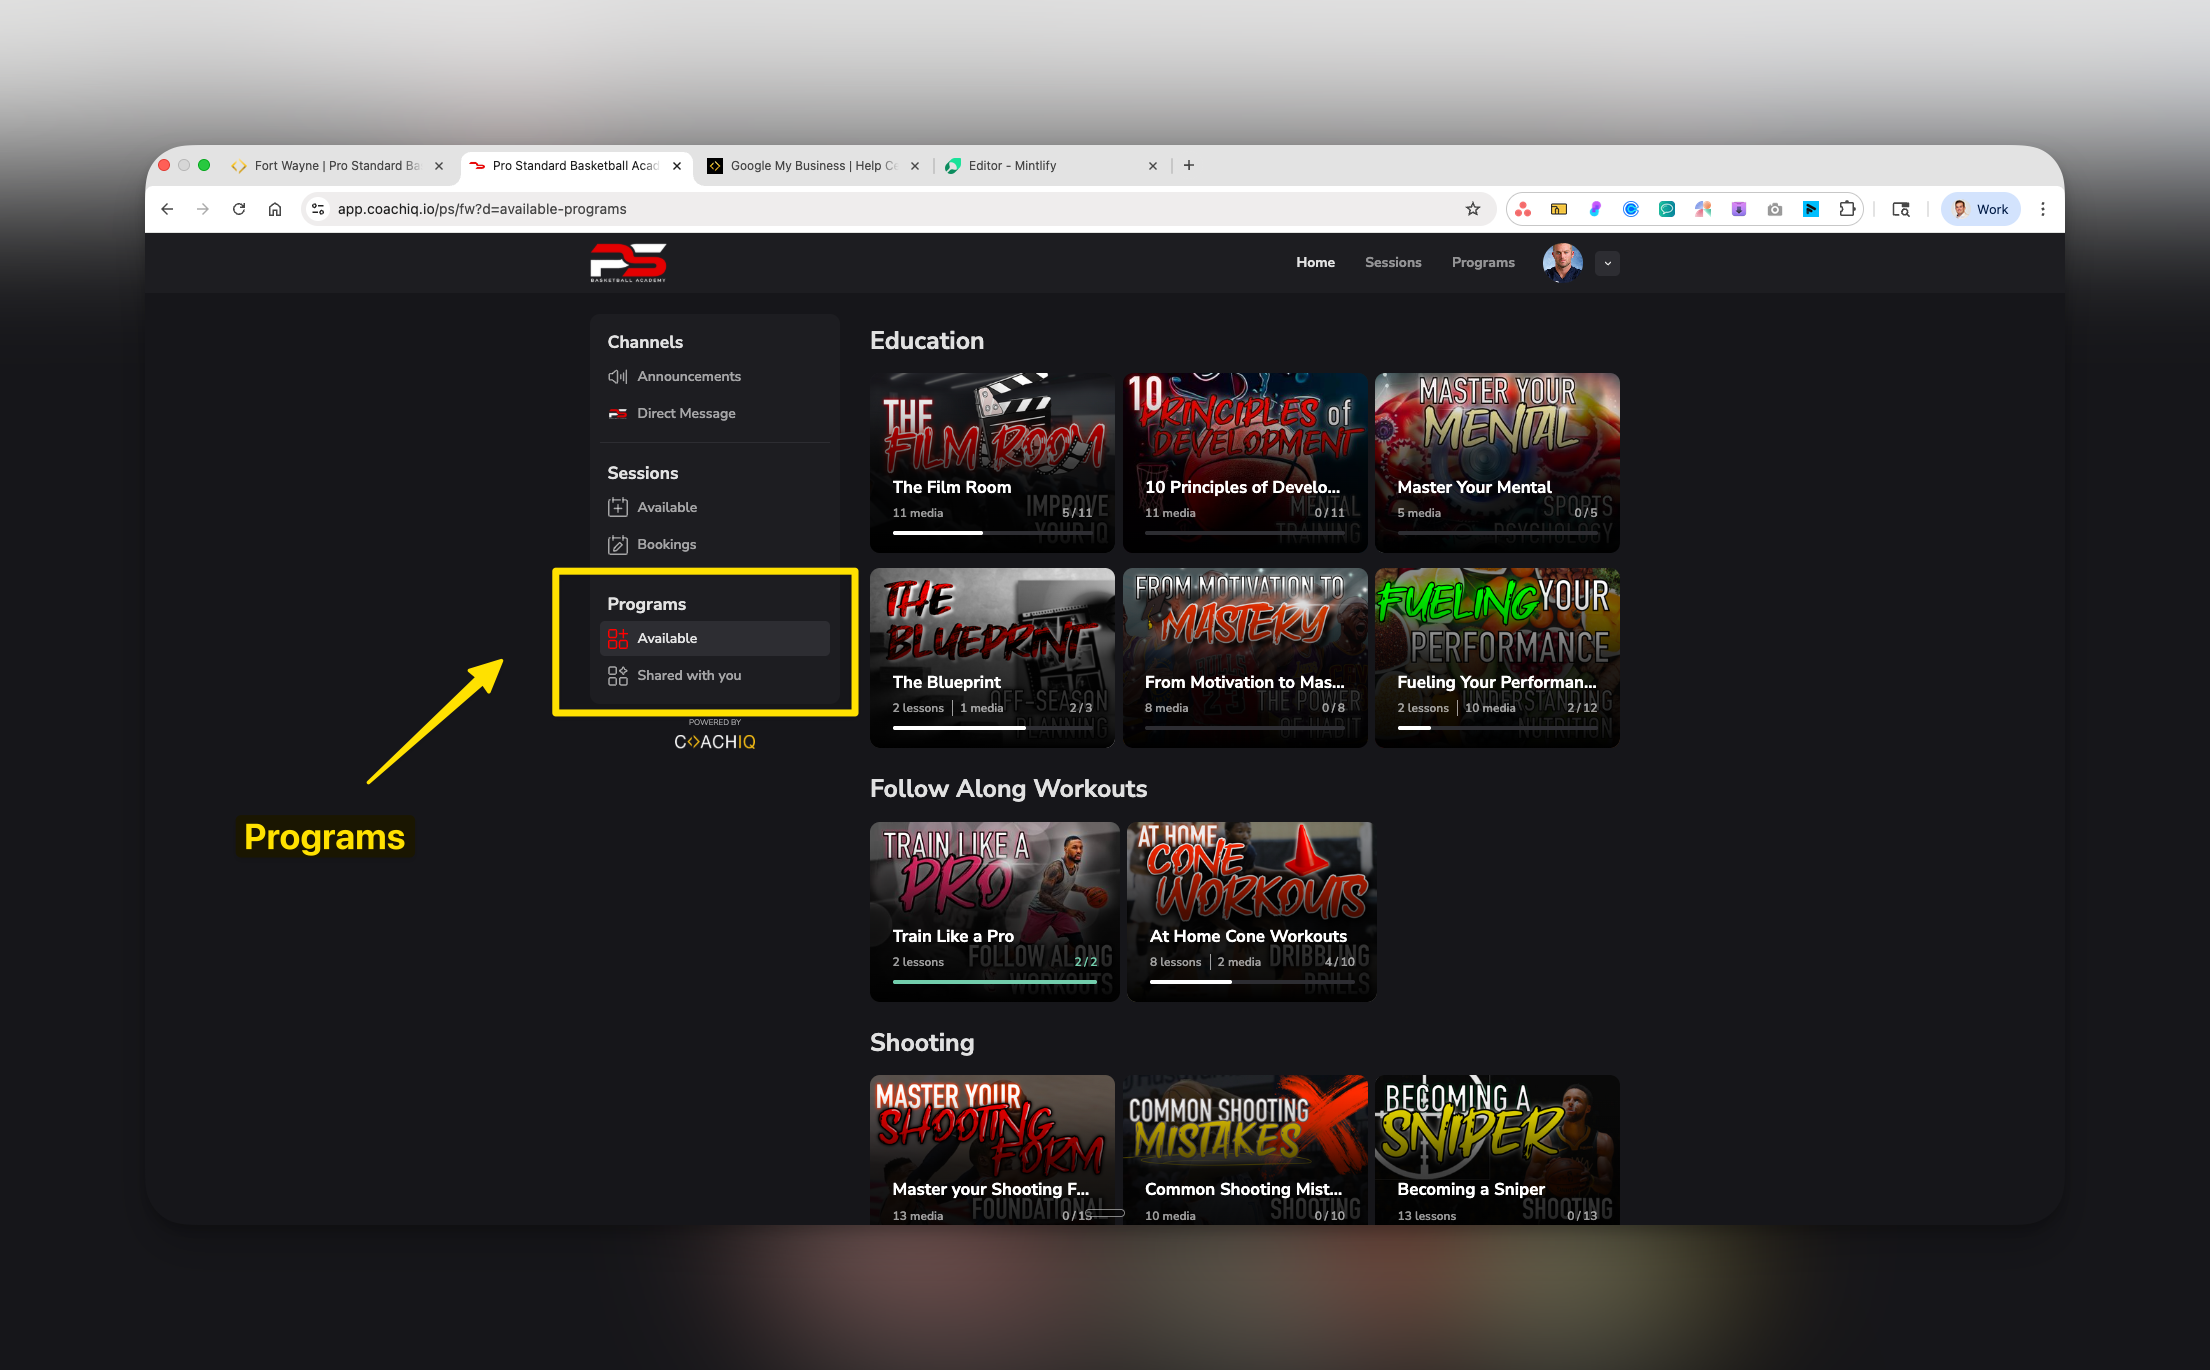
Programs vs Sessions distinction
- Quick Reference
- When to Use
| Feature | Programs | Sessions |
|---|---|---|
| Type | Self-paced content | Scheduled bookings |
| Shows | Progress percentage | Available time slots |
| Payment | One-time or subscription | Per session or credits |
| Access | Immediate after purchase | At scheduled time |
Athlete view components
- Program thumbnails with visual previews
- Lesson and media counts (format: “X lessons • Y media”)
- Completion progress for started programs
- Section-based organization
Accessing program settings
Activating the Programs page
Control athlete visibility of the Programs section through the Active toggle.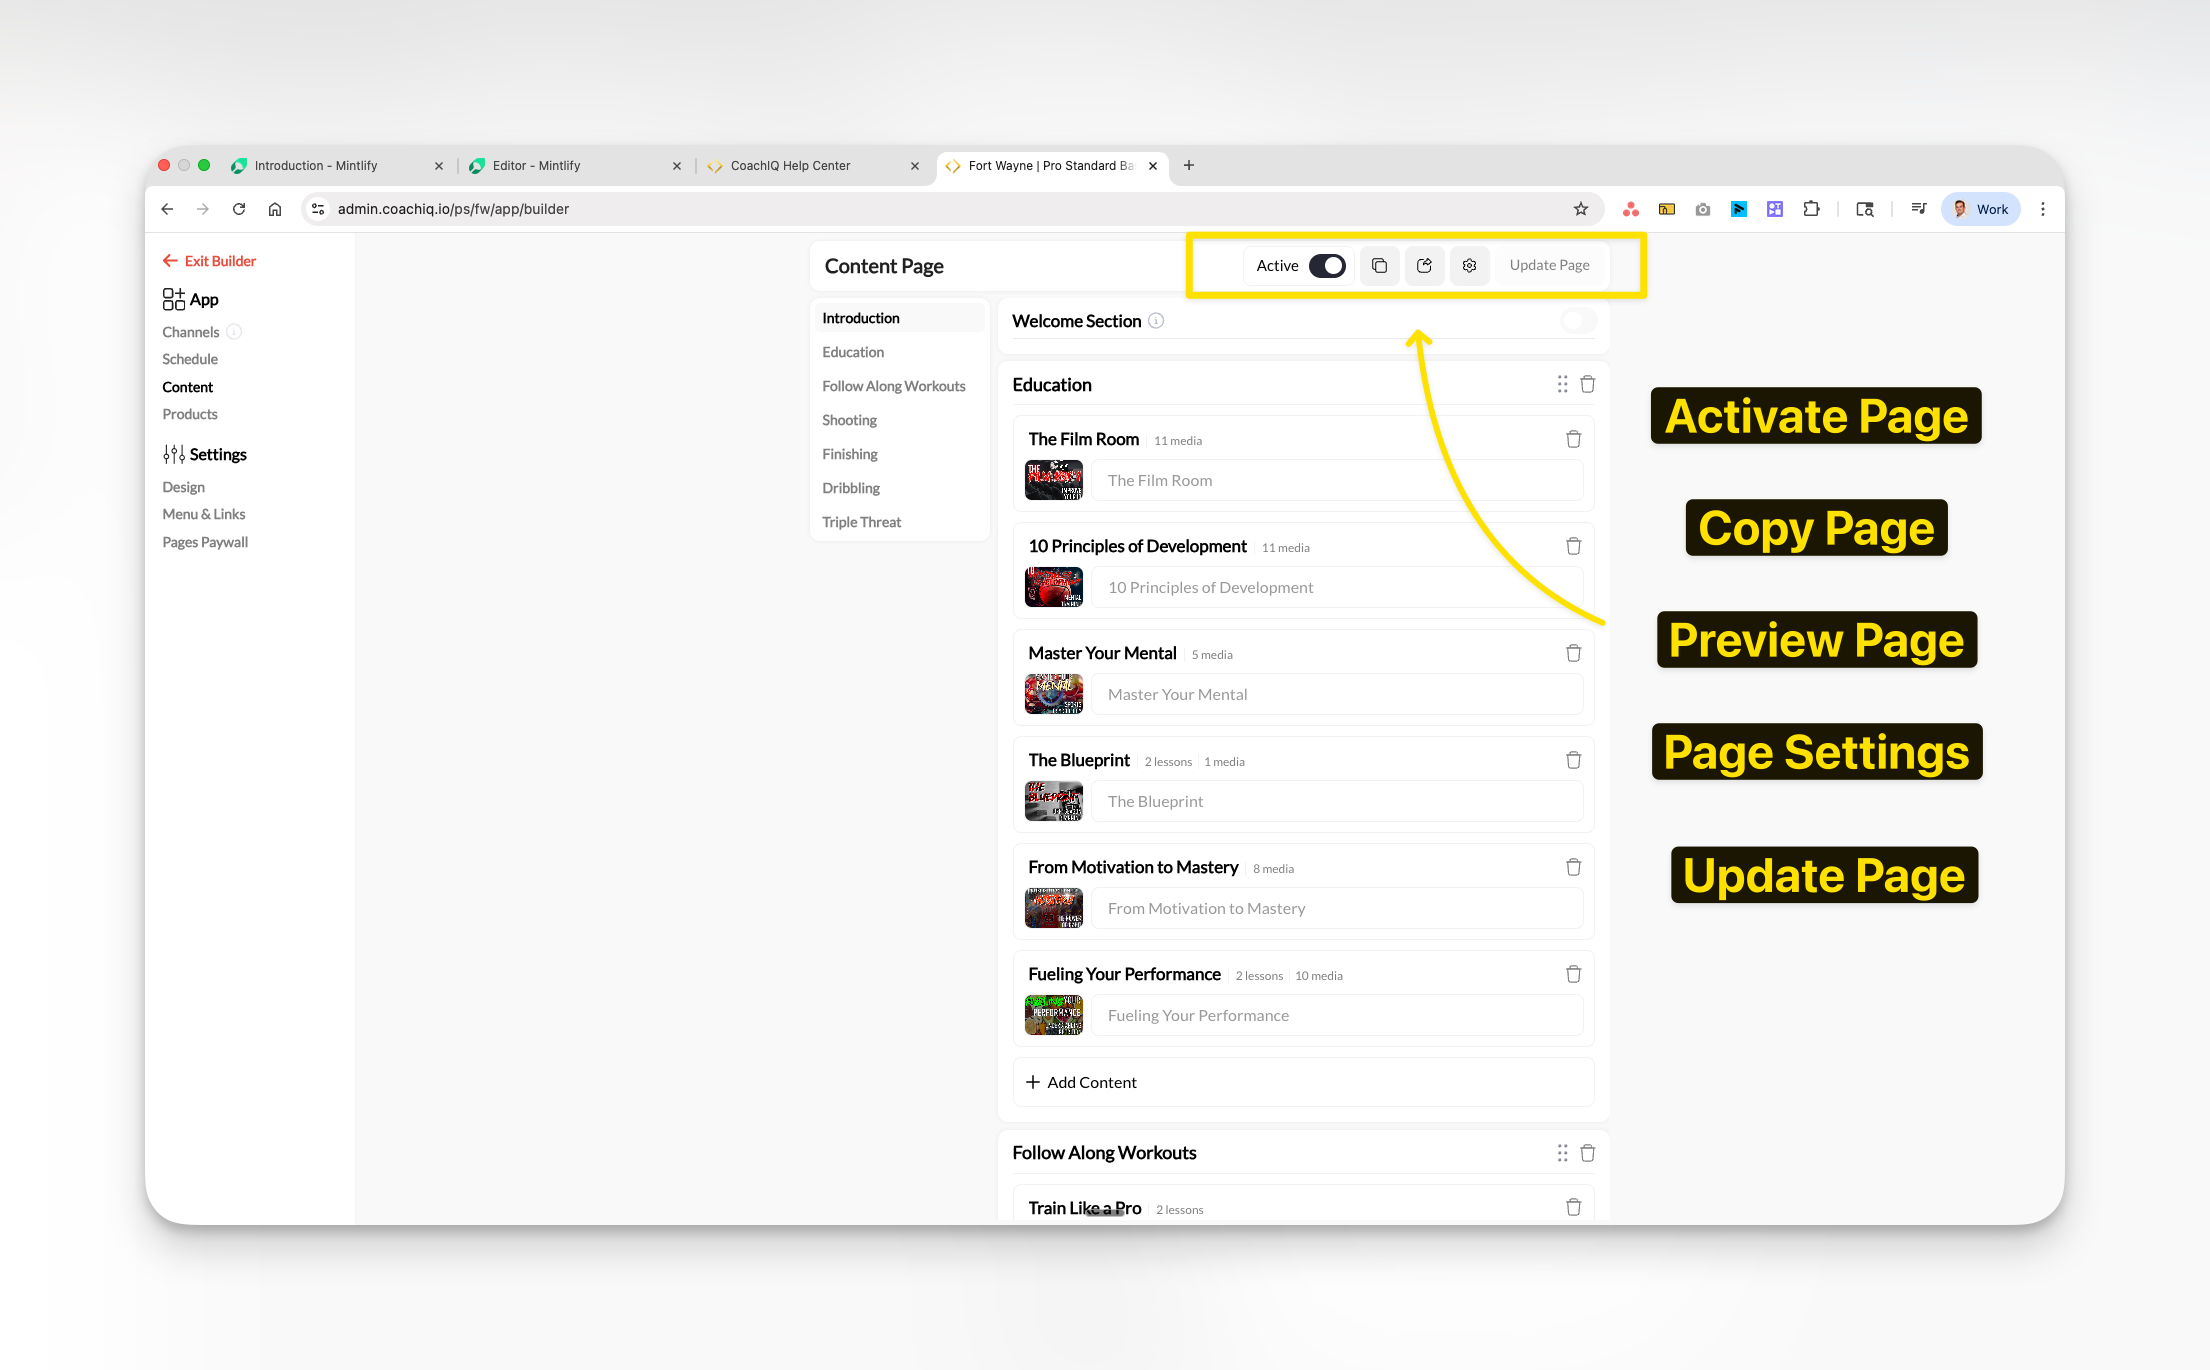
Toggle visibility
- ON: Programs visible to all athletes in their portal
- OFF: Programs completely hidden from athlete view
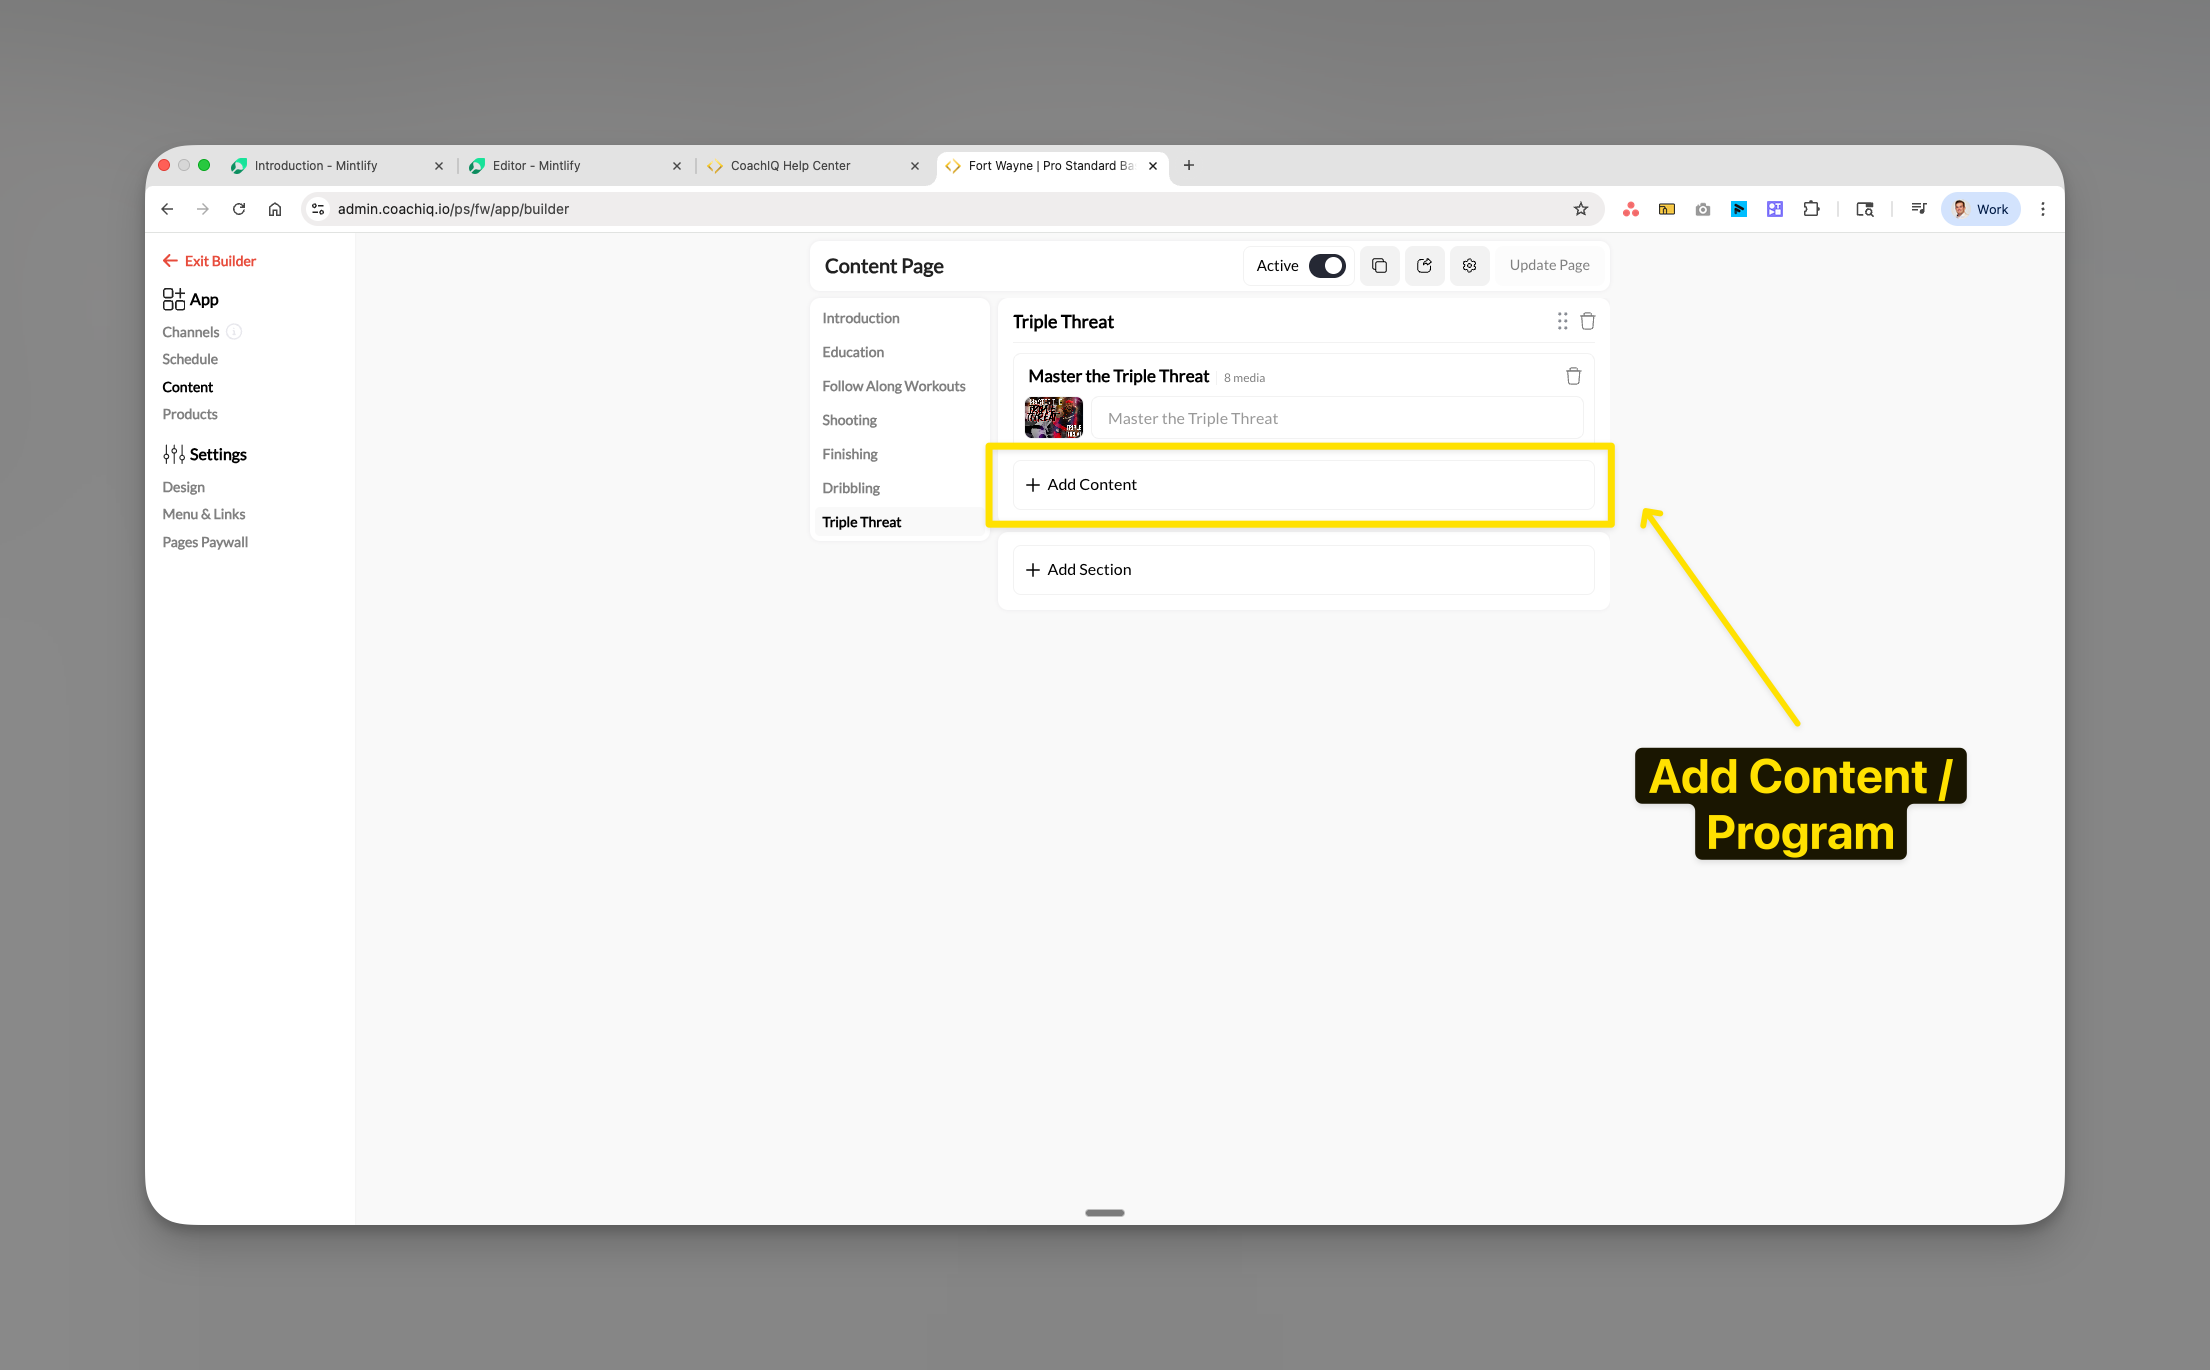
Adding individual programs
Select programs
The selection modal displays:
- Thumbnail image
- Program title
- Lesson and media count
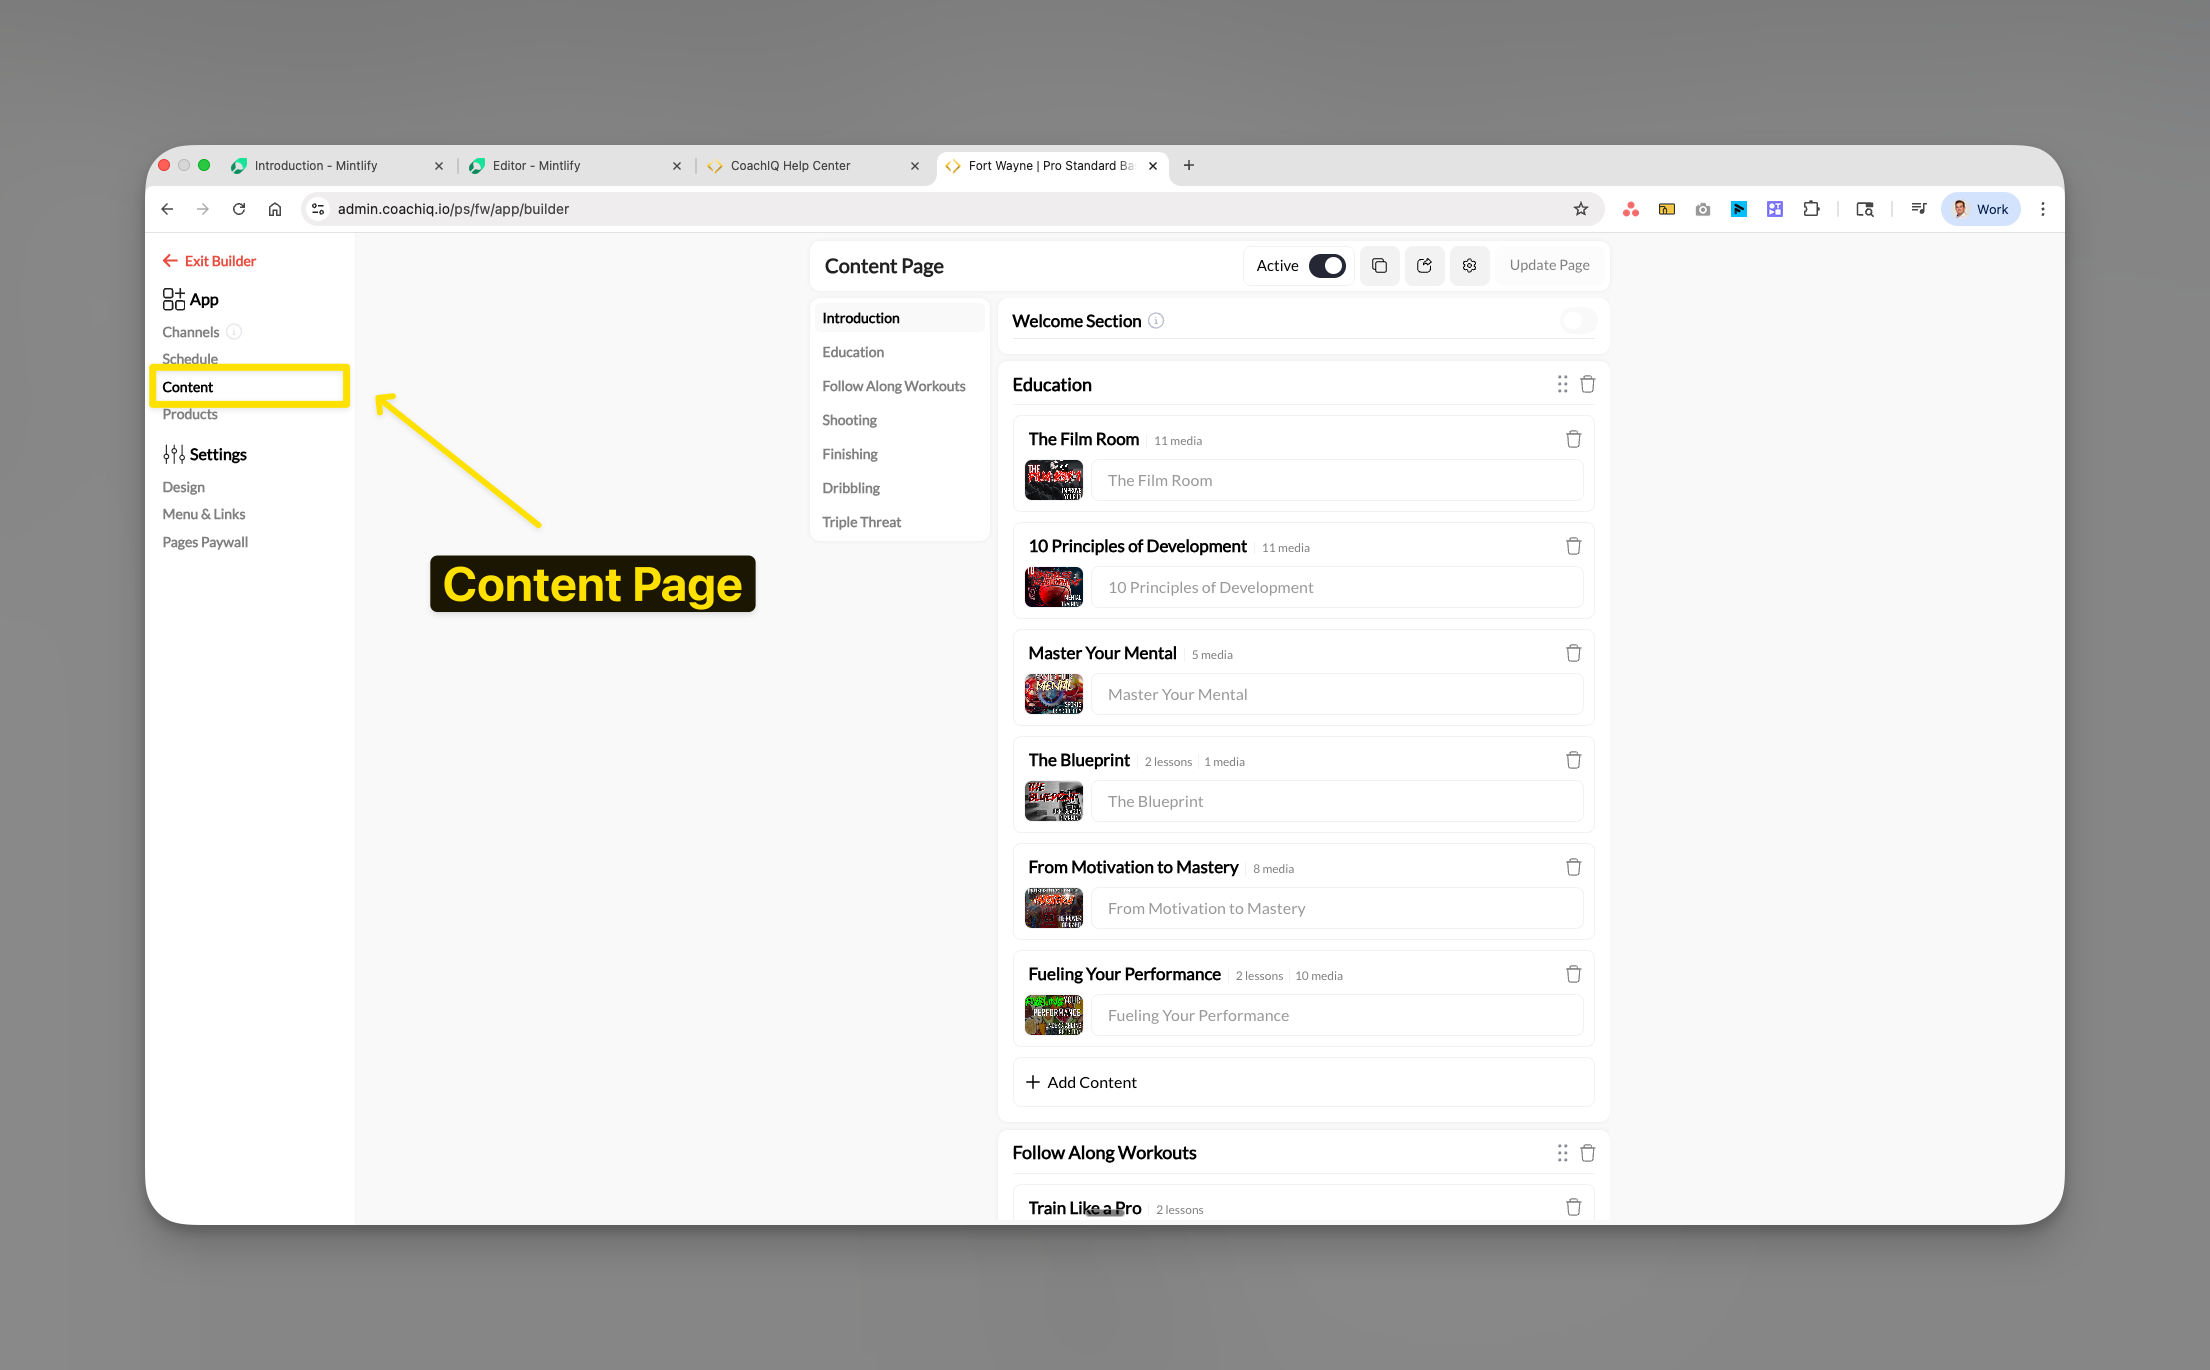
Creating and managing sections
Sections organize programs into logical categories for easier navigation.Adding a new section
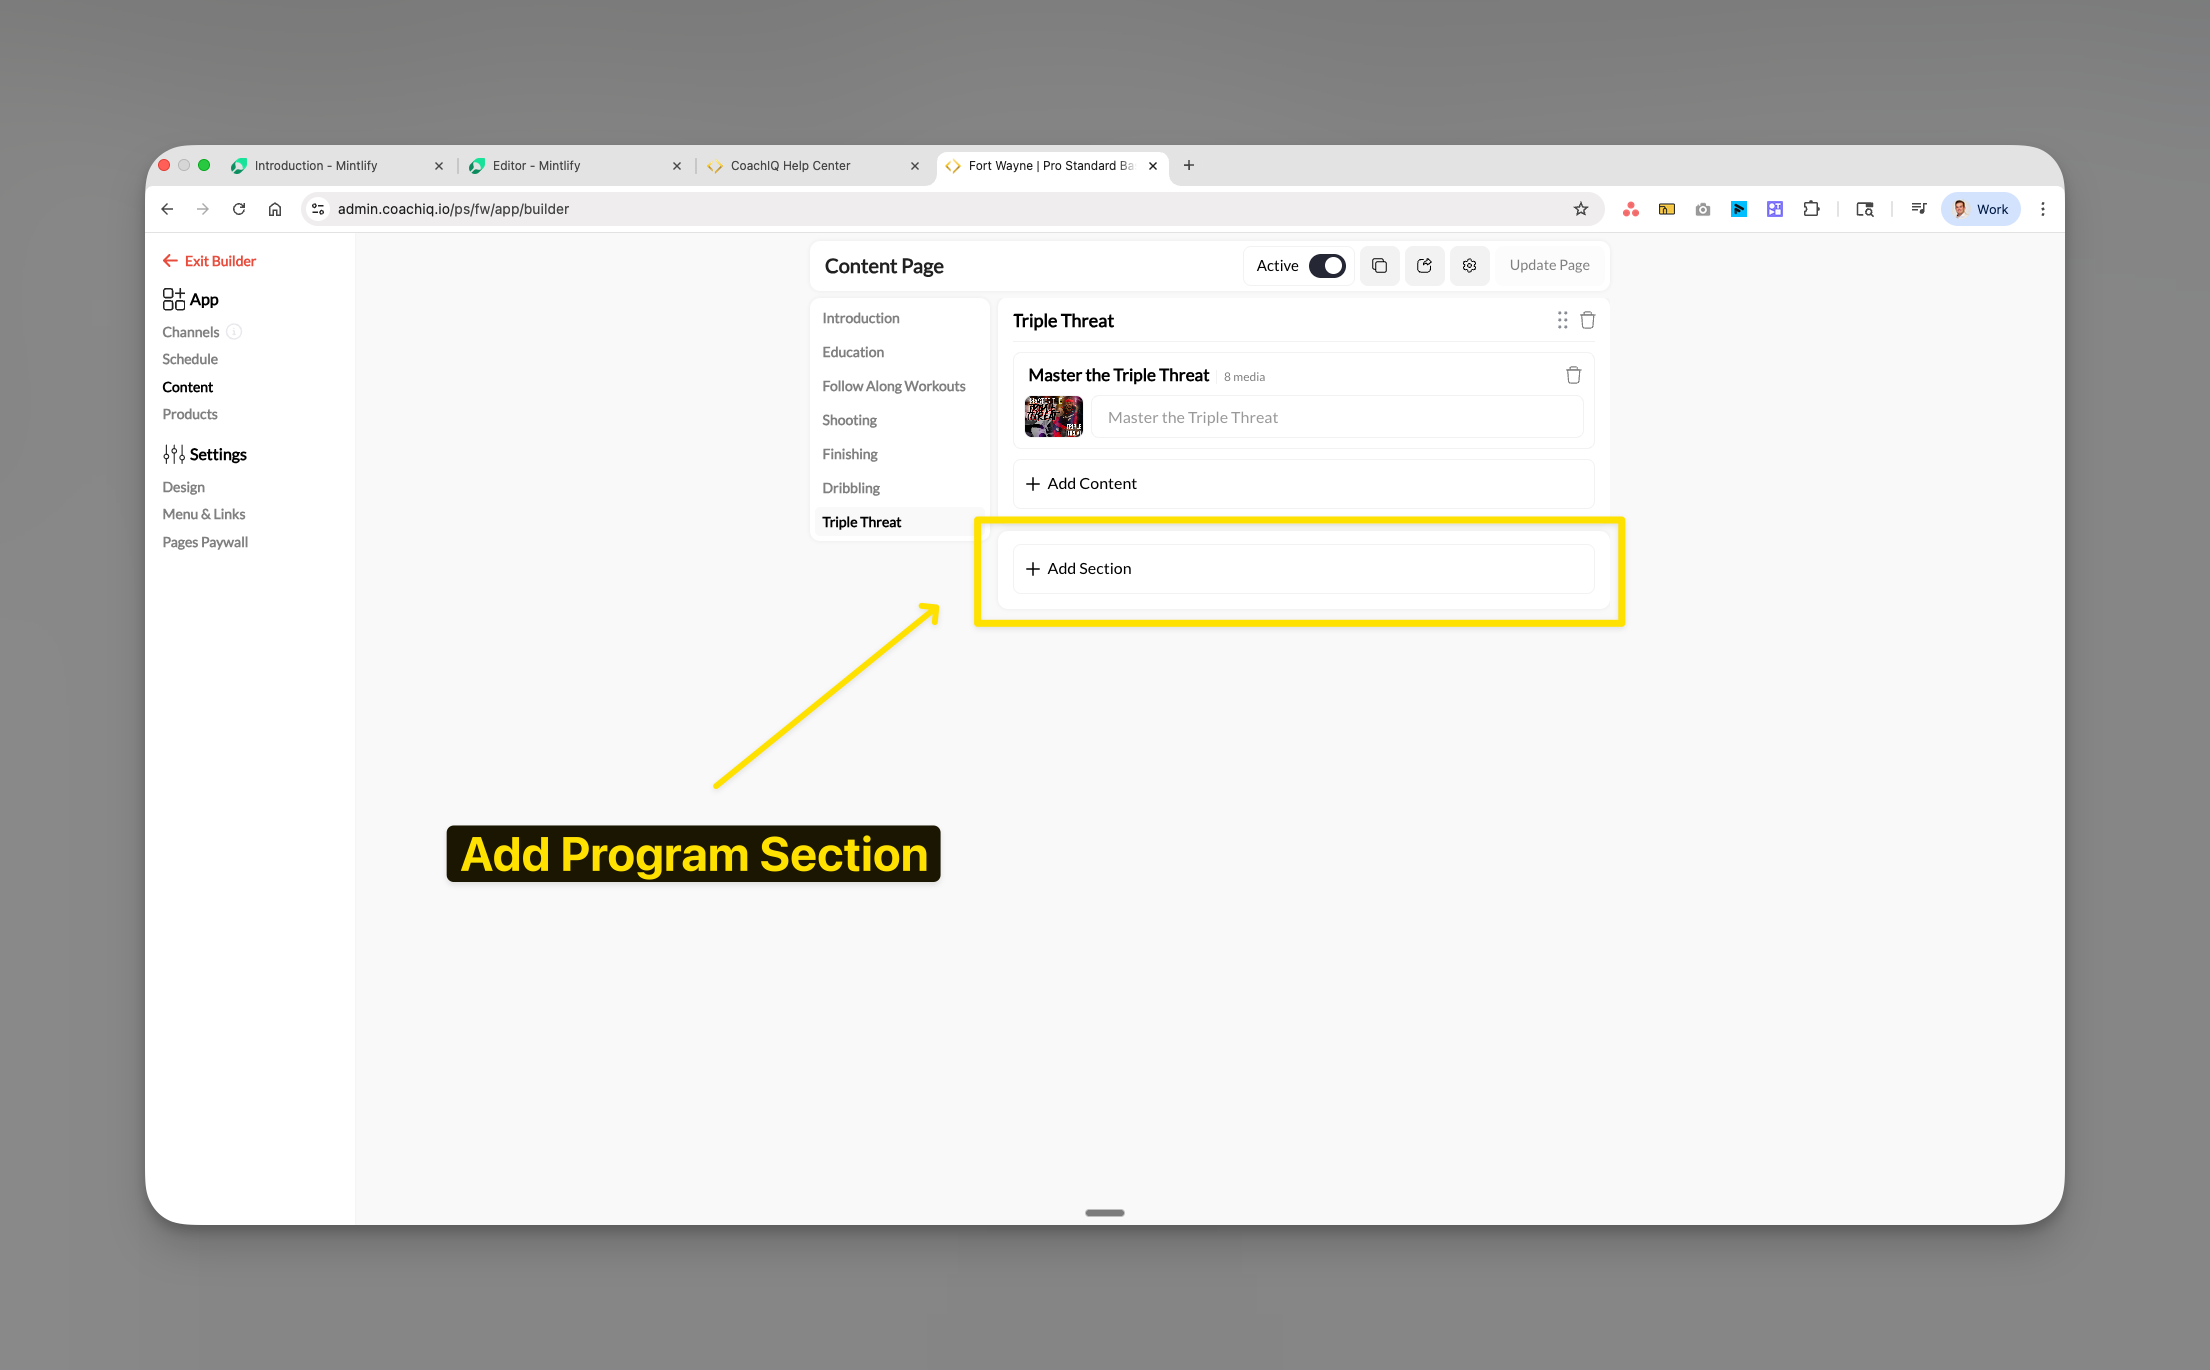
Name your section
Enter a descriptive name. Examples:
- “Education”
- “Triple Threat”
- “Follow Along Workouts”
- “Beginner Fundamentals”
- “Elite Training”
Setting up a Welcome Section
The Welcome Section prominently displays one featured program at the top of your Programs page.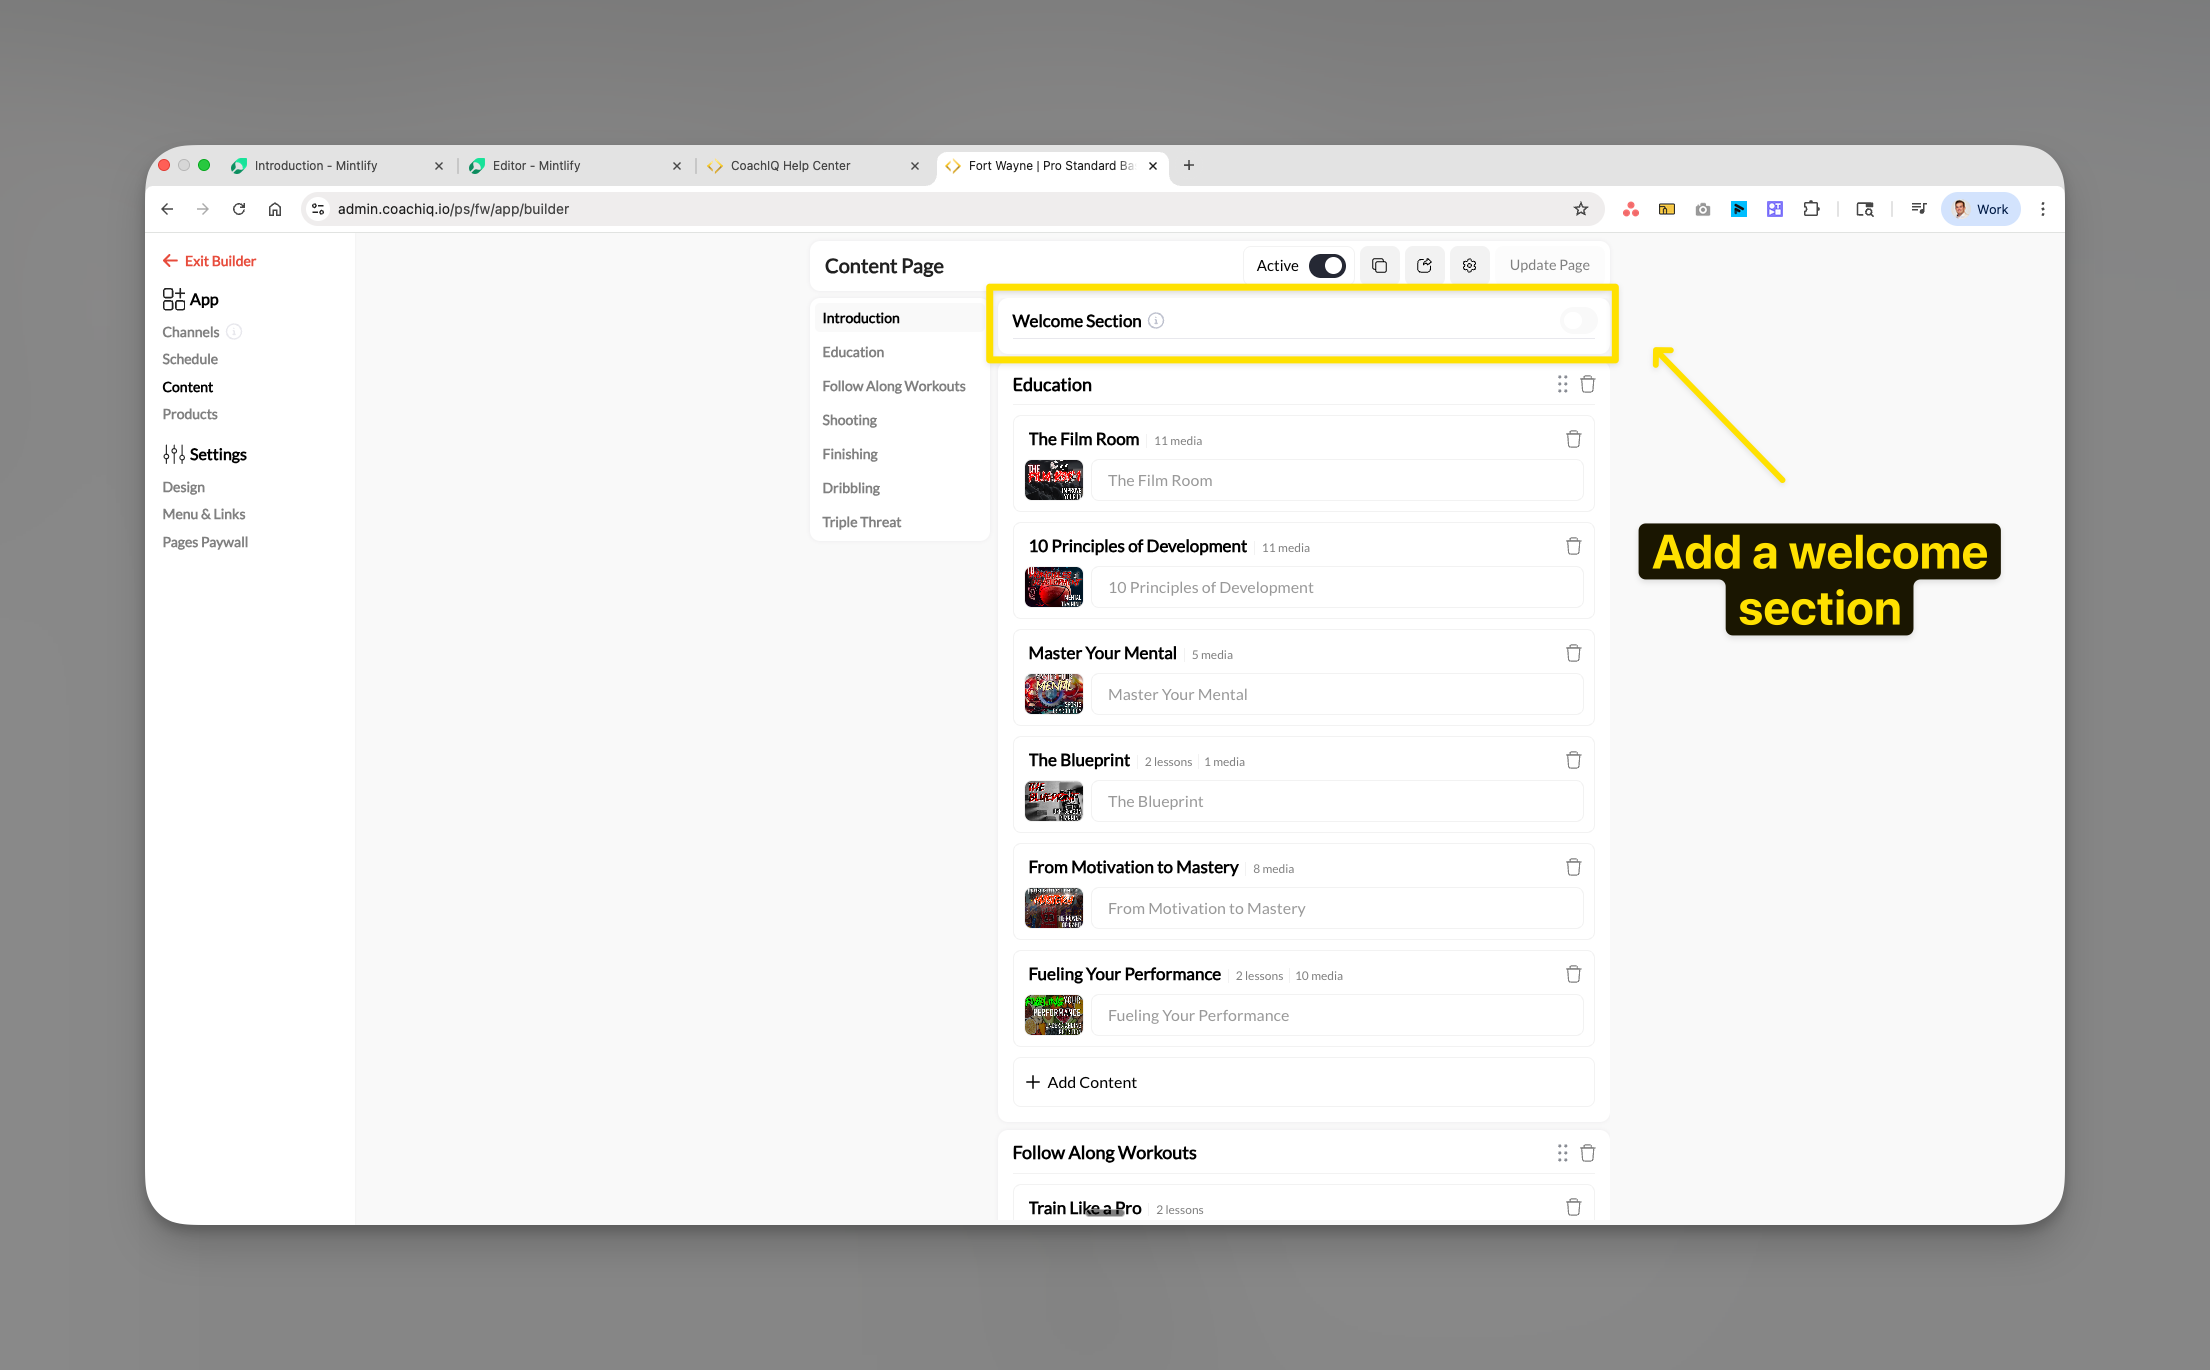
Organizing your Programs page
Reordering sections
- Hover over the section to move
- Click and hold the drag handle (⋮⋮)
- Drag to new position
- Release to place
Position your foundational content at the top for immediate visibility.
Deleting sections
- Click the trash icon (🗑️) next to section name
- Confirm deletion
Program access and sharing settings
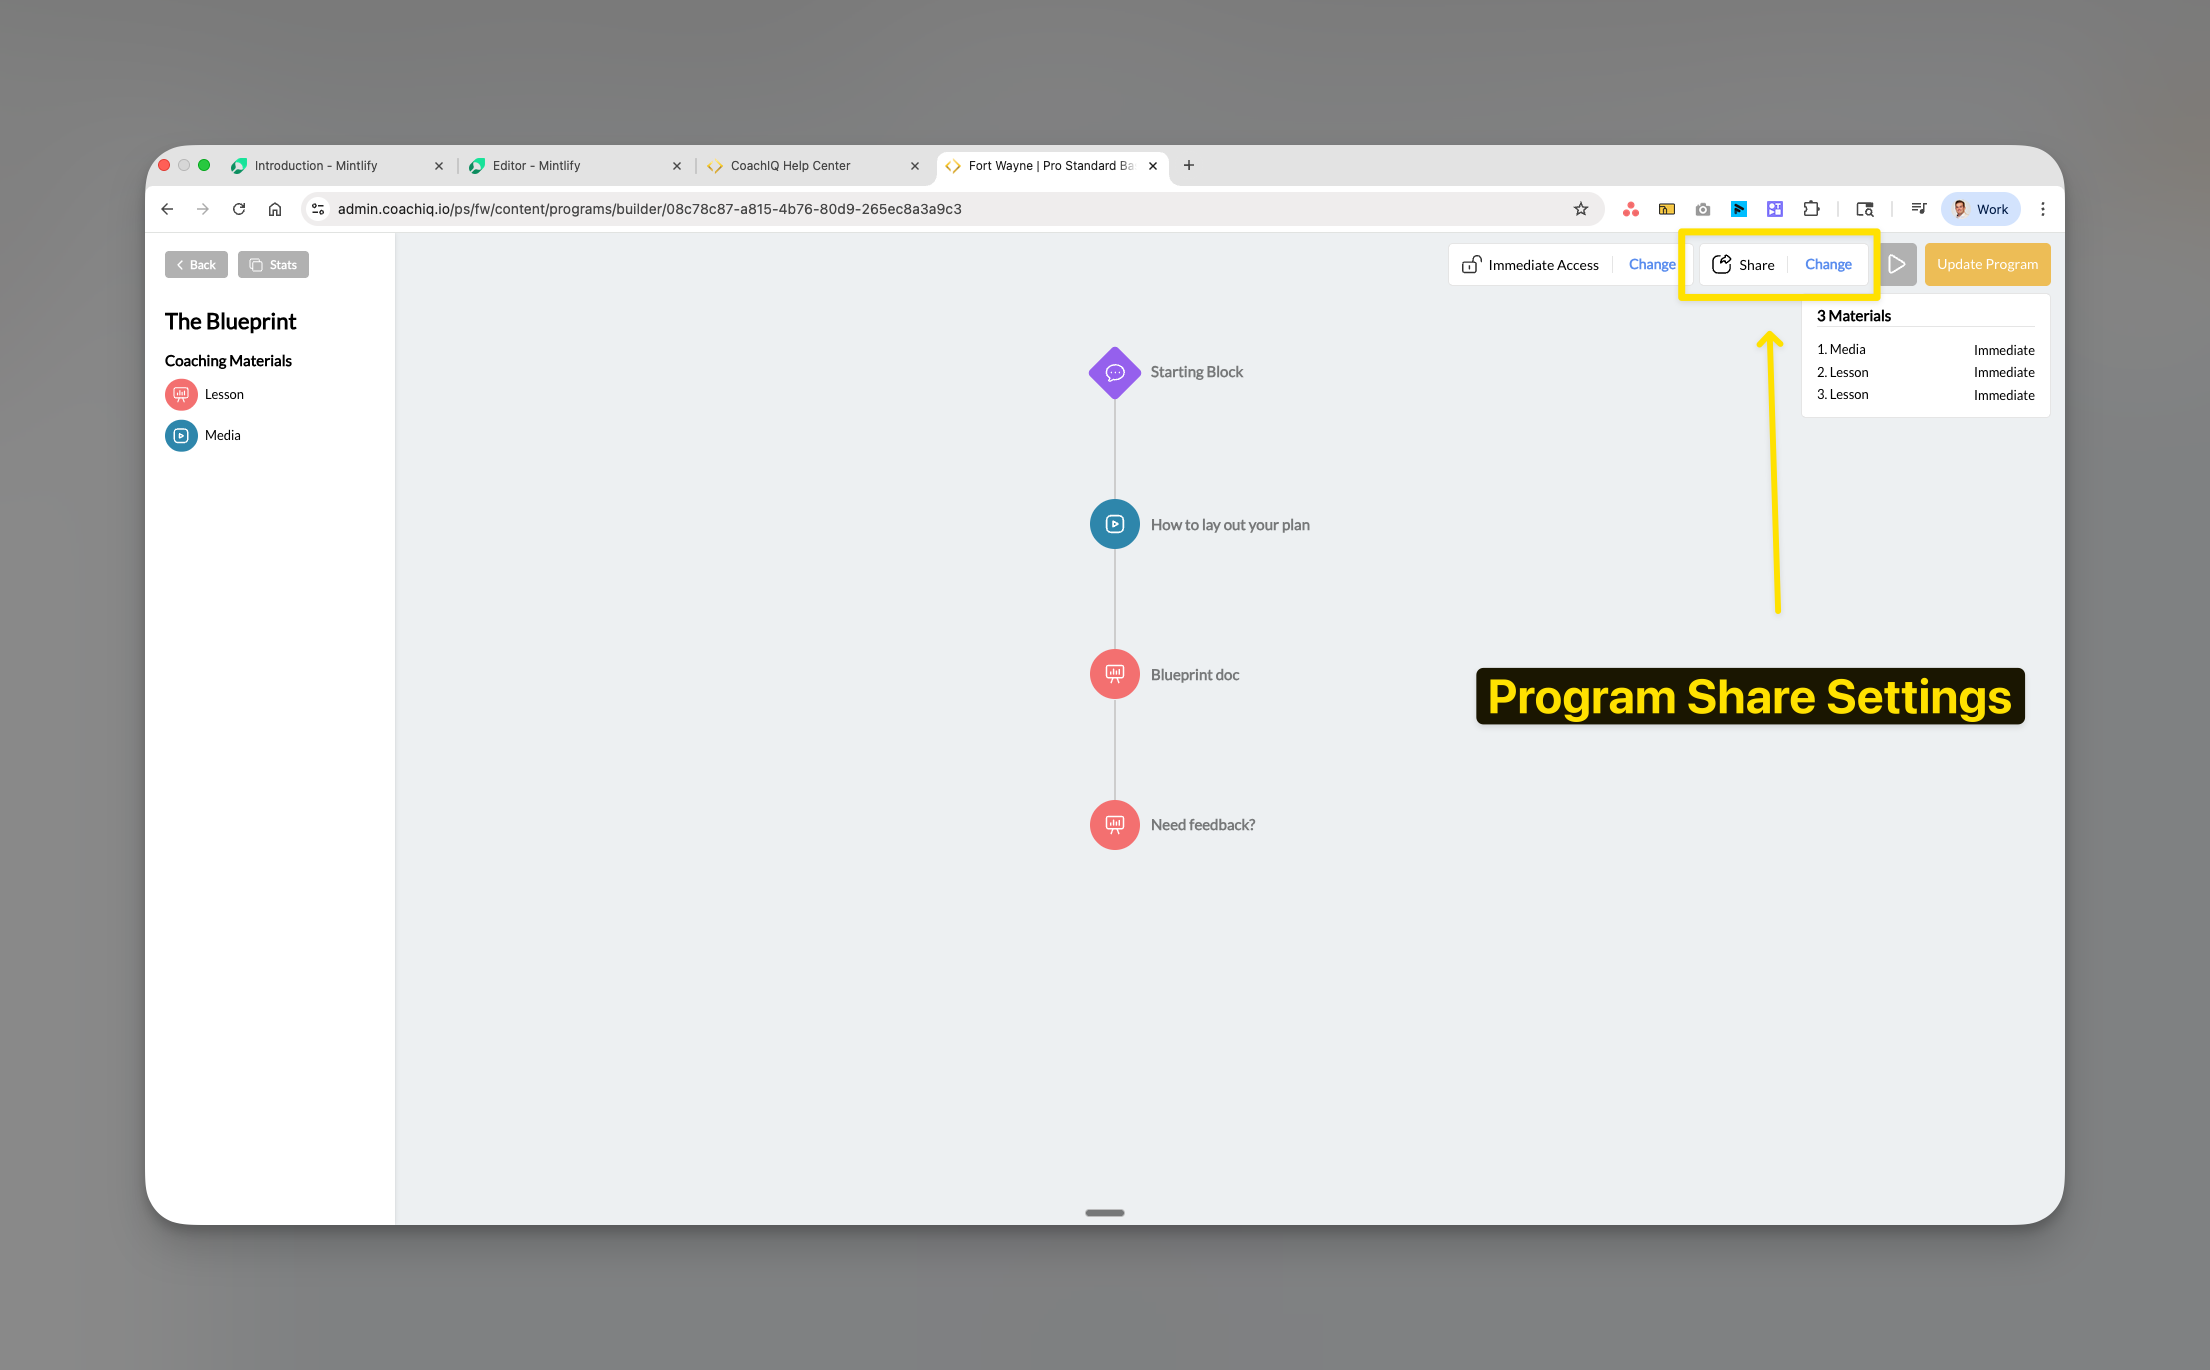
Choose access type
- Free
- Paywalled
- Private
Free Access
- Open to all athletes
- No payment required
- Great for introductory content
- Builds trust and engagement
Configure private access
For Private programs, toggle ON to restrict visibility to assigned athletes only.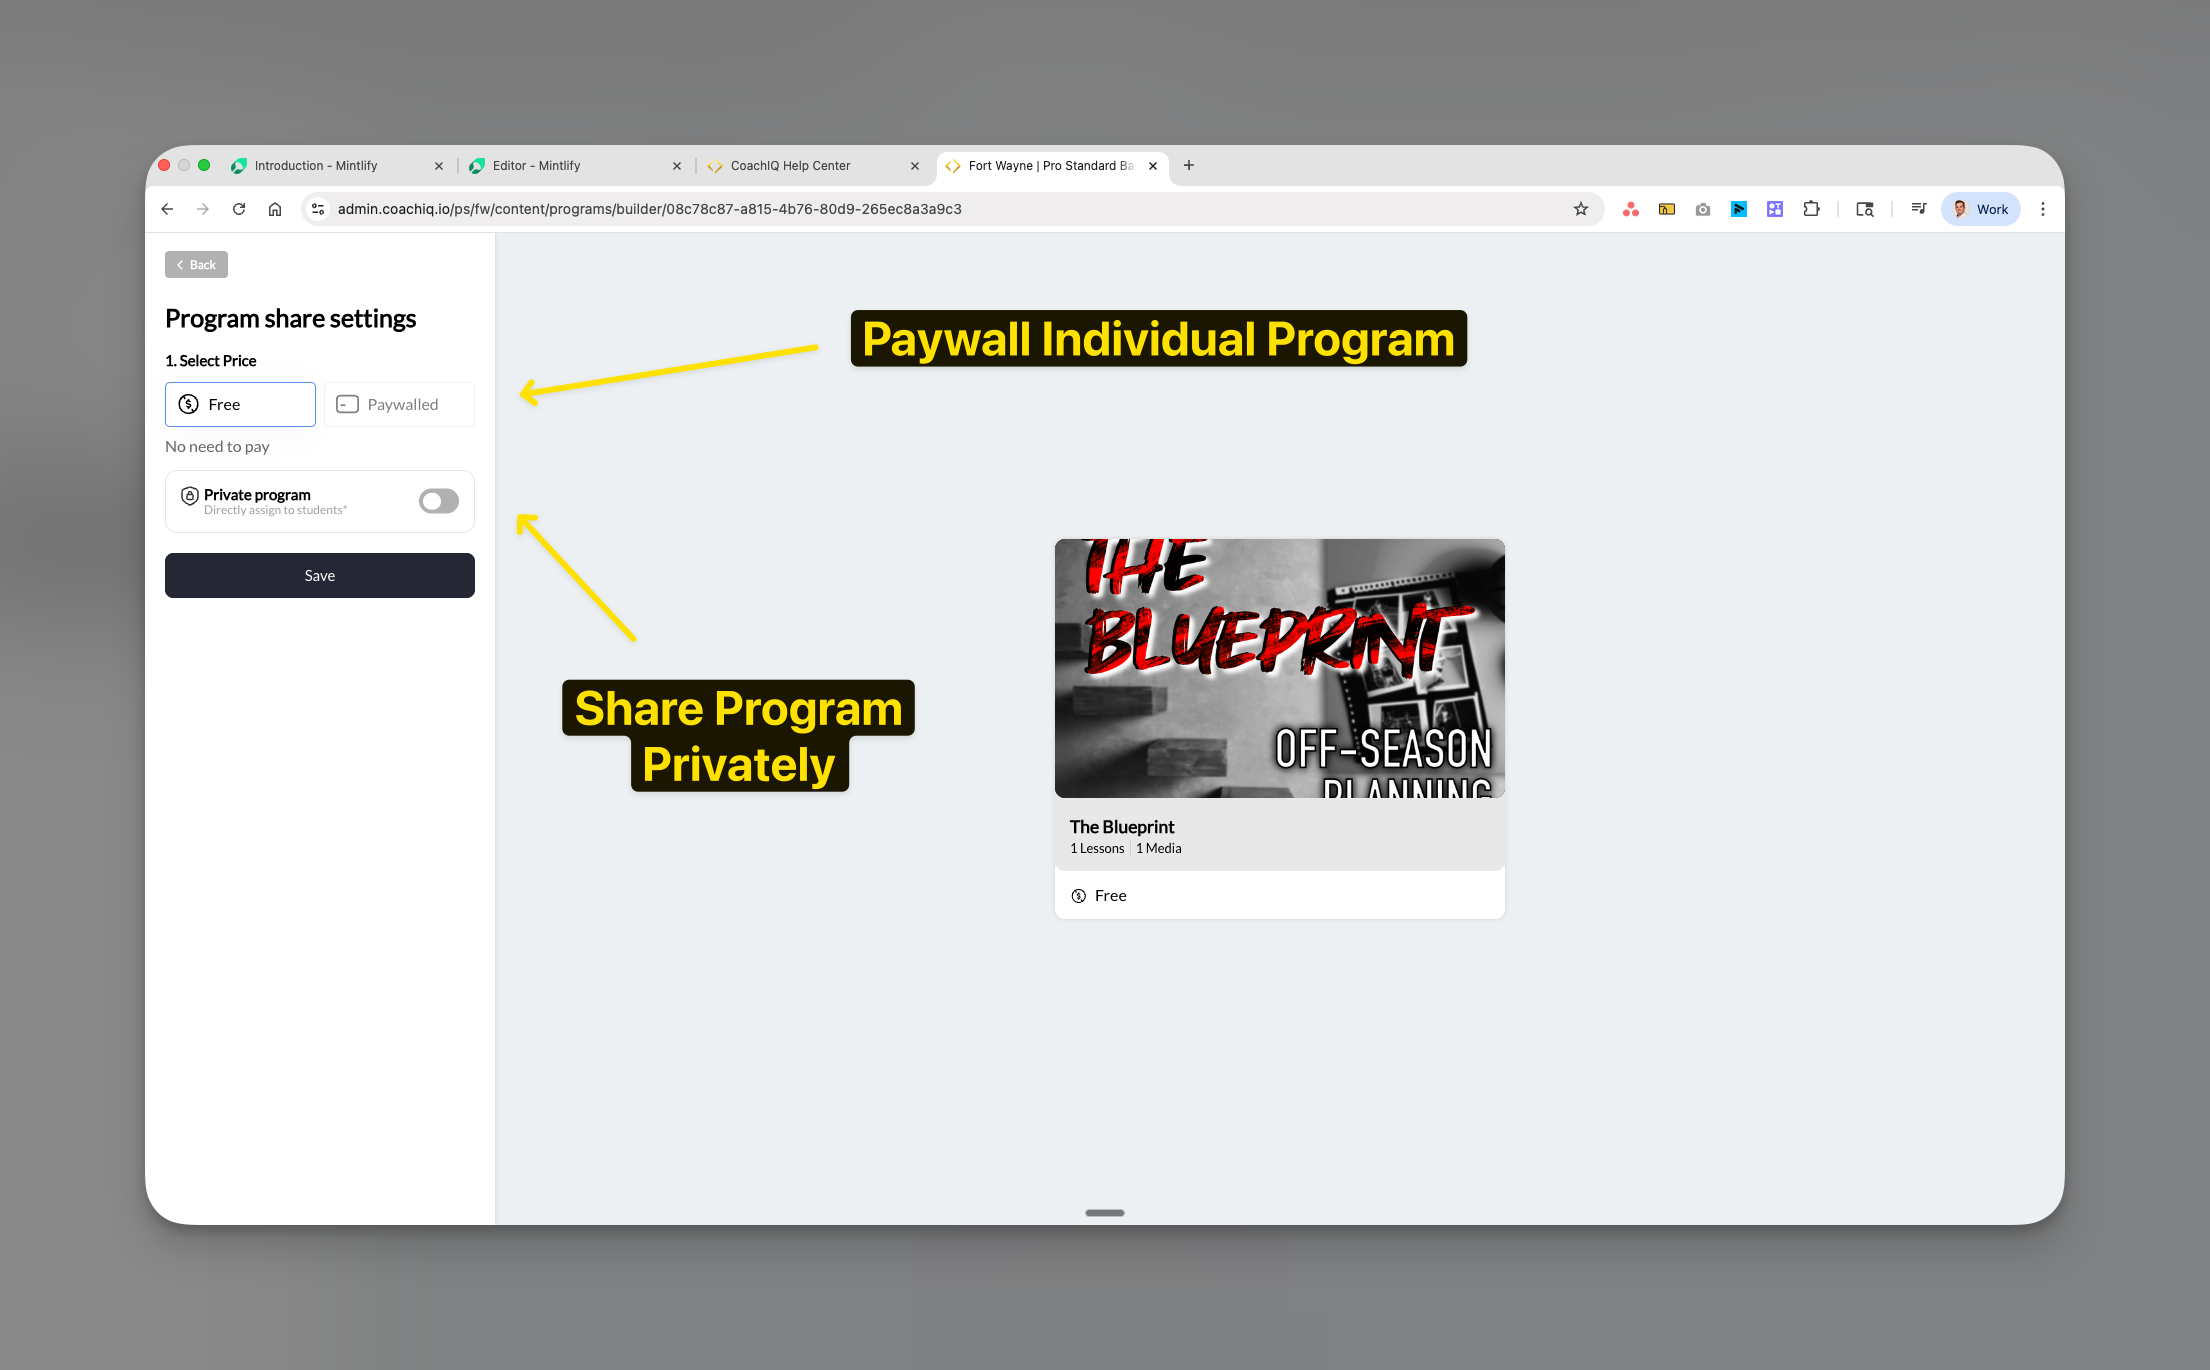
- Elite athlete exclusive content
- Beta testing new programs
- Personalized training plans
- Team-specific content
Page settings
Use the Settings panel to rename the Programs tab and update the page URL.Open the Settings panel
Click the gear icon in the top right of the Programs page to open the Settings panel.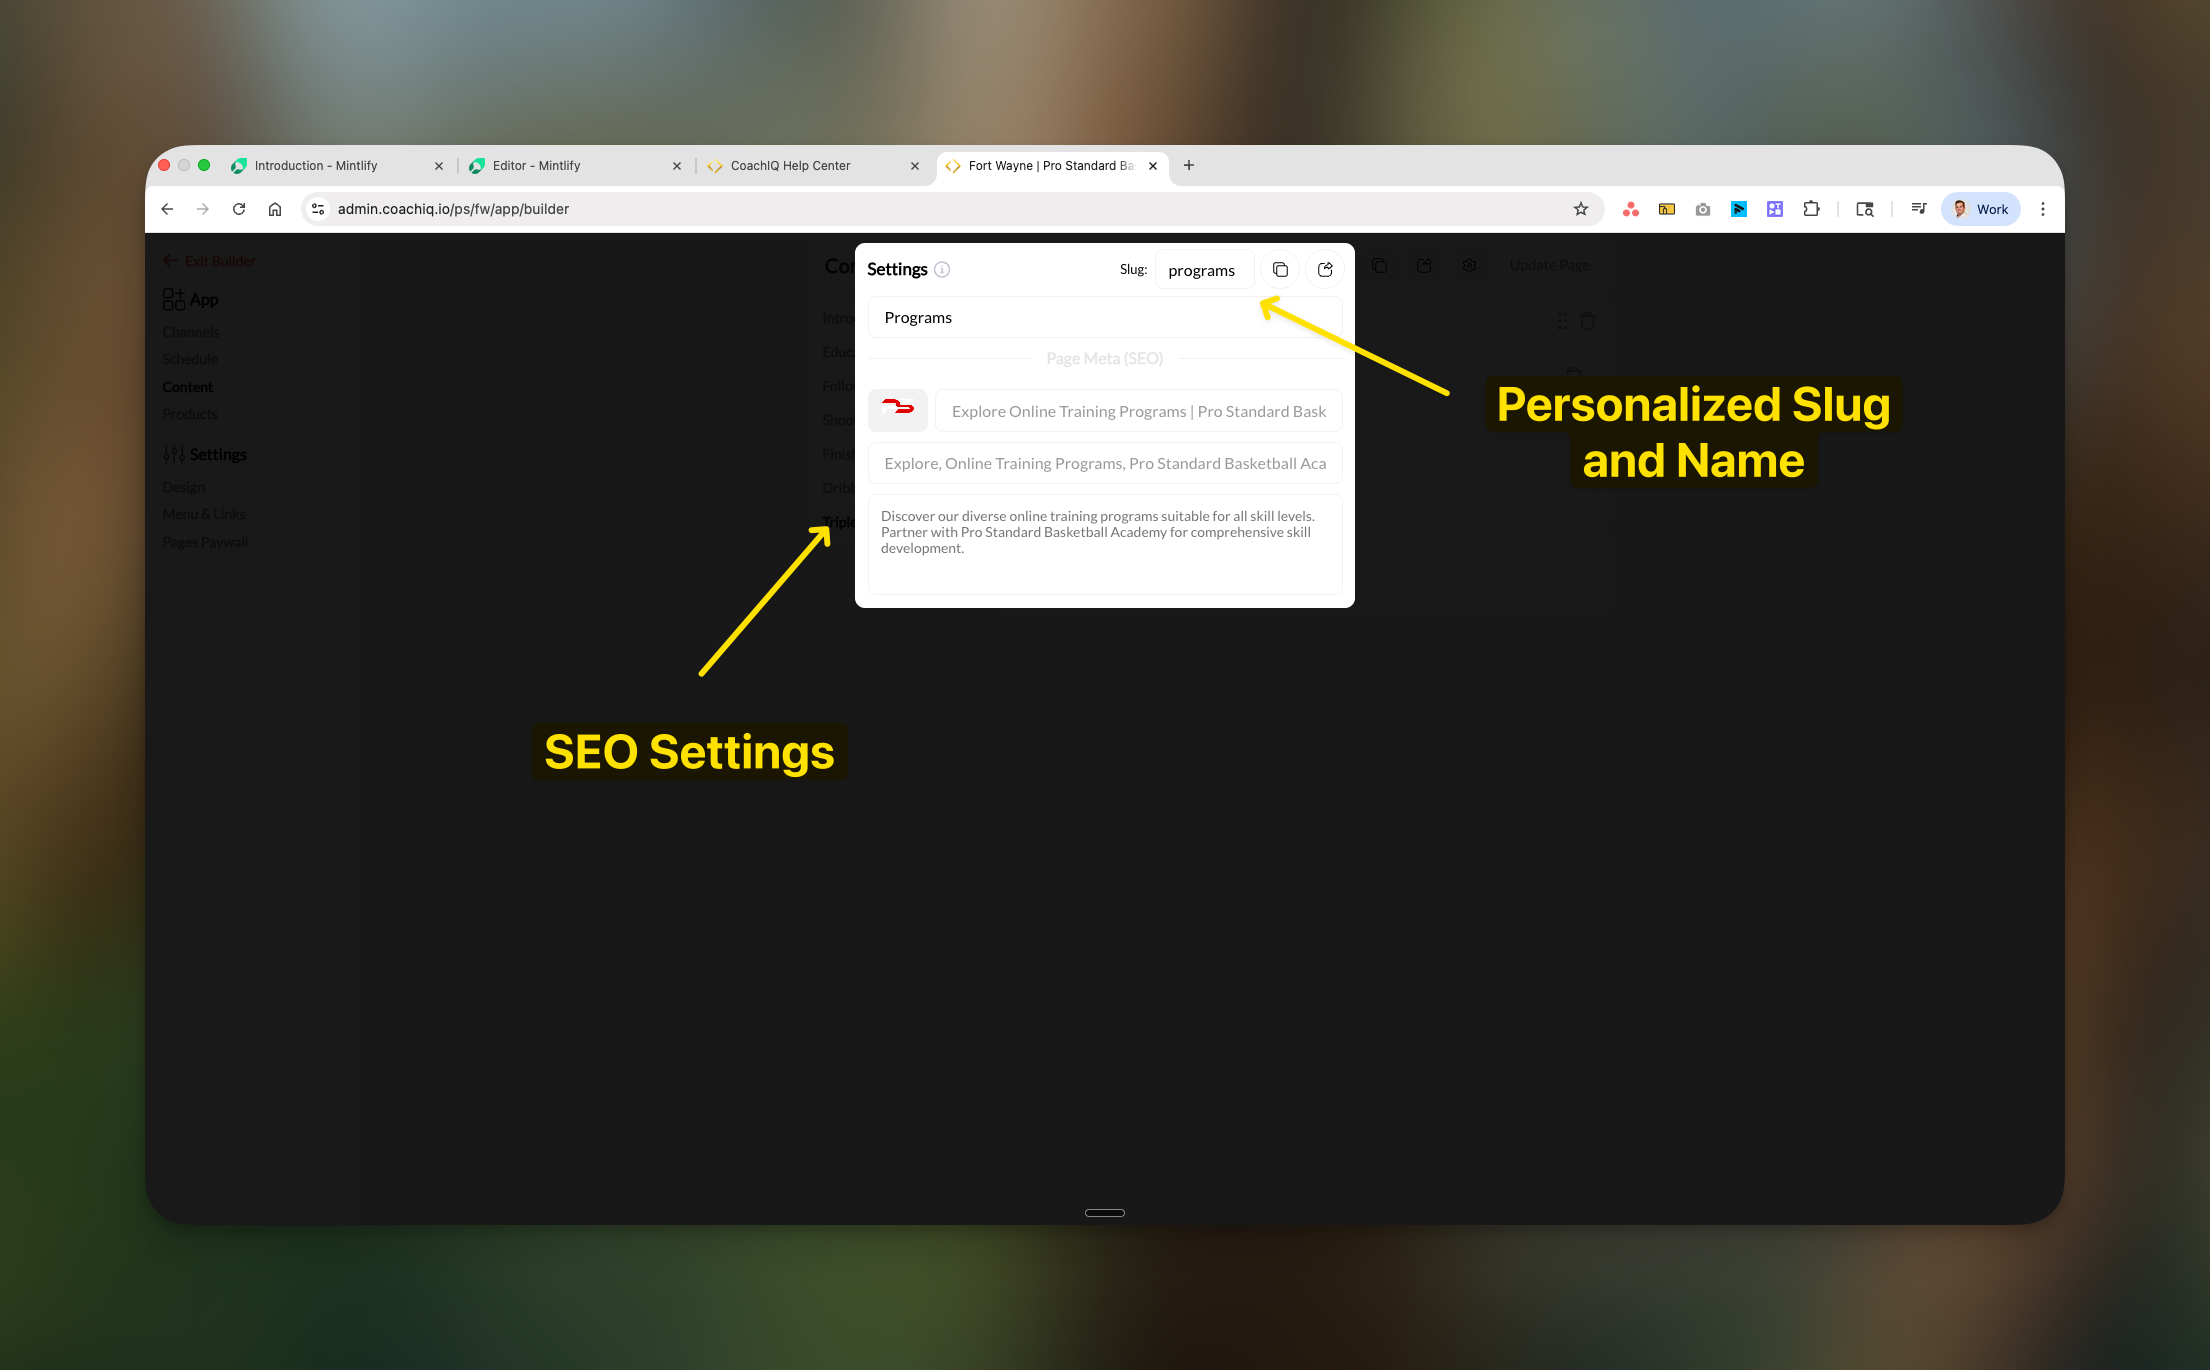
Rename the page
The first field at the top of the Settings panel is the Page Name — the display name athletes see as the tab in their portal. Update it to match your branding (e.g., “Training”, “Content”, “Resources”).
Update the URL slug
The Slug field controls the URL path for this page (e.g.,
/programs, /training).Previewing the athlete experience
Review the layout
Verification checklist:
- Section order correctness
- Thumbnail display quality
- Title and description clarity
- Welcome section prominence
Publishing your changes
Common questions
Where do I create new programs?
Where do I create new programs?
Programs are created in Content → Programs in your main admin dashboard. The App Builder only controls display configuration.
Why can't athletes see certain programs?
Why can't athletes see certain programs?
Diagnostic steps:
- Programs page Active toggle → Must be ON
- Program access setting → Check if Private or Paywalled
- Athlete status → Verify purchase or assignment
- Platform → iOS/Android have purchase restrictions
Can athletes search or filter programs?
Can athletes search or filter programs?
No search/filter capability currently exists. Structure your sections thoughtfully for easy navigation.
How does progress tracking work?
How does progress tracking work?
Progress percentage = (completed items ÷ total items) × 100Each lesson or media file completed counts toward the total.
Can I assign different programs to different athletes?
Can I assign different programs to different athletes?
Yes. Private program setting enables athlete-specific assignment for personalized content delivery.
Do sections collapse or expand?
Do sections collapse or expand?
Sections remain expanded for immediate content visibility on all devices.
Troubleshooting
Programs not appearing in selection modal
- Verify: Programs exist in Content → Programs
- Confirm: Programs are published (not draft)
- Action: Refresh App Builder page
Athletes report missing programs
- Check: Programs page Active toggle → Must be ON
- Check: Program access type → Not Private without assignment
- Check: Payment status → Purchase complete for paywalled
- Check: Platform restrictions → iOS/Android restrict in-app purchases
Thumbnails not displaying correctly
- Thumbnails configured in Program Builder only
- Cannot override in App Builder
- Verify proper aspect ratio in source
Section organization issues
- Confirm drag handle engagement
- Test in different browser if needed
- Always Update Page after reorganizing