Where to find this: Dashboard → Website Builder → Settings → Scripts & Analytics
Why tracking matters for your coaching business
Adding analytics and tracking to your website helps you understand how potential clients find and interact with your business. With proper tracking, you can:- See what’s working: Know which pages convert visitors into clients
- Optimize your marketing: Track which ads and campaigns drive bookings
- Understand your audience: Learn where visitors come from and what they’re looking for
- Make data-driven decisions: Stop guessing and start knowing what grows your business
Available tracking tools
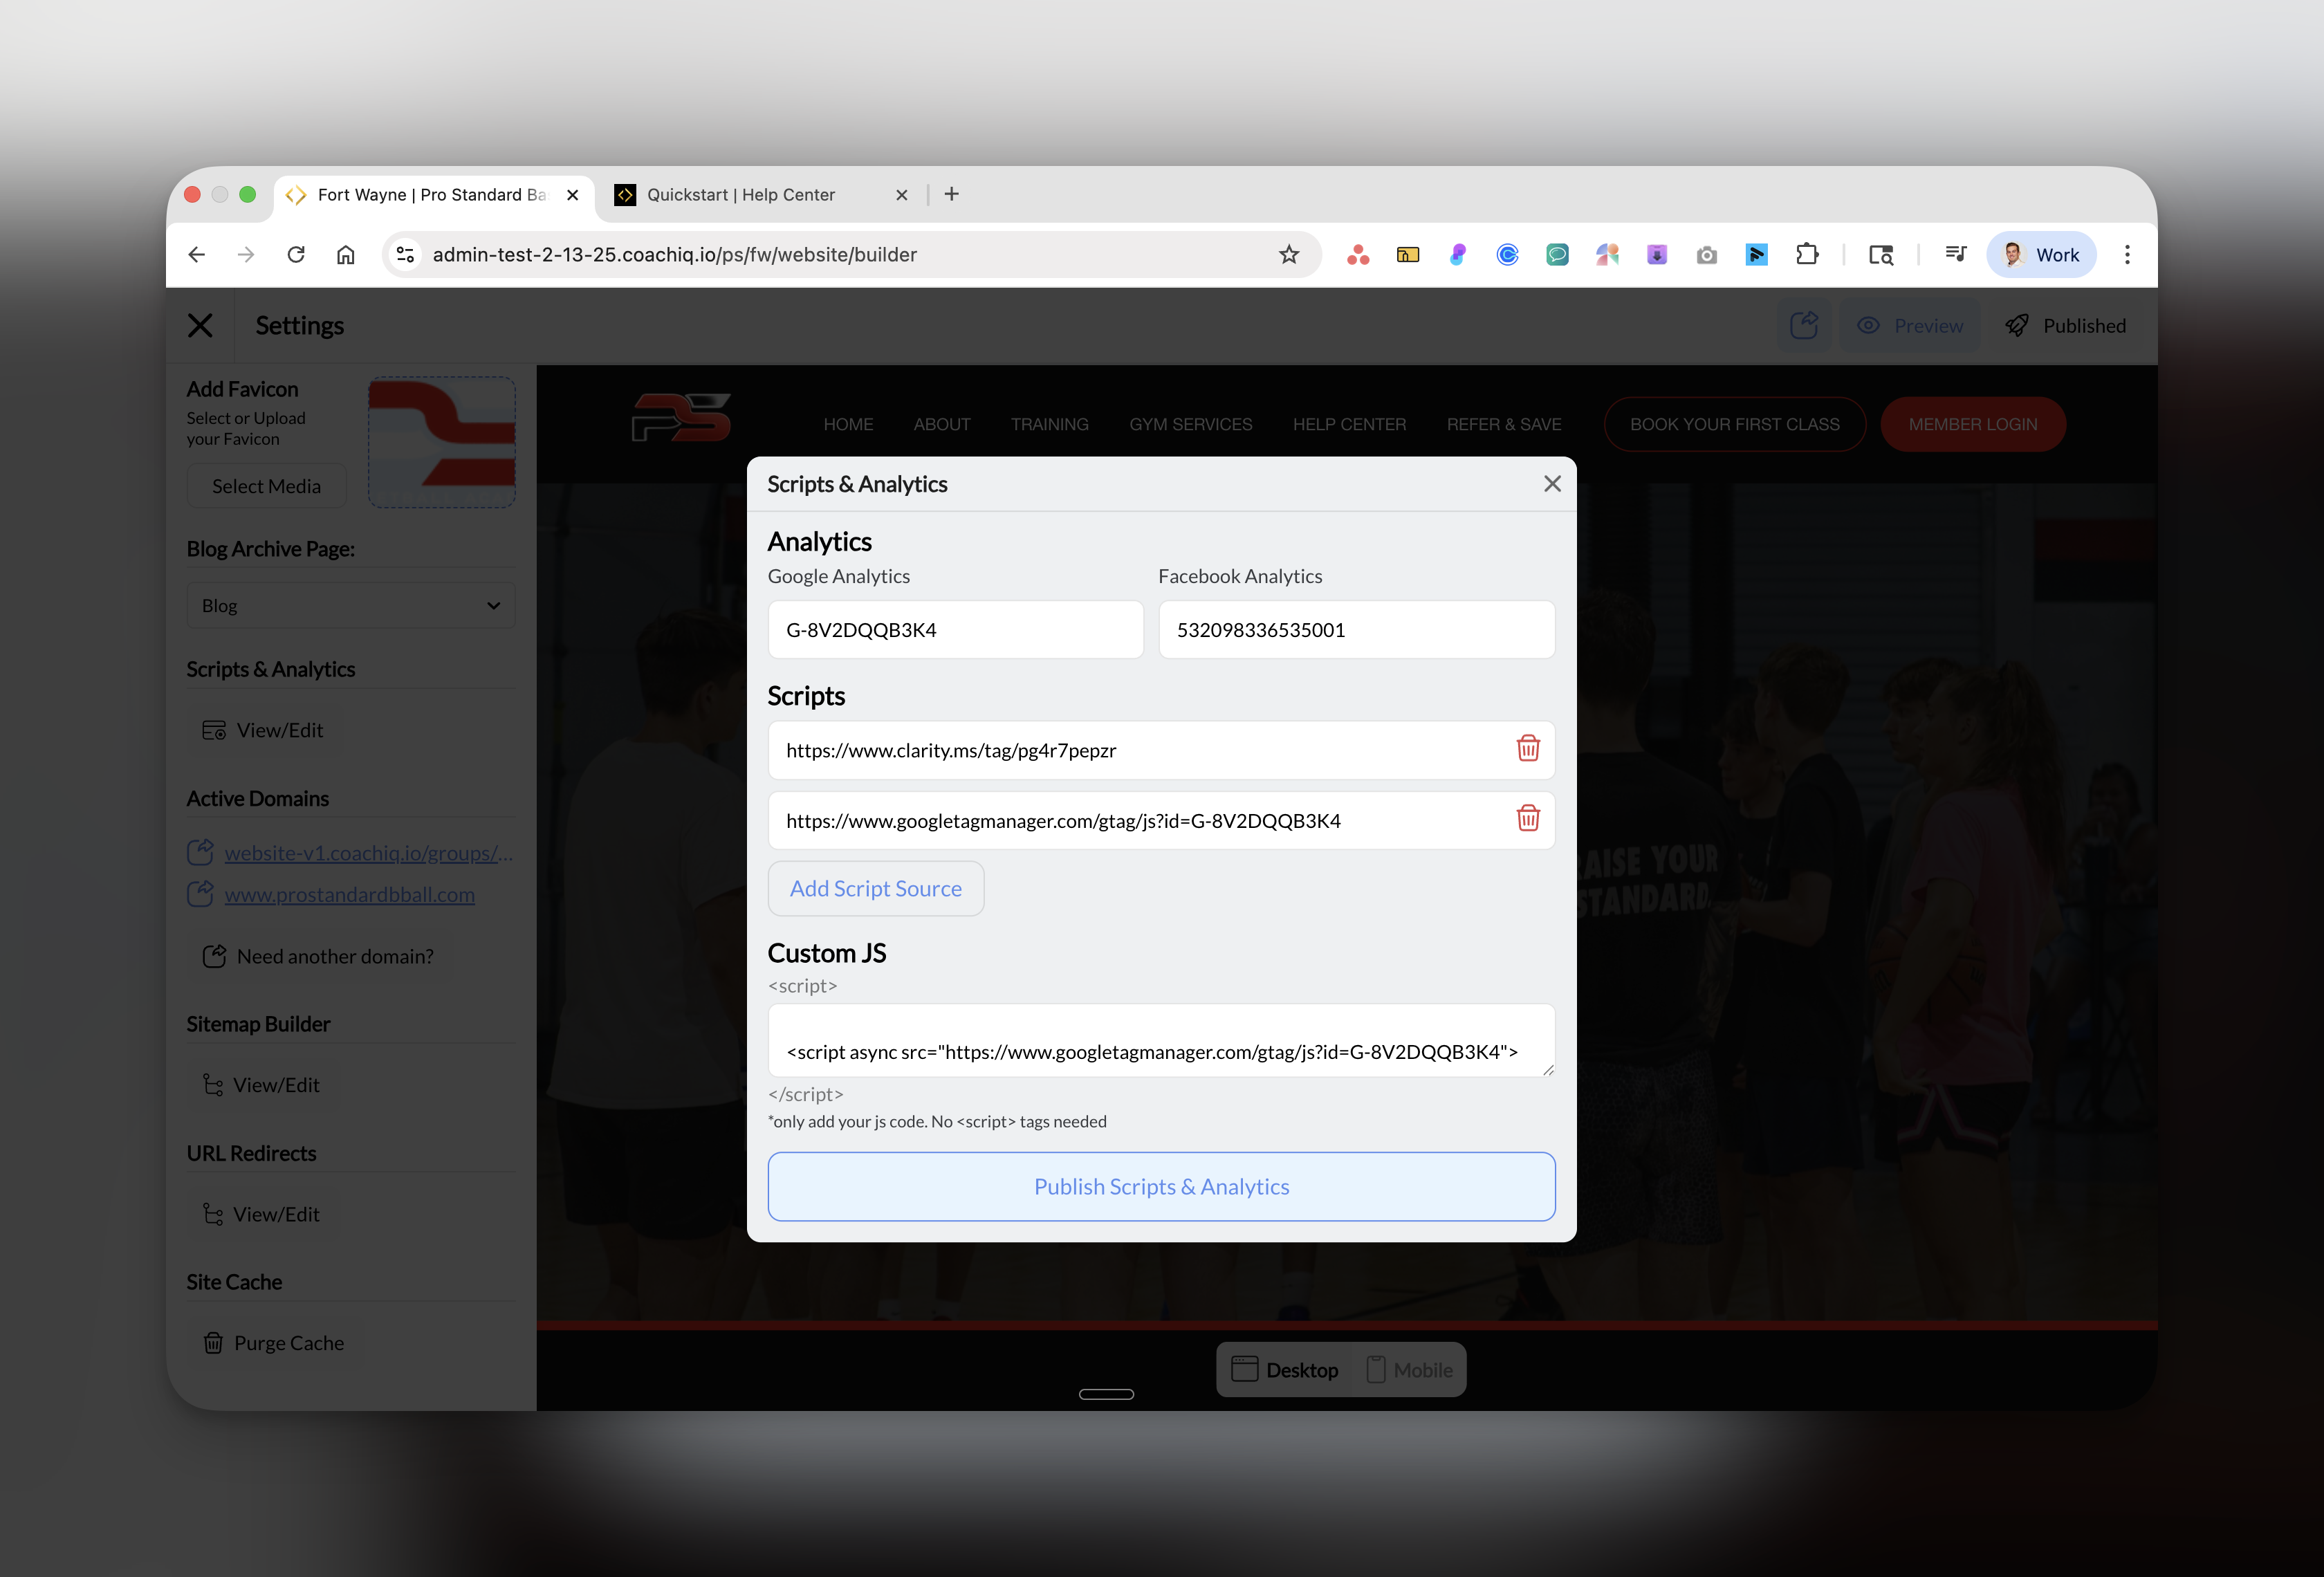
CoachIQ integrates with three powerful analytics platforms that work together to give you complete visibility into your website performance:Google Analytics
Track website traffic, user behavior, and conversion goals. See how many people visit, where they come from, and what actions they take.
Facebook Pixel
Measure Facebook ad effectiveness, build retargeting audiences, and track conversions from your Facebook marketing campaigns.
Microsoft Clarity
Watch session recordings and heatmaps to see exactly how visitors navigate your site. Identify confusion points and optimize user experience.
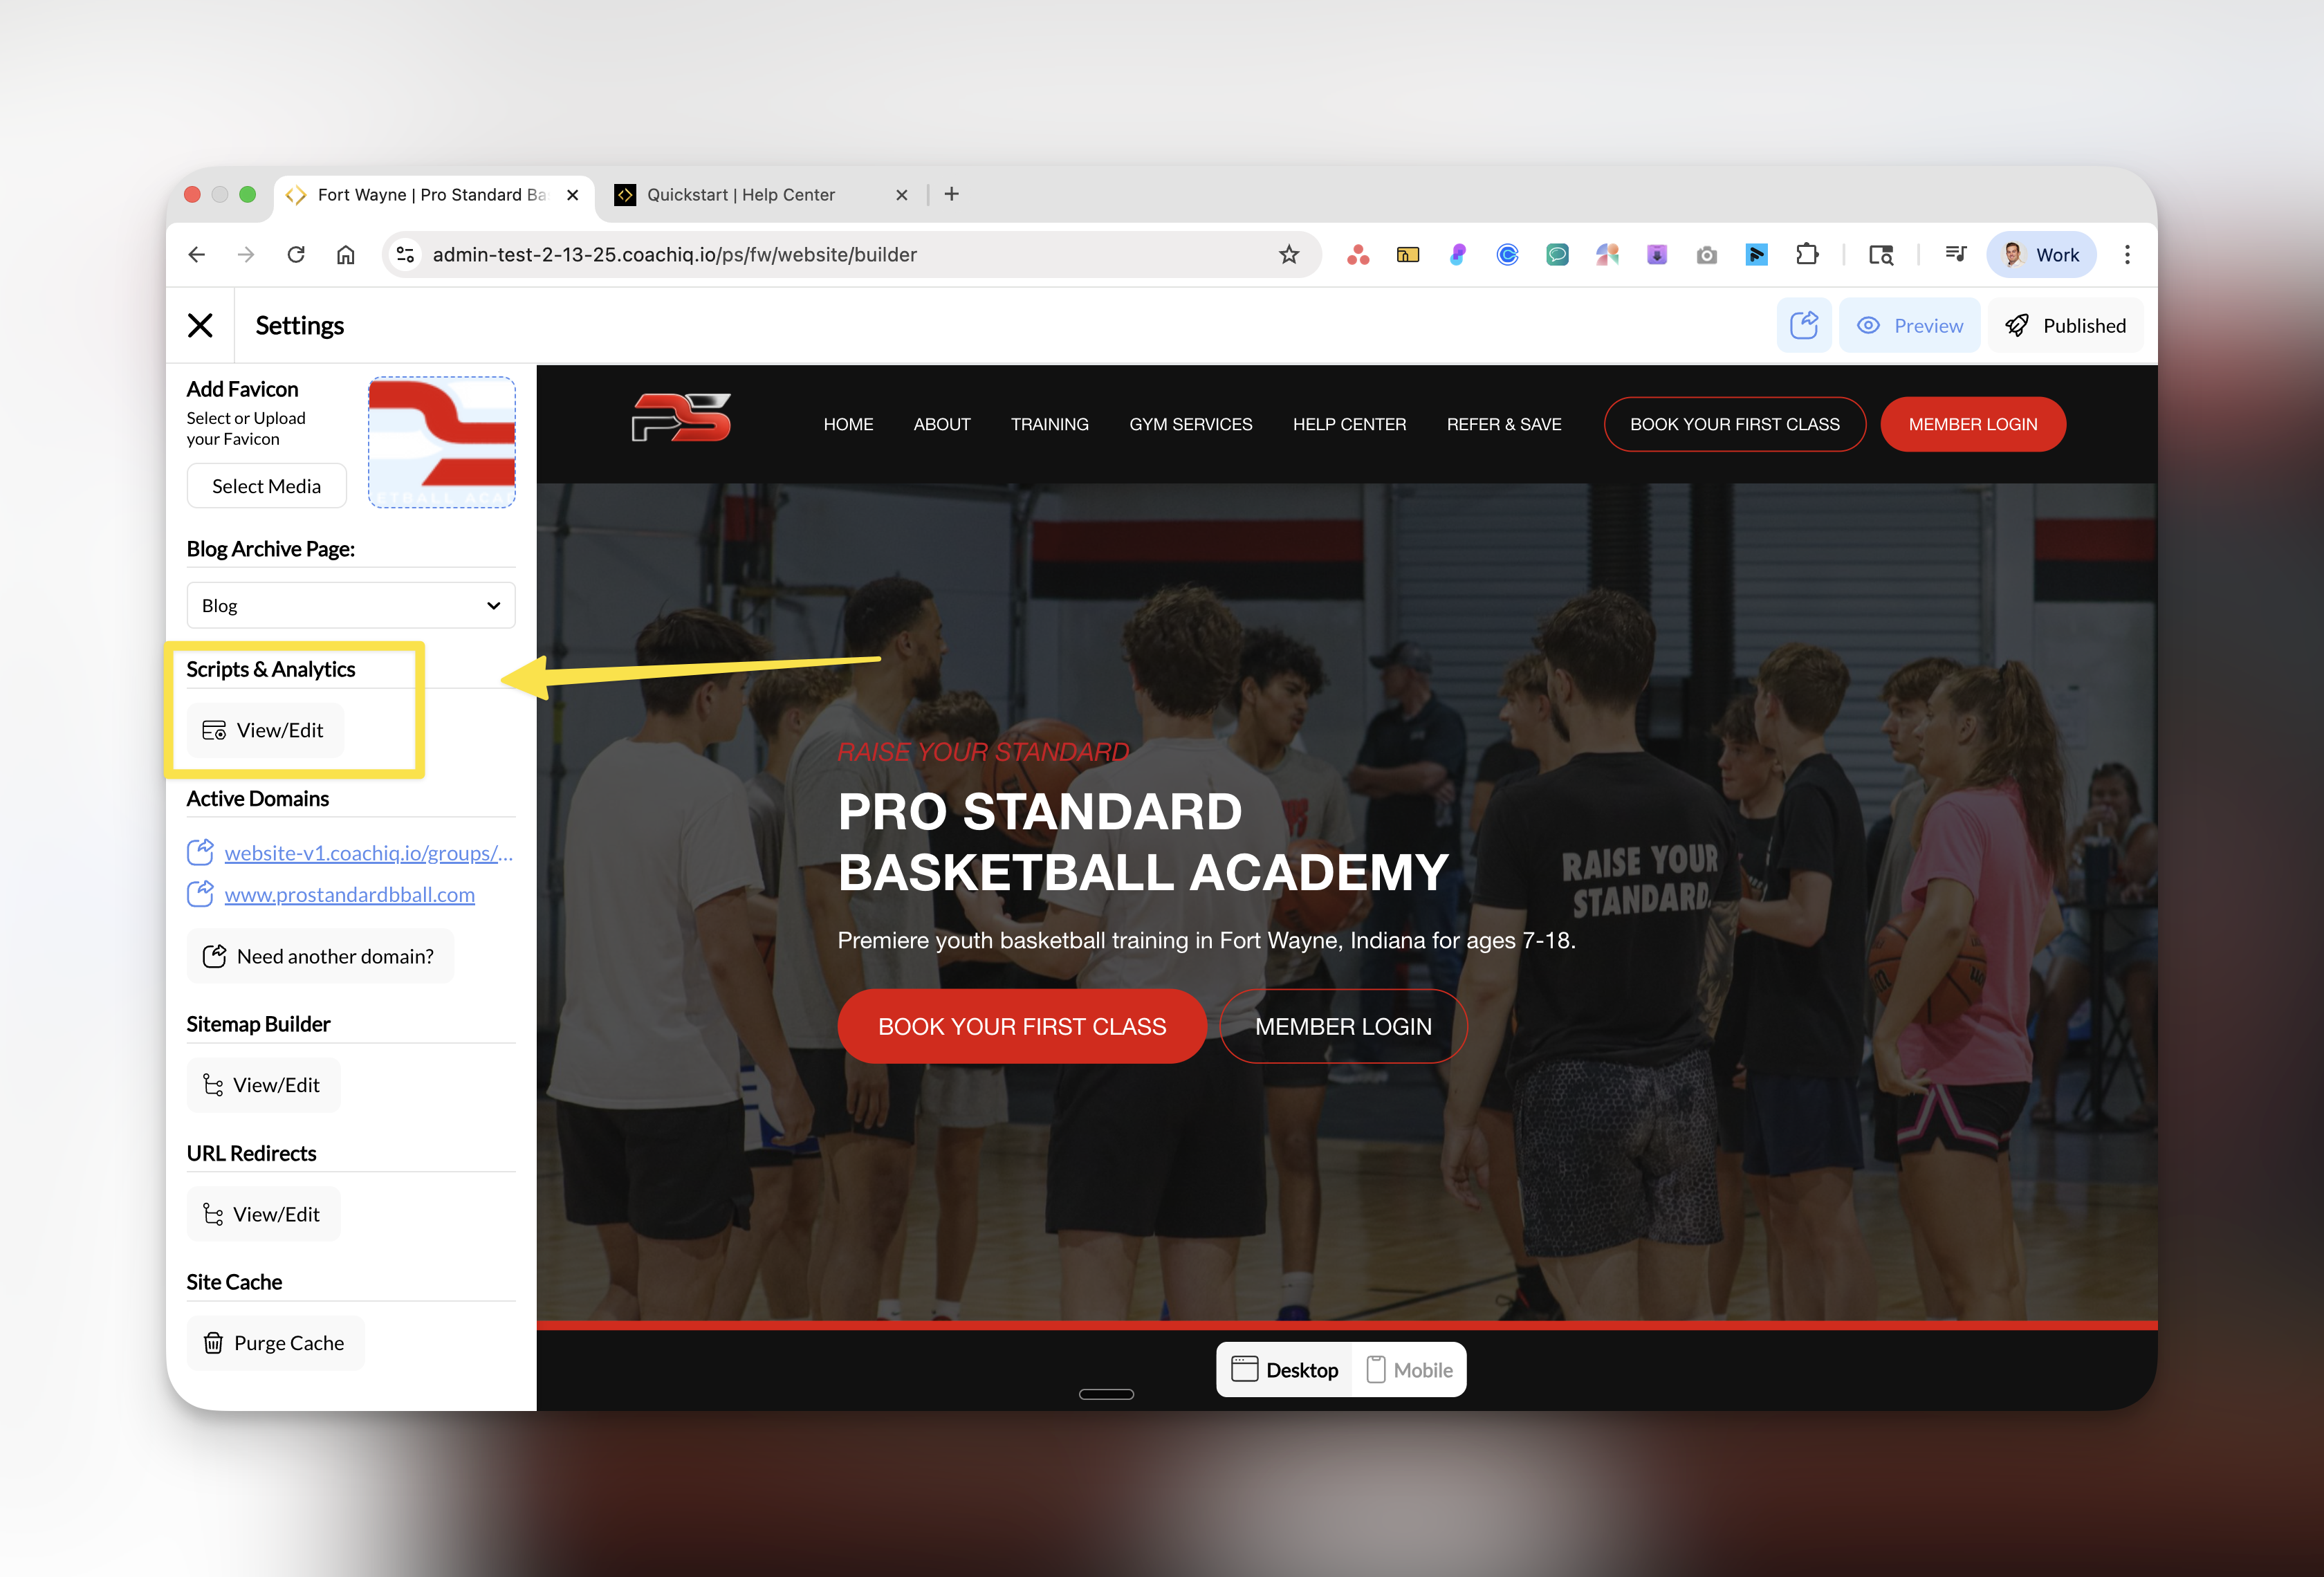
How to access Scripts & Analytics
Open Settings panel
In the left sidebar, locate and click on Scripts & Analytics under the Settings section.
Quick setup guide
- For New Coaches
- For Growing Businesses
- For Facilities
Start with these basics:
- Google Analytics - Essential for understanding your traffic
- Microsoft Clarity - Free tool to see how users interact with your site
What each tool tracks
Google Analytics provides:
- Visitor count and demographics
- Traffic sources (search, social, direct)
- Page views and session duration
- Goal completions (bookings, signups)
- Real-time visitor activity
Facebook Pixel tracks:
- Ad click-throughs to your site
- Conversions from Facebook ads
- Retargeting audience building
- Cost per acquisition
- Return on ad spend (ROAS)
Microsoft Clarity shows:
- Session recordings of real users
- Click heatmaps
- Scroll depth analysis
- Rage clicks and dead clicks
- Mobile vs desktop behavior
Best practices
Common questions
Do I need all three tracking tools?
Do I need all three tracking tools?
No, start with Google Analytics as your foundation. Add Facebook Pixel when you run Facebook ads, and Microsoft Clarity when you want to improve user experience. Each tool serves a different purpose.
Will tracking slow down my website?
Will tracking slow down my website?
No, these tracking scripts are optimized and load asynchronously, meaning they won’t affect your site’s loading speed or user experience.
Is tracking free?
Is tracking free?
- Google Analytics: Free for most coaching businesses
- Facebook Pixel: Free (you only pay for ads)
- Microsoft Clarity: Completely free with no limits
- Custom scripts: Depends on the service
Can I add other tracking tools?
Can I add other tracking tools?
Yes! Use the Custom JS field to add any other tracking scripts like:
- Google Tag Manager
- Hotjar
- LinkedIn Insight Tag
- TikTok Pixel
- Other marketing tools
How long before I see data?
How long before I see data?
- Google Analytics: 24-48 hours for full data (real-time available immediately)
- Facebook Pixel: Immediately for pixel fires, 24 hours for processed data
- Microsoft Clarity: 2-3 hours after installation
Troubleshooting
Quick fixes:
- Scripts not saving: Click “Publish Scripts & Analytics” button after entering your IDs
- Invalid tracking ID: Double-check you’re copying the entire ID including prefixes (G- for GA4)
- No data showing: Clear your website cache and verify the scripts are published
Next steps
Ready to set up your tracking? Start with the tool most relevant to your current needs:Basic website analytics
Facebook advertising
User behavior insights
Pro tip for coaches: Focus on metrics that matter - session bookings, contact form submissions, and program signups. Don’t get lost in vanity metrics like page views.