Where to find this: Payments → Products → + Create Product (or click existing product to edit)
Product Builder overview
The Product Builder has 7 sections. Only Section 1 is required. Configure additional sections based on your needs.
Section 1: Product Details
Required section - Every product needs at minimum a name and price.Product Name
Product Name
RequiredThe name clients see during checkout and in their purchase history.Best practices:
- Be specific: “60-Minute Basketball Training” not “Training”
- Include duration for sessions: “90-Minute Session”
- Add value: “Premium Coaching Package”
- “Individual Training Session”
- “Monthly Unlimited Membership”
- “10-Session Package - Youth Development”
Price
Price
RequiredDollar amount clients pay.Format: $XX.XX (US dollars or your Stripe currency)Minimum: $0.50 (Stripe requirement)Free products: Use Access Code type with $0.00 price
Description
Description
OptionalExplain what’s included in the purchase. Appears on checkout page.Supports:
- Plain text
- Line breaks
- Basic formatting
- Keep it concise (2-4 sentences)
- List what’s included
- Mention any restrictions or expiration
Features
Features
OptionalBullet point list highlighting product benefits.Appears: Below description on checkout pageBest practices:
- Use 3-5 features
- Start with action words
- Focus on benefits, not just features
- Personalized training plan
- Video analysis included
- Flexible scheduling
- Money-back guarantee
Product Type
Product Type
Subscription or One Time ProductSubscription: Charges client on a recurring basis once product is purchasedOne Time Product: Charges client once per purchase
Section 2: Payment Options
Configure pricing frequency and processing fees.Price
Price
All product typesSet or modify the product price. Same as Section 1 price field.
Payment Frequency
Payment Frequency
Subscription products onlyDefine how often payments occur and credits are issued. Use the Payment Every field to set a custom interval: enter a number and select the period (Day, Week, Month, or Year).Common setups:
- Every 1 Month — monthly billing (most common)
- Every 3 Months — quarterly billing
- Every 6 Months — semi-annual billing
- Every 1 Year — annual billing
Processing Fee
Processing Fee
All product typesConfigure who pays Stripe’s transaction fees (2.9% + $0.30 in US).Options:You absorb the fee (default)
- Client pays product price
- You receive product price minus Stripe fees
- Example: 48.05 to you
- Stripe fee added as separate line item at checkout
- You receive full product price
- Example: 1.76 fee = $51.76 charged to client
- Fixed amount: Add specific dollar amount (e.g., $2.00)
- Percentage: Add percentage on top (e.g., 3%)
- Both: Combine fixed + percentage
Add an initial down payment
Add an initial down payment
Subscription products onlyCharge a one-time amount on the first invoice in addition to the recurring price.OFF (default): Client is charged the recurring price starting on day one.ON: A separate one-time charge is added to the first invoice only. All subsequent invoices charge the recurring price.Use cases:
- Setup or enrollment fees
- Commitment deposits
- Registration fees
Enable access codes
Enable access codes
All product typesToggle ON to allow clients to redeem access codes at checkout to unlock this product. Configure the actual codes in Section 7: Access Codes.
Subscription length
Subscription length
Subscription products onlyDefine when the subscription ends.Ongoing (no end) (default): Subscription continues until the client or coach cancels manually.End after a number of billing cycles: Subscription automatically cancels after a set number of payments. Example: set to 12 for an annual commitment billed monthly.End on a specific date: Subscription automatically cancels on a chosen calendar date. Example: set to June 30 for a season-based membership.
Section 3: Credits
Configure session credits issued with purchase.Add credits once purchased
Add credits once purchased
Toggle ON or OFFTurn this on to issue credits when clients purchase this product.OFF (default): Product is payment-only. No credits issued.ON: Product issues specified number of credits to client’s account.
Credits require additional configuration in Schedule → Schedulers. Learn about credits →
Number of credits
Number of credits
Appears when credits are ONHow many credits to issue per purchase or billing period.Examples:
- 1 credit for single session products
- 10 credits for multi-session packages
- 4 credits per month for subscriptions
- ∞ credits for “unlimited” access
Credit expiration
Credit expiration
Appears when credits are ONWhen credits expire and become unusable.Options:Days since purchase (One Time product only)
- 30 days
- 60 days
- 90 days
- 120 days
- Custom number of days
- Calendar picker
- Set exact expiration (e.g., end of season)
- Master Credits (never expire)
- Client keeps credits indefinitely
- Credits carry over from one billing cycle to the next
- Credits expire when subscription cancels
- New credits issued each billing period
Section 4: Usage Limits
Restrict where credits can be redeemed.Which schedulers accept these credits
Which schedulers accept these credits
Appears when credits are ONSelect specific schedulers that accept this product’s credits.Universal Credits (default): Leave blank or select all. Credits work for any scheduler.Restricted Credits: Select specific schedulers only.Examples:
- “Youth Package” credits → Only youth training schedulers
- “Pitching Credits” → Only pitching lesson scheduler
- “Group Session Package” → Only group class schedulers
Limit credits per scheduler per billing cycle
Limit credits per scheduler per billing cycle
Advanced featureOverride how many credits can be used per billing cycle for a partcular schedulerExample:
- Product awards client 8 credits
- 4 credits can be used for a “Group Training” Scheduler
- 4 credits can be used for a “Private Training” Scheduler
Section 5: Confirmation Page
Where clients go after successful purchase.- Athlete Portal
- Thank You Page
- Custom URL
Default optionRedirect to client’s Athlete Portal after purchase.Client sees:
- Purchase confirmation
- Home page of the athlete portal
Section 6: Advanced Settings
Special configurations for specific business needs.Guest checkout
Guest checkout
Allow purchase without accountOFF (default): Client must create CoachIQ account to purchaseON: Client can checkout as guest with just email and payment infoWhen to enable:
- Selling merchandise to non-clients
- One-time workshop registration
- Public events open to anyone
- Session bookings (need account to schedule)
- Memberships (need account to access)
- Programs (need account for content)
Guest checkouts don’t create client profiles. Use for one-off sales to people who won’t need ongoing access.
Revenue sharing
Revenue sharing
Split revenue with partnersAutomatically split product revenue with other coaches or facilities.Configure:
- Partner Stripe account ID
- Percentage split (e.g., 70/30, 80/20)
- Flat fee per transaction
- Facility rental fees
- Contractor coach payments
- Referral partnerships
- Client pays full product price
- Stripe automatically splits payment
- Each party receives funds in their own Stripe account
Terms and conditions
Terms and conditions
Require terms acceptanceOFF (default): No terms required at checkoutON: Checkbox with link to terms appears at checkout. Client must check the box to complete purchase.Configure: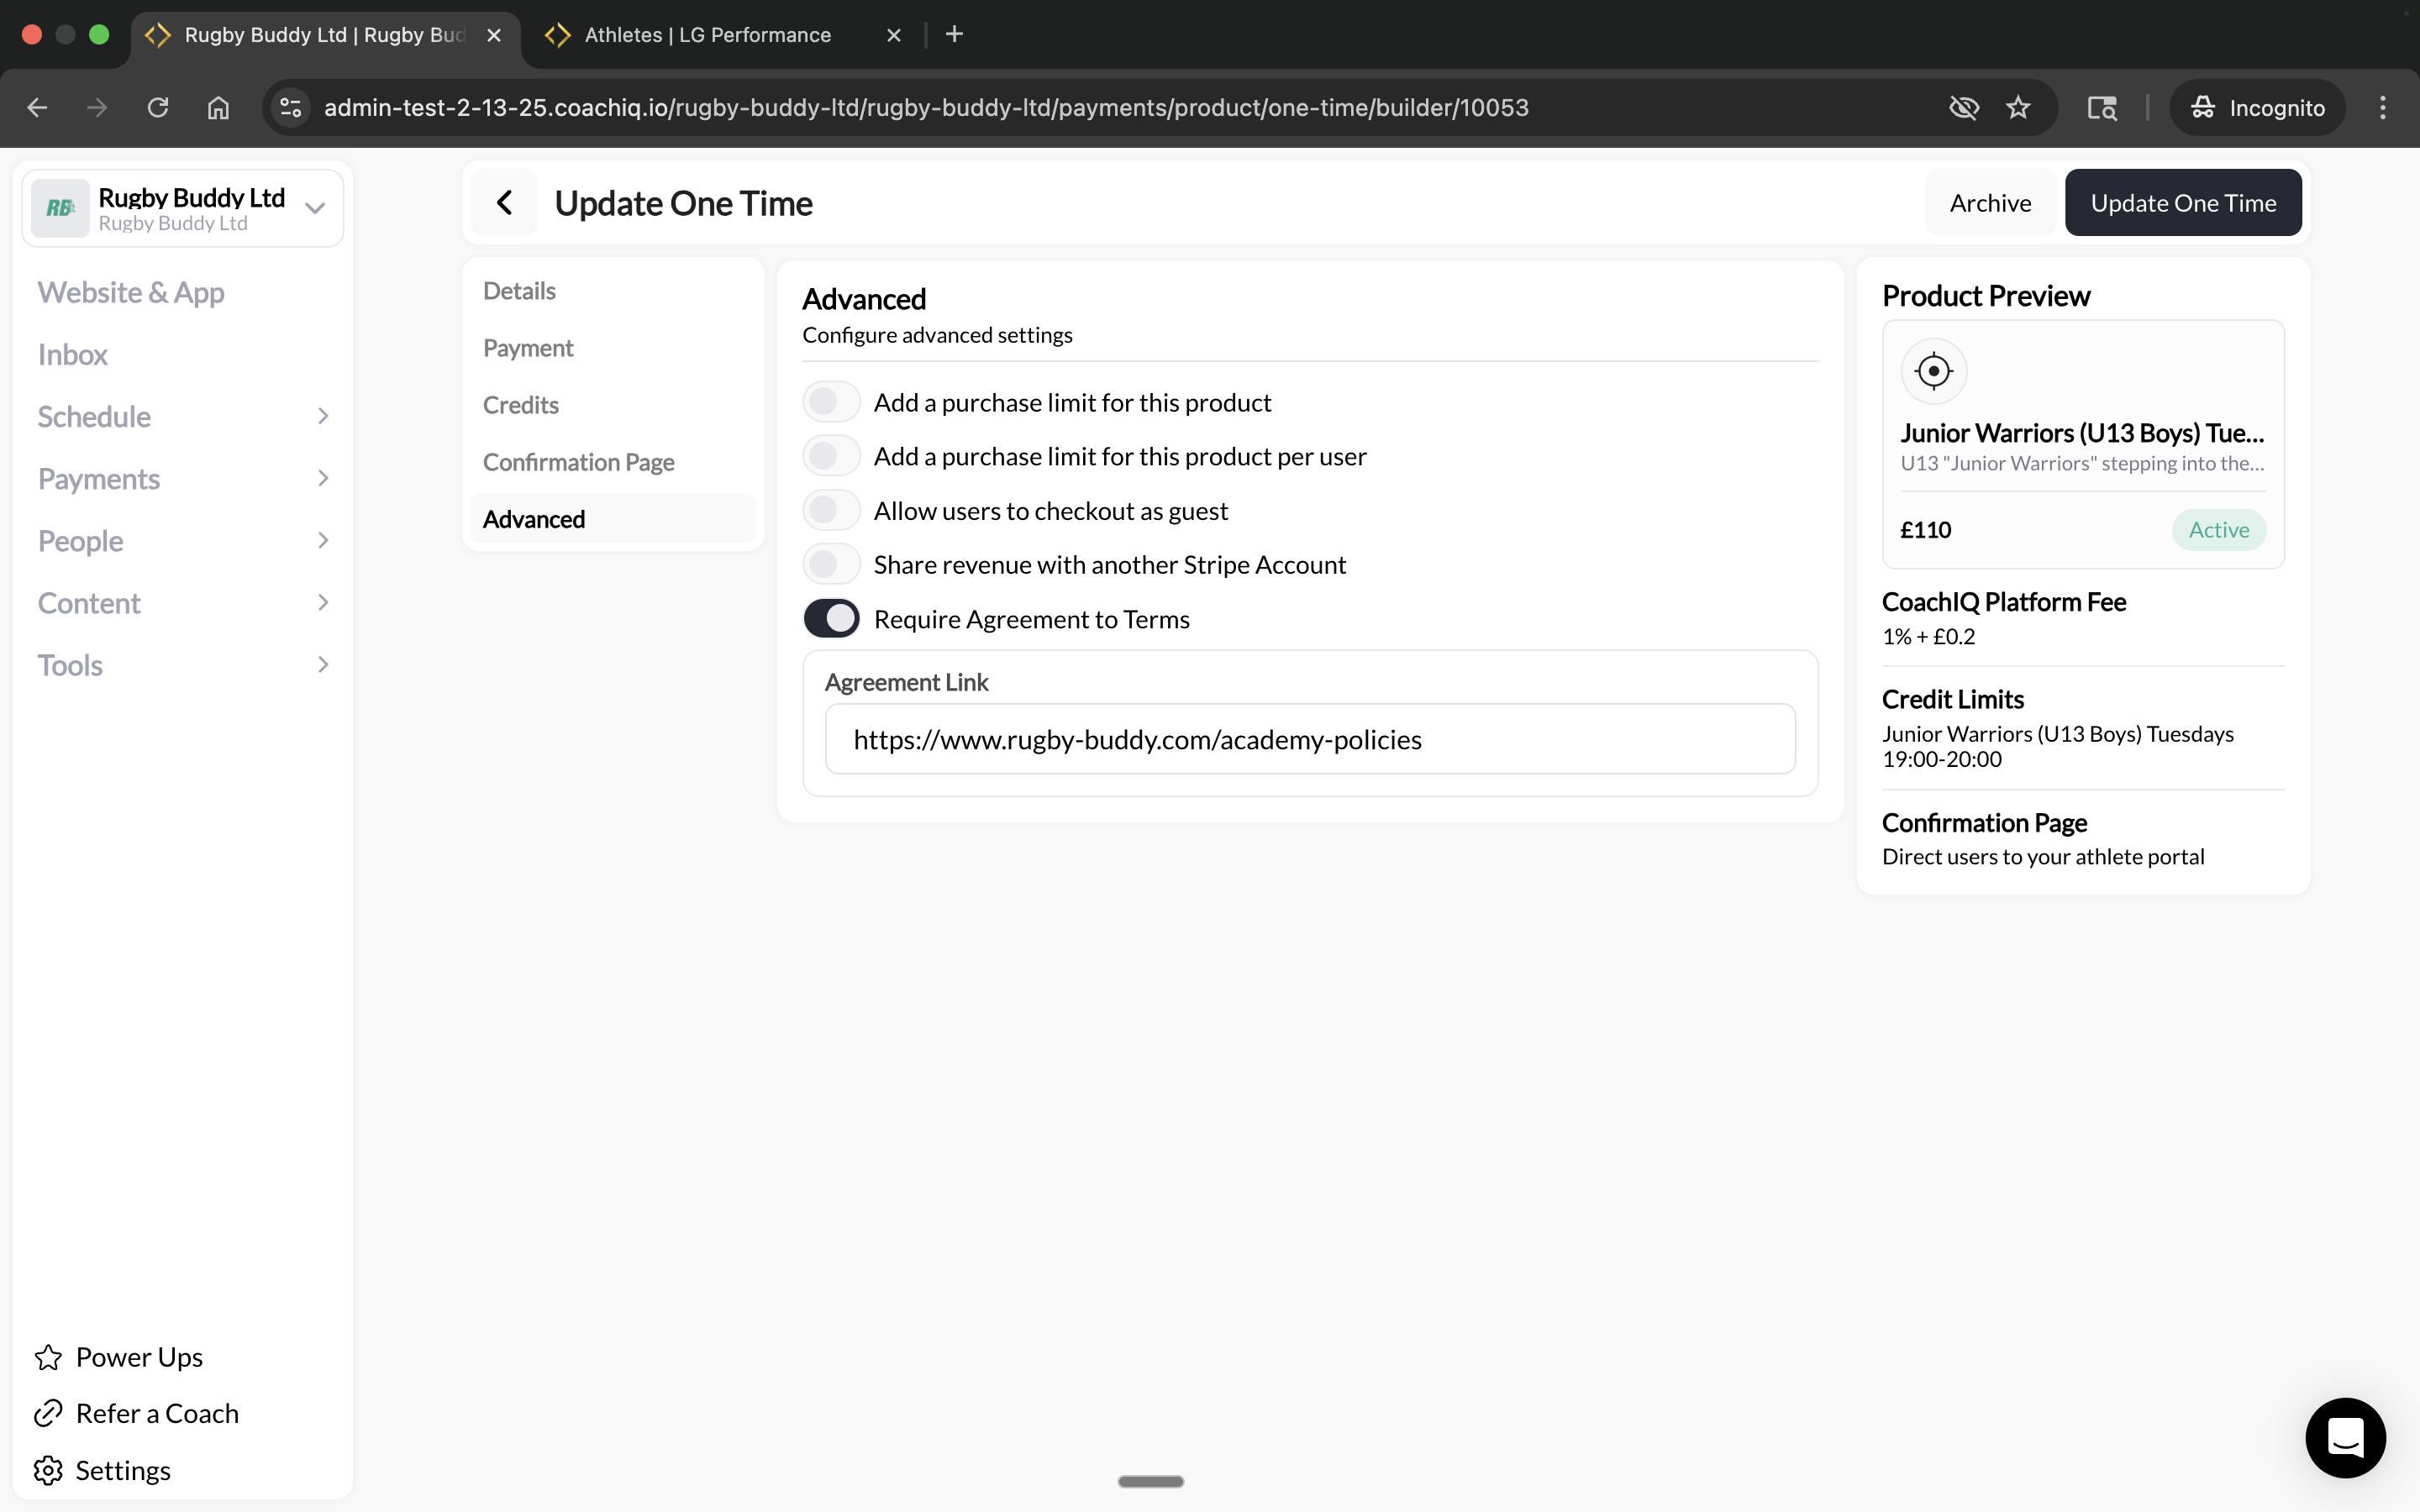
- Toggle Require Agreement to Terms to ON
- Enter your Agreement Link (URL to your terms page)
- Cancellation and refund policies
- Liability waivers
- No-show policies
- Service agreements
Section 7: Access Codes
Add access codes
Add access codes
Create redemption codes for this product.Code format: Any combination of letters/numbers (no spaces)Examples:
- SPONSOR2025
- TEAMDISCOUNT
- PARTNERSHIP50
Redemption limits
Redemption limits
Set how many times each code can be used.Options:
- Unlimited uses
- Limited uses (1, 10, 50, 100, custom)
View usage stats
View usage stats
See how many times each code has been redeemed.Displays:
- Code name
- Redemptions used / limit
- Last redemption date
Delete codes
Delete codes
Remove codes that are no longer needed.Deleted codes:
- Can’t be redeemed by new clients
- Still show in past transaction history
Archiving products
Products don’t have an Active/Inactive toggle like schedulers. Instead, you control visibility by where you add products, and use Archive to completely disable a product. To archive a product:- Go to Payments → Products
- Click on the product row
- Select Archive Product
- Disables the ability to purchase the product — it can’t be bought anywhere
- Does NOT remove the product from the Athlete Portal or other places it’s listed — remove it manually from any pages if you want to hide it
- Preserves all data and transaction history
- Doesn’t affect existing subscriptions or credits
- Can be reversed by unarchiving
Set up now, launch later: You don’t need to archive products to hide them. Products are invisible to athletes until you add them to the Athlete Portal, attach them to schedulers/forms, or share the direct link. See Products Overview for the full visibility model.
Related articles
- Product Types Explained
- Credits & Products
- Products Overview - Understand product visibility and archiving