Documentation Index
Fetch the complete documentation index at: https://help.coachiq.io/llms.txt
Use this file to discover all available pages before exploring further.
Overview
To connect your Wix domain to CoachIQ, you’ll add our team as a collaborator and we’ll handle all the technical DNS configuration for you. This process takes about 5 minutes on your end, and your domain will be fully connected within 24-48 hours.Why we handle it for you: DNS settings can be tricky, and one wrong entry can cause issues. Our team has connected hundreds of Wix domains and knows exactly what to configure. Let us handle the technical work while you focus on your coaching business.
Before you begin
You’ll need:
- Access to your Wix account that owns the domain
- Your domain name (e.g., yourcoaching.com)
- Your CoachIQ website published and ready
- About 5 minutes to add us as a collaborator
Connect your domain (Recommended method)
Prepare your CoachIQ website
First, let’s tell CoachIQ which domain you want to use:
- Log into your CoachIQ dashboard
- Navigate to Website Builder → Settings
- Under Active Domains, select Need another domain?
- Enter your domain with
www.in front (e.g.,www.yourcoaching.com) - Click Request Custom Domain
Domain requested! You’ll see a confirmation popup. Now let’s give our team access to configure it.
Log in to Wix
Visit Wix.com and sign in to the account that manages your domain.
Access Roles & Permissions
In your Wix dashboard, navigate to Settings → Roles & Permissions.If you’re in the site editor, look for the settings menu in the left sidebar.
Add CoachIQ support
Enter the following information: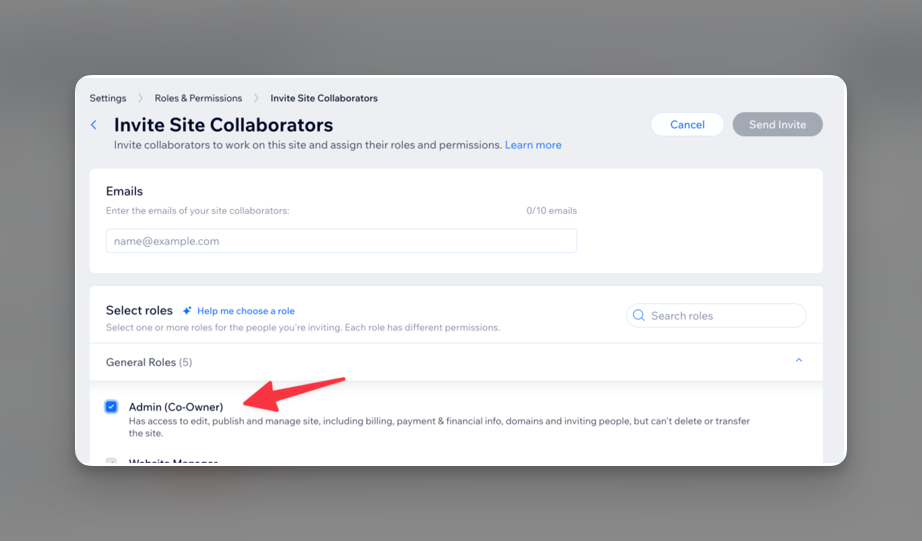
- Email:
liz@coachiq.io - Role: Check the box for Co-owner (this gives us the access needed for DNS configuration)
About collaborator seats: Wix includes 1 free collaborator seat. If you already have a collaborator, you may need to upgrade your Wix plan or temporarily remove the other collaborator.
Send the invitation
Click Send Invite to grant access to our team.
Invitation sent! Our team will receive notification immediately.
What happens next?
Our team will:
- Accept your collaborator invitation (within 2-4 hours during business hours)
- Configure your DNS records properly
- Set up SSL security certificates
- Test the connection thoroughly
- Notify you when everything is complete
- Remove our collaborator access if requested
Alternative: Configure DNS yourself
While we strongly recommend letting our team handle the technical setup, if you prefer to do it yourself, here’s how:Manual DNS configuration steps
Manual DNS configuration steps
Remove old records
Delete these existing records:
- Any A record with host
@or your domain name - Any CNAME record with host
www
Add new A record
Create a new record:
- Type: A
- Host:
@(or your domain if @ isn’t accepted) - Value:
76.76.21.21 - TTL: 1 hour or default
Add new CNAME record
Create another record:
- Type: CNAME
- Host:
www - Value:
website-v1.coachiq.io - TTL: 1 hour or default
Managing collaborator access
How to check invitation status
How to check invitation status
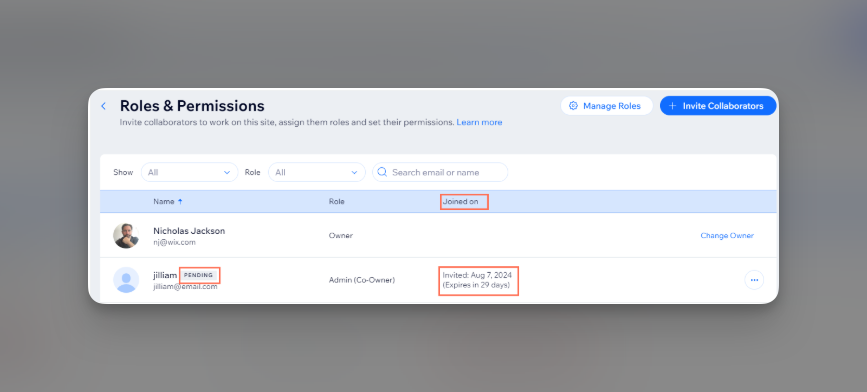
To see if our team has accepted the invitation:
- Go to Roles & Permissions in Wix
- Look for
liz@coachiq.ioin your collaborators list - Check for “PENDING” label (means not yet accepted)
- See “Joined on” column for acceptance date
How to resend an invitation
How to resend an invitation
If needed, you can resend:
- Go to Roles & Permissions
- Hover over
liz@coachiq.io - Click More Actions (three dots)
- Choose Resend Invite or Get Invite Link
How to remove access after setup
How to remove access after setup
Once your domain is connected and working:
- Go to Roles & Permissions
- Find
liz@coachiq.ioin the list - Click Remove to revoke access
Common questions
Why should I let CoachIQ handle this?
Why should I let CoachIQ handle this?
Our team has connected hundreds of Wix domains and knows the exact settings needed. We handle tricky issues like:
- Proper DNS record configuration
- SSL certificate setup
- Avoiding email disruption
- Testing and verification
Is giving collaborator access safe?
Is giving collaborator access safe?
Yes! The Co-owner role only gives us access to your site settings and DNS. We cannot:
- Access your payment methods
- Delete your Wix account
- View personal information
- Transfer your domain
Will my Wix website still work?
Will my Wix website still work?
No - once we point your domain to CoachIQ, it will display your CoachIQ website instead of your Wix site. Make sure your CoachIQ site is ready before we make the switch. Your Wix site content remains in your account for reference.
What about my email through Wix?
What about my email through Wix?
Your email will continue working normally! If you have Google Workspace or other email through Wix, we only change website records, not email (MX) records.
How long does connection take?
How long does connection take?
We configure settings within 2-4 hours of receiving access. DNS propagation then takes 24-48 hours to complete worldwide. Most users see their site live within 24 hours.
What if I have multiple domains?
What if I have multiple domains?
The collaborator access covers your entire Wix account. Just let us know all the domains you want to connect when you contact support.
Verify your connection
After we notify you that setup is complete:- Go to CoachIQ Settings → Active Domains
- Look for your domain in the list
- Click on it to test the connection
Troubleshooting
Video tutorial
Watch this step-by-step video guide for inviting collaborators in Wix:Pro tips
Need help?
If you encounter any issues:- Contact our support team immediately after adding us as a collaborator
- Include your domain name in your message
- Let us know any specific timeline requirements
- We typically respond within 2-4 business hours
- Include “Wix Domain Connection” in your message for fastest routing